


Roasting whole birds or large cuts of beef over an open grill grate often leads to uneven cooking, charred skin, and dried-out meat. Mounting a motorized spit rod transforms your standard outdoor grill into a radiant roasting oven that continuously bastes protein in its own juices. Learning how to use a grill rotisserie allows backyard cooks to prepare tender poultry, prime rib, and pork roasts with a uniform crust.
Before mounting the spit hardware, clearing your grill cookbox and setting up a dedicated workstation makes the entire cooking session run smoothly. Having a sturdy rolling BBQ prep table next to your grill provides the space you need to center large cuts of meat and secure spit forks. With correct hardware alignment, accurate spit balancing, and indirect heat management, you can tackle rotisserie roasting with complete confidence.
Pros
- Substantial 132-pound load rating accommodates large whole-animal roasts
- Eight vertical height positions provide practical heat management over open embers
- SUS304 food-grade stainless steel forks provide safe food contact and simple cleaning
- Ground stakes and tripod footing deliver sturdy outdoor placement on soft ground
Cons
- Requires a continuous electrical power connection to run the motorized spit
- Does not include an integrated firebox or charcoal pan, requiring a separate heat source
- Large 52-inch frame and spit rod require dedicated storage space when disassembled
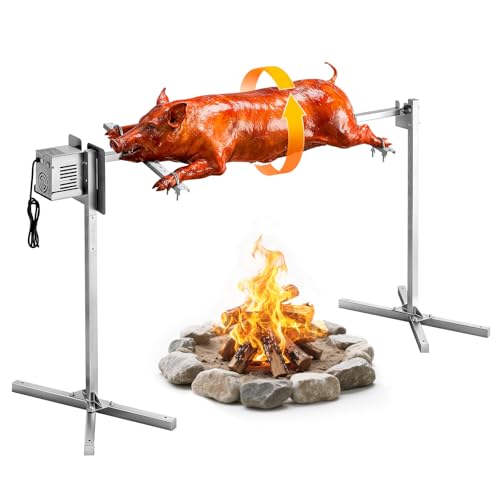
The VEVOR 52-inch electric rotisserie grill kit is a heavy-duty, freestanding spit roasting system built for open-fire cooking rather than enclosed cabinet grilling. Designed for backyard cooks, outdoor party hosts, hunters, and campers who enjoy traditional whole-animal roasting, this apparatus suspends food directly over charcoal coals or wood embers. If you have ever wanted to roast a whole pig, lamb, goat, or multiple large birds for a holiday feast or family reunion, this open-air rotisserie kit provides the physical framework and motorized turning power to make that happen.
Temperature regulation on an open spit roaster differs completely from standard gas or pellet grills. Because there are no burner knobs or digital controllers, heat management relies entirely on fire management and distance. The VEVOR kit addresses this through an eight-level vertical adjustment system, allowing you to raise the spit rod as the fire intensifies or drop it closer as the charcoal embers burn down. Powered by a 38W motor spinning at 3 RPM, the spit turns continuously to promote self-basting, which helps keep juices moving across the meat rather than dripping straight into the coals.
In terms of structural construction, the frame relies on stainless steel designed to resist outdoor moisture and withstand the radiant heat radiating from open fire pits. Direct food contact is handled by heavy-duty SUS304 stainless steel spit forks, which slide onto the 52-inch spit rod to anchor your meat firmly in position. The base consists of two 45-degree tripod assemblies, reinforced to prevent tipping under heavy loads. Ground stakes are also provided, giving extra stability when setting up on lawn surfaces, dirt campsites, or uneven backyard terrain.
Setting up the rotisserie requires basic mechanical assembly, and taking the time to balance the load along the spit rod is vital. With a listed capacity of up to 132 pounds, the motor and dual bearings are engineered to handle serious weight, but securing the meat centrally prevents unnecessary motor strain. Once cooking is finished, cleanup involves wiping down the stainless steel uprights and washing the SUS304 forks and spit rod. Because the kit disassembles into individual rods and tripod legs, packing it away for seasonal storage or transport to a campsite is relatively straightforward.
A realistic limitation of this system is that it is strictly an accessory kit rather than a self-contained barbecue grill. You must provide your own fire pit, charcoal trench, or heat-safe outdoor surface beneath it. Additionally, the 38W motor requires an active electrical outlet or a suitable outdoor generator or power station, meaning true off-grid cooks will need a portable power plan. It also demands active fire-tending to maintain an even bed of coals beneath the entire 52-inch span.
For outdoor entertainers and large-group cooks looking to expand beyond conventional grates, the VEVOR 52-inch electric rotisserie kit offers a capable, budget-friendly platform for spit roasting. Its solid weight capacity, food-grade forks, and adjustable elevation make it a practical investment for backyard pig roasts, festive gatherings, and outdoor open-fire celebrations.
The core strength of the VEVOR N52 rotisserie kit is its heavy-duty load capacity, rated to carry up to 132 pounds (60 kg). Across its 52-inch spit span, this expansive frame easily accommodates larger cuts that would never fit inside a standard residential barbecue grill, including whole suckling pigs, lambs, briskets, and turkeys.
Turning that much weight requires consistent mechanical drive. The included 38W electric motor operates at an optimal speed of 3 RPM, which delivers slow, steady rotation to ensure meat roasts evenly on all sides. Built-in dual bearings help minimize rotational friction, while an upgraded cooling fan and protective cover safeguard the motor housing during long, multi-hour cookouts.
Heat management on this rotisserie system relies on proximity to the fire bed, utilizing an eight-tier vertical height adjustment. This gives cooks direct control over cooking intensity, letting you raise the roast during flare-ups or lower it as wood embers dwindle toward the end of a long cook.
Stability is critical when suspending heavy, turning roasts over an open fire. The kit utilizes reinforced 45-degree tripod legs paired with ground anchor stakes, ensuring firm footing on grass, soil, or gravel. Its modular design allows it to straddle standard metal fire rings, custom brick fire trenches, or portable charcoal pans with ease.
Pros
- Comprehensive coverage of all grilling methods from direct heat to smoking
- Clear illustrations make complex techniques easy to understand and apply
- Digital format means instant access on any device - no waiting for shipping
- Written by a trusted barbecue authority with decades of hands-on experience
Cons
- Requires practice to truly master the techniques - it's not a plug-and-play tool
- No physical copy for those who prefer to flip through a printed book while cooking
- Some advanced techniques assume access to specific equipment not covered in the book
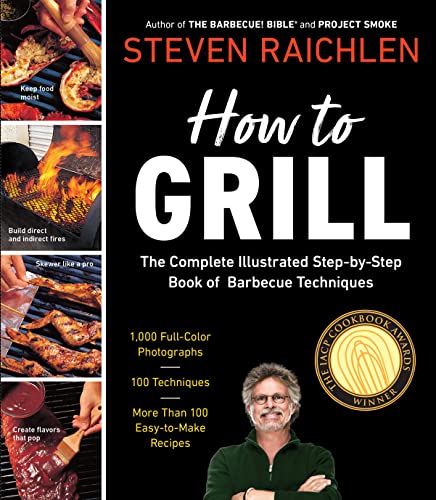
Steven Raichlen's How to Grill is more than just a cookbook - it's a complete illustrated course in outdoor cooking. Designed for backyard grillers, BBQ enthusiasts, campers, tailgaters, RV owners, and patio cooks, this digital guide covers everything from lighting a charcoal chimney to smoking a whole pork shoulder. If you've ever wanted to understand why your burgers char unevenly or how to get that perfect smoke ring, this book is your starting point.
The real strength of this guide lies in its emphasis on technique over recipes. You'll learn how to manage heat consistency for searing steaks, control temperature for low-and-slow smoking, and even how to adjust your grill for different fuel types. The step-by-step illustrations break down complex processes like indirect grilling and charcoal banking, making them accessible even for beginners. Whether you're fast-grilling burgers for a crowd or babysitting a brisket all afternoon, the methods here help you achieve better results with less wasted fuel.
Since it's a Kindle eBook, the portability factor is outstanding. You can pull it up on your phone while tailgating, reference it on a tablet at the campsite, or read it on your laptop before a backyard party. The knowledge inside is far more valuable than any single piece of gear - it teaches you how to get the most out whatever grill you own, whether it's a propane gas grill, a charcoal kettle, or a pellet smoker. For those who enjoy learning on the go, the digital format is a huge plus.
Setup and cleanup are non-issues here - you simply download the file and start reading. But like any skill-based resource, the real work happens when you step away from the book and fire up your grill. Some techniques require practice to get right, and a few assume you have specialized tools like a rib rack or a fish basket. That said, the lessons on grease management, flare-up control, and airflow are universally applicable and will improve any outdoor cook's confidence immediately.
If you're serious about improving your barbecue game, this book is a smart investment. It's not a gadget that will do the work for you, but it will teach you principles that last a lifetime. Pair it with your favorite grill and some good meat, and you'll be cooking like a pro in no time.


Pros
- Stainless steel build is durable and easy to maintain
- Motor runs smoothly and quietly for hours of unattended cooking
- Versatile fit works with many gas grill brands and sizes
- Counterweight helps balance uneven cuts for consistent rotation
Cons
- Motor may struggle with very heavy or unevenly balanced loads near 30 pounds
- Spit rod length may not fit smaller grills under 28 inches without modification
- Assembly instructions could be clearer for first-time rotisserie users
The TURBRO Stainless Steel Rotisserie Kit is a solid addition for anyone who owns a gas grill and wants to expand their outdoor cooking options. This kit includes a 4W electric motor, a 34-45 inch square spit rod, meat forks, and a counterweight, all designed to fit grills with a cookbox up to 39 inches wide. It's built for backyard grillers, BBQ enthusiasts, and tailgaters who want to slow-roast whole chickens, roasts, or even a small turkey without hovering over the grill.
In real-world use, the motor rotates meat at a steady 2-2.4 RPM, which is ideal for self-basting and even cooking. The rotation helps render fat slowly and keeps the meat moist, while the exterior gets a nice, crispy finish. You won't get the same smoke flavor as a dedicated smoker, but the rotisserie action does a great job of locking in juices. For backyard parties or weekend BBQs, this kit lets you cook a large roast while you focus on sides and drinks.
Build quality is a strong point here. The spit rod and forks are made from food-grade 304 stainless steel, which resists rust and holds up well to outdoor conditions. The motor housing feels sturdy, and the 59-inch power cord gives you flexibility to place your grill where it's convenient. Cleaning is straightforward - the stainless steel parts wipe down easily, and the motor just needs a quick wipe to keep it free of grease buildup.
Setup takes a bit of patience, especially if you're new to rotisserie cooking. The kit includes hardware for both horizontal and vertical motor mounting, which helps it fit a wider range of grills. However, the instructions could be clearer, and you may need to adjust the counterweight to balance uneven cuts. Once it's set up, though, it works reliably cook after cook.
One limitation is that the motor is rated for up to 30 pounds, but very heavy or lopsided loads can cause it to struggle or stall. Also, the spit rod length is designed for grills with a cookbox between 28 and 39 inches, so smaller portable grills may not work without modifications. For most standard gas grills, this kit is a great fit.
Overall, the TURBRO Rotisserie Kit is a practical upgrade for anyone who enjoys rotisserie-style cooking at home or on the go. It's especially useful for backyard entertainers who want to impress guests with a beautifully roasted bird or a succulent pork shoulder. If you have a compatible gas grill and want to add rotisserie capability without breaking the bank, this kit delivers solid performance and durability.

Mastering the Grill Rotisserie: Setup, Technique, and Safety
Rotisserie grilling relies on continuous cylindrical rotation over steady, indirect radiant heat. As the meat turns, rendered fats and flavorful juices roll across the surface rather than dripping immediately onto your burners or charcoal. This natural self-basting cycle keeps the interior moist while building a deeply caramelized exterior crust.
Understanding How Rotisserie Cooking Works on a Grill
Traditional direct grilling applies high heat to one side of the food at a time, requiring frequent flipping to avoid burnt edges. A rotisserie system changes this dynamic by maintaining a steady turning rate, typically between 2 and 3 revolutions per minute. This constant circular motion distributes heat evenly across the meat surface during every rotation cycle.
Centrifugal and gravitational forces work together as the spit rod turns. Liquified fat coats the outer layers of the roast, preventing moisture loss and basting spices back into the muscle fibers. Uncontrolled drippings can still occur, but the constant turning drastically reduces flare-up risks when paired with a proper catch pan.
Closed-lid roasting creates a convection chamber where hot air circulates freely around the suspended protein. Keeping the grill dome closed traps radiant heat and stabilizes internal chamber temperatures. Opening the lid repeatedly drops cookbox heat rapidly and extends your total cooking timeline.
Selecting and Installing Rotisserie Hardware
Standard gas grill conversions rely on kits designed for specific cookbox widths. Hardware packages like the TURBRO Stainless Steel Rotisserie Kit for Gas include modular spit rods that adjust between 34 and 45 inches to accommodate grill boxes measuring up to 39 inches across. These kits utilize a standard 5/16-inch square drive profile that mates securely with motorized drive units.
Motor mounting brackets attach to the outer side panel of your grill casing using stainless steel fasteners. Universal motors, such as the TURBRO Universal Stainless Steel Grill Rotisserie motor, feature standardized 3-inch bracket spacing and grounded power cords. Securing the motor bracket tightly ensures that the drive housing stays level when under heavy rotational resistance.
Large open-fire cookouts require freestanding rotisserie assemblies built for heavy weights. High-capacity kits like the VEVOR Rotisserie Grill N52″ feature a 38-watt motor designed to turn up to 132 pounds across an adjustable tripod frame. These heavy-duty platforms allow outdoor cooks to raise or lower large cuts across multiple height levels above open charcoal beds.
Preparing and Trussing Meat for the Spit
Proper preparation begins with butcher’s twine before any food touches the steel spit rod. Loose chicken wings, drumsticks, or dangling flaps of beef will swing erratically as the spit turns, leading to burnt extremities. Trussing pulls limbs tightly against the core body of the roast, creating a compact cylinder of uniform thickness.
Poultry requires special attention around the cavity and breast. Cross the twine behind the back, loop it securely around each drumstick joint, and tie the legs firmly together over the tail vent. Tuck the wing tips backward underneath the shoulder joints to prevent them from catching on the grill grates or burners during rotation.
Boneless roasts such as pork loin or rolled ribeye require tied intervals spaced approximately one inch apart along the entire length. Consistent spacing prevents the center from bulging outward under gravitational pressure. A tight, uniform bind ensures that the food rotates as a single solid unit without flexing on the skewer.
Centering the Meat and Securing the Spit Forks
Slide the first multi-prong spit fork onto the rod with its tines facing inward toward the center. Push the pointed end of the spit rod straight through the center of mass of your seasoned roast. Centering the rod through the physical balance point prevents excessive wobble that could strain electric drive gears.
Drive the tines of the first fork deeply into the solid muscle tissue of the roast. Slide the second fork onto the opposite side of the rod, pushing its prongs into the other end of the meat until both forks grip firmly. Check that the meat cannot slip or spin freely around the shaft when twisted by hand.
Lock both meat forks into position by tightening their integrated thumb screws with pliers if necessary. Loose screws can back out due to heat expansion and constant motor vibration during a multi-hour roast. Confirming that the forks are locked prevents the food from sliding along the rod while turning.
Balancing the Spit Rod with Counterweights
An unbalanced spit rod puts immense stress on small electric motors, often resulting in jerky rotations or stripped drive gears. Many complete kits include an adjustable counterweight collar that mounts on the non-drive end of the spit. Counterweights offset the natural asymmetry found in whole turkeys, legs of lamb, or bone-in roasts.
To check the balance of your loaded spit, place the rod loosely across two level supports before engaging the motor. Let the rod roll freely until gravity pulls the heaviest side of the meat directly to the bottom. The portion hanging downward represents your heavy axis, which must be offset for smooth rotation.
Rotate the counterweight arm so that its weighted head points straight up, directly opposite the heavy side of the meat. Lock the collar firmly in place and spin the spit rod 90 degrees by hand to verify that it stays in place without falling. When the rod stops in any position without spinning on its own, your setup is balanced and ready for the motor.
Configuring the Grill Burners and Drip Pans
Rotisserie cooking requires an indirect heat zone to prevent burning the underside of the spinning meat. Remove the standard cooking grates from your gas grill to create vertical clearance for the turning roast. Place a heavy-duty aluminum drip pan directly over the center burner flavorizer bars or deflector shields.
Turn on the outer burners while leaving the burners directly below the food turned completely off. On a three-burner gas grill, light the left and right burners while keeping the center burner unlit. If your grill features a dedicated infrared rear rotisserie burner, use that element alone to cast radiant infrared heat across the back of the turning food.
Fill the drip pan with roughly one-half inch of water, broth, or cider to keep drippings from scorching. The liquid catches rendered fat cleanly, preventing smoke and flare-ups while adding humidity to the cooking chamber. Keep an eye on fluid levels during long cooks and add warm water if the pan runs dry.
Managing Cookbox Temperature and Cooking Pace
Adjust your outer burner dials to maintain a steady chamber temperature between 325 degrees and 350 degrees Fahrenheit. Lower temperatures allow connective tissue to break down slowly while preventing outer skin from scorching. Keep your hood thermometer or digital ambient probe monitored to ensure stable cooking conditions.
Once the spit rod is set inside the motor collar and the motor is turned on, watch the first several revolutions carefully. Confirm that the motor turns smoothly at its rated speed, typically 2 to 2.4 RPM on models like the TURBRO replacement motor, without shuddering. Check that tied legs and wings clear the drip pan with at least one inch of breathing room.
Close the grill hood and resist the temptation to check the food constantly during the first hour of roasting. Each time the grill dome is opened, heat escapes and interrupts the natural convection cycle. Culinary guides like Steven Raichlen’s “How to Grill” emphasize stable heat over rapid surface searing for large rotisserie items.
Applying Glazes, Sauces, and Finishing Basting
The rotating action of the spit rod naturally bastes the meat in warm fat, but you can brush extra seasonings toward the end of the cook. Avoid applying sugar-heavy sauces during the early stages of roasting because sugars begin burning around 265 degrees Fahrenheit. Premature saucing produces a blackened, bitter exterior long before the interior reaches target doneness.
Apply glazes and finishing barbecue sauces during the final 15 to 25 minutes of total cooking time. Brushing a rich glaze like tangy cranberry barbecue sauce over rotating poultry or pork ribs creates a glossy, lacquered crust. The continuous motion distributes the sauce evenly without pooling or scorching in a single spot.
Use a long-handled silicone basting brush to coat the meat while the spit rod continues to turn slowly. Applying thin layers allows each coat to set and caramelize under the radiant heat before you brush on the next pass. Two light applications yield a far better crust than a single heavy slather.
Verifying Doneness and Resting the Roast
Visual cues such as golden skin or clear juices can be deceiving on a rotisserie. Always use an instant-read digital meat thermometer to confirm internal doneness according to authoritative food safety guidelines. Turn off the rotisserie motor switch temporarily so the meat stops turning while you take an accurate reading.
Insert the thermometer probe into the thickest section of the muscle without touching the metal spit rod or internal bones. Metal skewers conduct heat and can read higher than the actual center of the meat. Whole poultry must reach an internal temperature of 165 degrees Fahrenheit in the breast and thigh, while whole beef cuts and pork roasts require a safe minimum of 145 degrees Fahrenheit followed by a resting period.
Wear heat-resistant grilling gloves when lifting the hot spit rod off the grill brackets. Transfer the entire assembly to a cutting board and let the meat rest for 15 to 20 minutes before loosening the fork thumb screws. Resting allows internal juices to redistribute throughout the muscle fibers, keeping every slice moist and tender.
Essential Fire Prevention and Outdoor Safety Rules
Fuel-burning grills must always be operated strictly outdoors in well-ventilated open spaces. Never operate a gas or charcoal grill inside a garage, breezeway, carport, or enclosed porch, even if garage doors and windows are left wide open. Fuel combustion produces deadly carbon monoxide gas that can accumulate quickly and cause severe illness or death.
Position your outdoor grill at a safe distance from combustible structures, vinyl siding, deck railings, and low-hanging tree branches. Fat drippings from large rotisserie roasts pose a fire hazard if catch pans overflow or touch active burner flames. Always keep a dry chemical fire extinguisher nearby and never throw water on an active grease fire.
Route electric cords safely away from high-traffic footpaths and hot exterior metal surfaces of the grill casing. Use an outdoor-rated, grounded extension cord plugged into a GFCI-protected outlet when operating electric motors. Inspect cords before each session for frayed insulation or pinched wires to avoid shock hazards.
Cleaning, Hardware Maintenance, and Motor Storage
Routine cleaning after each cook protects stainless steel hardware from pitting and rust. Remove the spit forks and slide them into hot, soapy water to soften baked-on grease and protein residues. Solid 304 stainless steel rods and forks can be scrubbed clean with a non-abrasive brass brush or nylon scouring pad.
Electric drive motors should never be submerged in water or sprayed with a garden hose. Even motors featuring waterproof switches, such as the TURBRO 4W replacement motor, have internal gearing and electrical components that moisture can ruin. Wipe down the outer casing with a damp microfiber cloth to remove grease splatter before storing it.
Store your motor, spit forks, and counterweights indoors in a dry area between outdoor cooking sessions. Leaving electric rotisserie motors attached to an uncovered outdoor grill exposes them to moisture, driving rain, and corrosive humidity. Proper cleaning and indoor storage ensure your rotisserie setup stays ready for your next outdoor gathering.


Write Your Review
No reviews yet. Be the first to share your experience!