


Stepping out onto the patio with seasoned steaks or marinated vegetables feels exciting until sticky grates, leftover grease, or erratic burner flame ruin the cook. Taking ten minutes to properly clean, inspect, and heat your outdoor cooker guarantees better flavor while keeping your cooking area safe. Learning how to prep a bbq grill before adding any ingredients is the single most reliable habit for preventing stubborn flare-ups and torn meat. A tidy setup transforms outdoor cooking from a chaotic scramble into an effortless culinary routine.
A thorough prep routine involves more than merely turning a dial or lighting charcoal chunks with a match. You need a dedicated workflow that separates raw ingredients from finished platters, ensures adequate fuel, and cleans the cooking surface before it touches food. Many backyard cooks streamline their setup by arranging tools on rolling barbecue prep tables so marinades, spatulas, and clean platters stay within arm reach. Establishing these habits keeps outdoor cooking sanitary, protects family members from cross-contamination, and delivers restaurant-quality sear marks every single time.


Pros
- Sturdy stainless steel construction holds up to outdoor use and high heat
- Large capacity reduces trips back to the kitchen while grilling
- Silicone brush distributes sauce evenly and doesn't shed bristles like traditional brushes
- Compact size stores easily in a camping bin or grill caddy
- Affordable price point makes it a practical gift for BBQ enthusiasts
Cons
- Pot is not insulated, so the exterior gets hot – use a glove or towel when handling
- Silicone brush head can retain odors from strongly flavored sauces if not washed promptly
- Brush handle is a bit short for very deep pots, but fine for this 16 oz size
If you spend any time at the grill, you know that basting is more than just brushing on sauce — it's about keeping meat moist and layering flavor. The Cuisinart Sauce Pot and Basting Brush Set is a simple but smart tool that makes the job easier, whether you're cooking in your backyard, at a tailgate, or over a campfire. This set pairs a 16-ounce stainless steel pot with a silicone basting brush, and the integrated lid keeps the brush right where you need it, so you're not fumbling around for a separate brush while your burgers are sizzling.
This accessory is best suited for backyard grillers, BBQ enthusiasts, campers, tailgaters, and RV owners who want a dedicated sauce pot that won't tip over or spill. The stainless steel construction is durable and easy to clean — a quick rinse is usually all it takes after a cookout. The 16-ounce capacity is generous enough for a full rack of ribs or a couple of pork shoulders, so you won't be constantly running back inside to refill. The silicone brush head is removable and dishwasher-safe, which is a huge plus when you're dealing with sticky, sugary sauces that can gum up traditional bristle brushes.
In real-world use, the pot heats up quickly on a gas grill or camp stove, which is great for keeping your sauce warm and fluid. The rubberized handle on the brush gives you a secure grip even when your hands are covered in oil or rub. The brush itself distributes sauce evenly without dripping all over your grates, and the silicone bristles don't shed or melt like cheap nylon brushes. For low-and-slow smoking sessions where you're mopping every hour, this set saves time and mess.
Build quality is solid for the price. The stainless steel pot won't rust or corrode, and the lid snaps on tightly to keep the brush from falling out during transport. The brush head stays attached firmly but pops off for cleaning. One realistic limitation: the pot gets hot to the touch, so you'll need a glove or a towel to handle it when it's full of hot sauce. The brush handle is comfortable but not overly long, so if you're basting a very deep pot, you might have to tilt it a bit.
Cleanup is straightforward — the pot is non-stick enough that most sauces rinse right off, and the brush head can go in the dishwasher. Storage is easy because the set is compact and the lid keeps everything together. It's a practical addition to any outdoor cooking setup, from a weekend BBQ on the patio to a camping trip where you're cooking over a propane stove. If you enjoy adding layers of flavor with mops, glazes, or butters, this Cuisinart set is a reliable, affordable choice that won't let you down.


A Complete Step-by-Step Guide to Prepping Your BBQ Grill
Getting your outdoor cooker ready requires a disciplined progression that starts long before meat hits hot metal. When you understand how to prep a bbq grill methodically, you eliminate cold spots, prevent food from tearing against grates, and dramatically reduce dangerous grease fires. Every grill style demands slight adjustments, yet the fundamental rules of cleanliness, fuel readiness, and heat staging remain identical. Following a standard setup routine allows you to focus on cooking technique rather than scrambling to fix equipment issues mid-cook.
Step 1: Inspecting Grill Hardware and Confirming Fuel Safety
A quick physical inspection of your grill protects both your property and your dinner guests from unexpected hazards. For gas units, check the flexible rubber hose connecting the regulator to your propane tank for cracks, brittleness, or pest damage. Applying a simple mix of liquid dish soap and water across the fittings while turning on the gas valve quickly reveals leaks through growing bubbles. Charcoal and pellet units require a check of the vents, hopper, and firebox to ensure clear airflow and dry mechanical components.
Safe clearance around the cooker is just as vital as checking the internal components. Always position your grill outdoors on a level, non-combustible surface at least ten feet away from wooden decks, vinyl siding, and low-hanging tree branches. Never operate any gas, charcoal, or pellet grill inside a garage, breezeway, or enclosed porch, even if the overhead door remains wide open. Dangerous carbon monoxide gas accumulates rapidly in enclosed spaces, creating a fatal breathing hazard alongside severe structural fire risks.
Step 2: Clearing Old Ash, Debris, and Grease Traps
Trapped debris from previous cooking sessions chokes necessary airflow and imparts an unpleasant, stale flavor to fresh ingredients. On charcoal kettles and ceramic cookers, scoop out cold residual ash from the bottom bowl before lighting fresh fuel. Piled ash absorbs ambient moisture, promotes rust in metal vents, and blocks the oxygen necessary to reach high searing temperatures. Transfer all discarded ash into a dedicated metal bucket with a tight lid rather than tossing it into a paper garbage bag.
Gas and pellet units depend heavily on clean internal heat diffusers and grease drip pans. Inspect the slide-out grease tray beneath the firebox and empty any accumulated drippings before lighting the burners. Old pork and beef fat liquifies rapidly as the grill climbs past moderate temperatures, creating massive grease fires that cannot be extinguished by closing the lid. Scraping away heavy carbon deposits from burner shields keeps heat radiating evenly across the entire cooking chamber.
Step 3: The High-Heat Burn-Off and Grate Scrubbing Procedure
Firing up the grill empty is the easiest way to loosen baked-on sauces and caramelized proteins from previous cookouts. Ignite your burners or establish your charcoal bed, close the heavy lid, and let the chamber climb to high heat for ten to fifteen minutes. The intense heat pyrolyzes stubborn organic material, converting greasy grime into dry, brittle carbon ash that releases without heavy muscle work. This thermal sanitization also destroys any surface bacteria before fresh raw ingredients make contact with the metal.
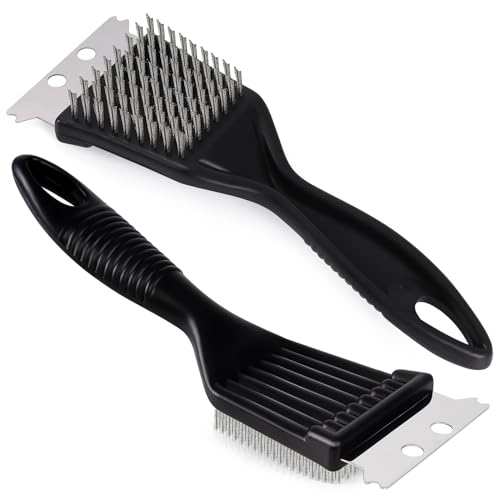
Once the cooking grates are blazing hot, scrub them vigorously with an appropriate cleaning tool. Use a coil-style brush, a wooden scraper, or a ball of crumpled aluminum foil held firmly with long grilling tongs. Avoid cheap traditional wire brushes with loose metal bristles because detached wires can stick to grates and accidentally transfer into cooked food. Working across the grates while they remain hot takes minimal effort and leaves a clean, smooth metal foundation for your food.
Step 4: Seasoning and Oiling Hot Cooking Grates Correctly
Clean metal grates are naturally porous, meaning cold proteins will bond tightly to the steel or cast iron if not properly lubricated. Applying a thin coating of high smoke point cooking oil creates a slick barrier that promotes clean spatula releases and sharp sear marks. Neutral oils such as canola, avocado, grapeseed, or refined peanut oil work best because they withstand intense heat without scorching into acrid smoke. Avoid extra virgin olive oil or butter for this step because low smoke points cause bitter off-flavors and soot.
Application technique matters just as much as your choice of cooking fat. Fold a sturdy sheet of paper towel into a tight small pad, dip it lightly into cooking oil, and grasp it securely with long spring-loaded tongs. Wipe the oiled pad along each grate bar in smooth, deliberate strokes until the metal shines with a light sheen. Never spray canned aerosol cooking oil directly onto hot grates or live flames because aerosol propellants ignite violently and cause severe flash fires.
Step 5: Dialing In Temperatures and Establishing Two-Zone Heat
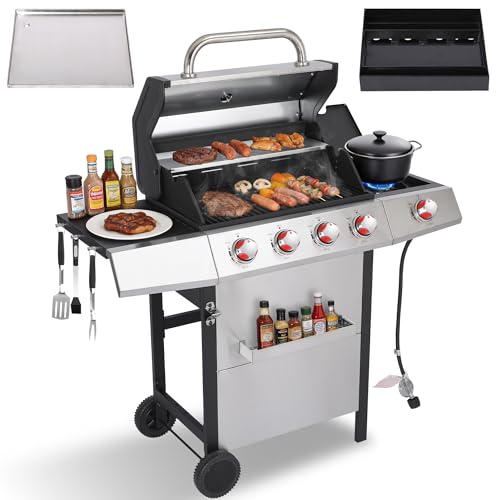
Cooking everything directly over roaring flames is one of the most frequent mistakes backyard grillers make. Establishing a two-zone fire gives you total control over cooking speed, flare-ups, and meat texture. On a gas unit, ignite the burners on one side while leaving the opposing burners turned completely off. On a charcoal cooker, bank all the lit coals against one side of the lower grate to produce a searing zone directly above the fuel and a gentler roasting zone on the open side.
This spatial setup allows you to sear thick steaks or chops over intense radiant heat, then shift them to indirect heat to finish roasting gently without burning the exterior. Indirect heat also functions as an immediate safety refuge whenever melting fat drips and triggers high flame flares. Backyard cooks working with versatile smoker and griddle combos often use similar dual-surface strategies to balance direct contact browning with slow ambient heat roasting.
Allow your grill to stabilize at your intended cooking temperature for at least five minutes before opening the lid. Rely on an ambient probe thermometer rather than the dome thermometer mounted on the lid hood. Built-in dome gauges measure the hot air collecting at the very top of the chamber, which often differs by thirty to fifty degrees from the actual grate level where your food sits. Knowing your true grate temperature ensures precise timing and consistent doneness.
Step 6: Assembling Dedicated Stations for Raw Meat and Cooked Food
Grilling success relies on solid kitchen prep and organization just as much as fire management. Carrying items outside piece by piece leads to forgotten tongs, scorched meat, and serious cross-contamination hazards. Using nested prep and serve trays or modular carry systems allows you to transport everything from the kitchen to the patio in a single organized trip. Stainless steel or heavy plastic tubs keep marinades contained so slippery juices never drip across your deck boards or counter space.
Strict separation between raw meat containers and clean serving platters is mandatory for food safety. Deep marinating trays work well for seasoning raw ribs, burgers, and poultry, but those raw trays must never receive finished food off the grill. Color-coded silicone lids or separate shallow serving trays eliminate confusion when family members or guests assist near the outdoor cooking area. Wash hands thoroughly or switch to clean disposable nitrile gloves immediately after handling raw meats and before touching clean tools.
Step 7: Marinating, Seasoning, and Safe Meat Handling at the Grill
Prep your meats thoroughly on a sanitized cutting board before lighting the burners. Patting steaks, poultry, and pork dry with clean paper towels removes surface moisture, which allows rubs to adhere and ensures crisp browning rather than mushy steaming. If you are preparing a crispy grilled chicken wings recipe, tossing the meat in oil and dry spices inside a deep prep basin guarantees complete, even flavor coverage without messy countertop splatter.
Keep raw meats chilled in the refrigerator until fifteen to twenty minutes before grilling, allowing thicker cuts to shake off extreme chill without reaching unsafe bacterial temperatures. Discard any marinade that came into direct contact with raw poultry or meat rather than brushing it onto finished food at the end of the cook. If you want to use marinade as a dipping glaze, boil it vigorously in a small saucepan on a side burner for several full minutes to neutralize potential bacteria.
Step 8: Managing Sauces, Basting Glazes, and Flare-Up Prevention
Basting sauces with heavy sugar, honey, or molasses content requires careful timing to avoid ruining your finished barbecue. Applying sweet glazes too early exposes sugars to direct heat, turning rich sauces into bitter, black crusts within minutes. Keep your basting glazes warm in a dedicated stainless steel sauce pot fitted with a silicone basting brush beside the grill. Wait until the final five to ten minutes of cooking, then brush the sauce gently over the meat while it rests over indirect heat.
Flare-ups occur when liquid fat drops onto hot flavorizer bars, charcoal coals, or burner tubes, igniting sudden bursts of flame. Never spray water from a squirt bottle onto a gas or charcoal grill to combat grease flares, as water spreads burning grease and creates dangerous steam plumes. Simply move the food immediately to your indirect cool zone and close the lid to starve the fire of incoming oxygen. Keeping grates scraped and trimming excess outer fat bands during prep prevents most flare-ups before they ever begin.
Step 9: Post-Cook Burn-Off, Brushing, and Safe Storage Practices
Finishing your meal does not mark the true end of the grilling workflow. Once you lift the last piece of cooked meat onto your clean serving platter, close the lid and turn the burners to medium-high for five minutes. This quick post-cook burn-off chars any fresh grease and sauce drippings clinging to the grates, transforming them into loose carbon while the metal remains piping hot. Give the grates a brisk pass with your scraper so the cooker sits virtually clean and ready for your next session.
Allow the cooker to cool completely to ambient outdoor temperature before covering it with a weather-resistant vinyl or canvas cover. Trapping residual heat beneath a tight cover causes condensation to form against cast iron and painted steel, accelerating damaging rust and mold growth. Shut off the propane cylinder valve securely, or confirm charcoal embers are completely cold and extinguished before walking away for the night. Routine care turns your cooker into a reliable, durable backyard workhorse for many seasons to come.
Mastering the art of grill preparation turns unpredictable backyard cooking into a dependable, relaxed outdoor experience. By inspecting hardware, sanitizing grates through high heat, establishing two distinct heat zones, and organizing clean prep trays, you set the stage for juicy, evenly cooked meals every time. Respecting basic fuel safety, trimming excess fats, and maintaining a clean drip pan keeps you and your family safe from fires and foodborne illness. Take pride in these preliminary steps, and your barbecue will consistently deliver the mouthwatering flavor and tender texture your guests crave.




Write Your Review
No reviews yet. Be the first to share your experience!