


Starting a Weber grill involves a specific sequence of actions that ensures both safety and consistent heat output.
- For gas models, you must open the lid, connect the fuel, and ignite the burners before adjusting the temperature.
- For charcoal models, the process centers on arranging the coals correctly and managing airflow to reach cooking temperature.
- Understanding these distinct steps prevents common issues like flare-ups or uneven heating, allowing you to cook with confidence.
- Whether you are using a Spirit, Genesis, or Kettle series grill, the fundamental principles of fuel management and ignition remain consistent across the lineup.
Many owners struggle with ignition because they skip preliminary checks or misinterpret the manufacturer’s instructions. The Weber grill design prioritizes user-friendly controls, but these controls only work effectively when the fuel system is clean and functional. By following the specific procedures outlined below, you can avoid the frustration of failed ignitions and ensure your grill is ready for cooking. This approach also helps extend the lifespan of your equipment by preventing unnecessary stress on the igniter and gas lines.


Pros
- Eliminates petroleum-based lighter fluids that taint grilled meat flavor
- Specialized cone grate generates rapid airflow for uniform coal ignition
- Integrated heat shield provides confident handling and burn protection
- Sturdy aluminized steel construction handles intense heat cycles without warping
Cons
- Requires heat-resistant barbecue gloves for safe handling on breezy days
- Can generate floating ash flakes when lighting lower-quality charcoal in open wind
- Exterior steel naturally discolors and develops patina after initial firings
The Weber Rapidfire Chimney Starter is a dedicated charcoal ignition cylinder designed to eliminate the hassle and chemical aftertaste of petroleum lighter fluid. Engineered specifically for charcoal purists, backyard pitmasters, patio grillers, and weekend campers, this standard-sized chimney provides a direct, reliable way to prep burning coals for any charcoal kettle or offset smoker. Getting coals glowing red before dumping them onto the fire grate is critical for temperature consistency, and this tool handles that startup phase with speed.
Outdoor cooking performance relies on natural convection physics combined with a specialized cone-shaped bottom grate. That conical grate pulls oxygen directly into the center of the fuel stack, lighting briquettes or all-natural lump charcoal from the bottom up in roughly fifteen minutes. Because the coals ignite cleanly using just paraffin starter cubes or balled-up newspaper, there are zero foul petroleum fumes to taint your burgers, steaks, or slow-smoked pork butts. The resulting bed of coals achieves searing-level radiant heat that spreads evenly across your cooking grates.
Durability remains a standout feature in Weber's design. The body is formed from heavy-duty aluminized steel that stands up to recurring thermal shocks without warping or seam splitting. A durable heat shield protects your hand from radiant heat, while the ergonomic thermoplastic handle provides a secure grip when lifting and pouring. While the silver exterior inevitably discolors after repeated firings, the structural integrity of the cylinder and the cone grate easily withstands prolonged outdoor exposure and high-heat duty cycles.
Transport and practical backyard usability are straightforward. Measuring thirteen inches high and seven and a half inches wide, the chimney fits comfortably on top of the bottom grate of standard kettle grills or outdoor camp fire pits. When the coals are fully ash-covered, the balanced handle assembly lets you pour coals cleanly into charcoal baskets, vortex funnels, or two-zone split configurations. Cleanliness is simple because gravity leaves most ash behind in the fire bowl, requiring little maintenance beyond a quick shake before storing it in a dry shed or garage.
There are a few basic realities to keep in mind around the patio. The metal cylinder reaches blistering temperatures during operation, which means heavy-duty heat-resistant grill gloves are essential during dumping, especially on breezy afternoons. Low-grade briquettes can also generate floating ash flakes while lighting in open wind. For any outdoor cook running a kettle, barrel smoker, or portable tailgating pit, this starter delivers dependable, flavor-friendly coal ignition that pays for itself in time saved and better-tasting barbecue.
Mastering heat zones starts with how you light your fuel. The Weber Rapidfire Chimney Starter holds enough charcoal to power an entire afternoon of indirect smoking or direct high-heat searing. Filling the cylinder to the rim yields enough fuel for a blazing 500-degree sear on steaks, while a half chimney provides steady 250-degree smoke temperatures for ribs and chicken.
To maximize fuel efficiency at the campsite or backyard patio, place two small natural starter cubes directly on your grill grate beneath the cone. The draft draws flames upward into the charcoal center without wasting extra fuel. Once the top layer displays a fine grey ash coating, dump the coals directly into your grill setup without lingering, preserving maximum radiant heat for your cook.

Pros
- Restores essential ash-cleaning and vent control functions for better cooking performance.
- Sturdy metal construction outlasts the plastic or thin metal parts it replaces.
- Simple DIY installation saves the cost of buying a new grill.
- Works across multiple 22-inch Weber kettle models.
- Makes post-cook cleanup quick and mess-free, especially after long smoking sessions.
Cons
- Only fits 22-inch Weber kettle grills (check your model's compatibility before ordering).
- Some users may need to slightly adjust or drill mounting holes for a perfect fit.
- Does not include additional hardware like the ash catcher or handle, only the internal sweep and rods.
If you own a 22-inch Weber charcoal kettle grill, the one-touch cleaning system is one of the most used (and abused) components. Over time, the damper blades can rust, the control rod can seize up, and sweeping ash becomes a hassle. The Yilador one-touch cleaning system kit is a direct replacement designed to restore that essential function and get your grill back to peak performance.
This kit is ideal for backyard grillers and BBQ enthusiasts who want to keep their existing kettle running smoothly without splurging on a new grill. It's also a smart buy for tailgaters and campers who rely on a portable charcoal setup and need reliable vent control for temperature management. The one-touch mechanism lets you sweep ash from the bottom of the grill into the catcher below, without having to remove the cooking grates or dump hot coals. That means less mess and more time focused on cooking burgers, steaks, or a low-and-slow rack of ribs.
When it comes to real-world performance, the damper blades give you fine control over airflow. Open them wide for a hot, searing fire to char steaks; close them down for indirect, low-temperature smoking. The metal construction feels thicker and sturdier than the original parts, which tend to bend or rust after a few seasons. Yilador uses a heat-resistant metal that holds up well to the intense temperatures inside a kettle. I've found the rotation is smooth right out of the box, and the blades maintain a tight seal against the grill bowl for better draft control.
Build quality is a clear step up from stock parts. The blades are reinforced and the control rod is a solid piece of metal with a secure handle connection. Unlike some knockoffs that feel flimsy, this kit inspires confidence. It's also designed to resist rust and corrosion, which is critical for any outdoor cooking equipment left exposed to the elements. The installation took me about 10 minutes with the included screws and a screwdriver. The instructions are clear, and all you need to do is remove the old assembly, drop in the new blades, and attach the rod.
One limitation to keep in mind: this kit only fits 22-inch Weber kettles from the Master-Touch, Performer, and Original series. If you have a different size (18-inch or 26-inch) or a non-Weber brand, it won't work. Also, while the blades fit snugly on most models, a tiny fraction of grills may require you to drill new mounting holes. That's rare, but worth noting. Overall, at its price point, this kit offers an affordable fix that saves you from retiring a perfectly good grill.
My honest recommendation: if your Weber's ash sweep is stuck, broken, or missing, and you want to restore proper heat control and easy cleanup, this Yilador kit is a practical choice. It's especially valuable for regular charcoal users who cook multiple times a week, tailgaters who pack up their grill often, and anyone who loves the flavor of charcoal but hates the cleanup hassle. For under fifteen bucks, it can extend your grill's life by years.
Regular ash removal is key to maintaining even airflow and preventing grease buildup inside your kettle grill. With the Yilador one-touch system, you can sweep ash into the catcher before each cook or after the coals have cooled. For deep cleaning, remove the grates and the ash catcher, then spray the interior with a grill-safe degreaser and wipe it down. The metal blades can be wiped with a damp cloth; avoid using abrasive brushes that could scratch the finish. To prevent rust, store your grill covered and dry the blades after washing. This small routine will keep the one-touch mechanism moving smoothly for years.
The method for starting your grill depends entirely on the fuel type installed. Gas grills use a push-button or match ignition system to light the burners, while charcoal grills require a chimney starter or lighter fluid to ignite the coals. Before beginning either process, ensure the grill is placed on a stable, non-flammable surface away from overhanging branches or structures. This initial setup is critical for safety and prevents accidents that can occur if the grill is unstable or too close to combustible materials.
| Fuel Type | Primary Ignition Tool | Typical Pre-Heat Time | Key Control Mechanism |
|---|---|---|---|
| Propane Gas | Push-Button Igniter or Long Match | 10-15 Minutes | Burner Knobs |
| Natural Gas | Push-Button Igniter or Long Match | 10-15 Minutes | Burner Knobs |
| Charcoal | Chimney Starter or Lighter Fluid | 20-30 Minutes | Vent Dampers |
For gas grills, the first step is to ensure the propane tank valve is fully open. If you are using a natural gas line, verify that the main shutoff valve is in the on position. Next, open the grill lid completely. This allows the gas to flow freely and prevents pressure buildup inside the cabinet, which can interfere with ignition. Keep the lid open during the entire lighting process to ensure proper airflow and to see the flame clearly.
Turn the burner knobs to the high or light position. If your grill has a push-button igniter, press and hold the button for five to ten seconds while the gas flows. You should hear a clicking sound as the igniter sparks. If the flame does not catch immediately, do not keep pressing the button indefinitely. Instead, wait thirty seconds to allow any unburned gas to dissipate before attempting again. This waiting period is a critical safety measure to prevent a gas buildup explosion.
If the push-button igniter fails to light the grill, use a long-reach match or lighter. Insert the flame into the ignition port or near the burner tube while holding the knob in the high position. Once the flame is established, you can close the lid and adjust the knobs to your desired cooking temperature.
For charcoal grills, fill a chimney starter with briquettes and place crumpled newspaper or a lighter fluid-soaked pad underneath. Light the newspaper and wait until the coals are covered in gray ash, which indicates they are ready for cooking.
Gas Grill Ignition Sequence and Safety Checks
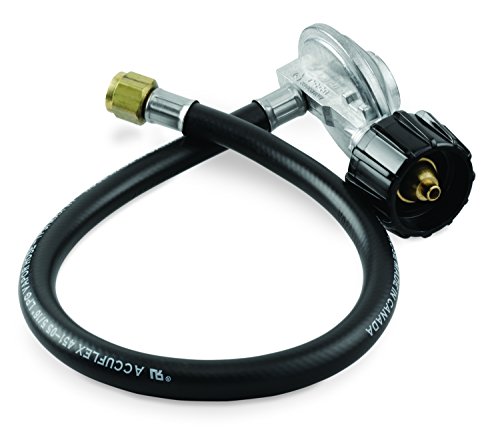
The ignition sequence for gas grills is designed to prevent gas leaks and ensure reliable lighting. Always check the hose and regulator connections for tightness before turning on the fuel. A loose connection can lead to a leak, which is dangerous and can cause the grill to fail to ignite. The Weber Hose and Regulator Kit is a common replacement part if you notice hissing sounds or smell gas, indicating a potential leak in the system.
When using the push-button igniter, ensure the battery is fresh. A weak battery may produce a weak spark that is insufficient to ignite the gas mixture. If you suspect the battery is the issue, replace it with a new one before attempting to light the grill again. The igniter kit for Weber grills often includes the button, wires, and ignition chamber, making it easy to replace if the original unit is damaged or worn out.
During the lighting process, keep your face and hands away from the ignition port. If the grill does not light after three attempts, turn off the fuel source and wait for five minutes. This allows any accumulated gas to disperse into the atmosphere. After the wait time, you can try the ignition process again. If the grill still does not light, there may be a blockage in the burner tubes or a faulty igniter that requires professional attention.
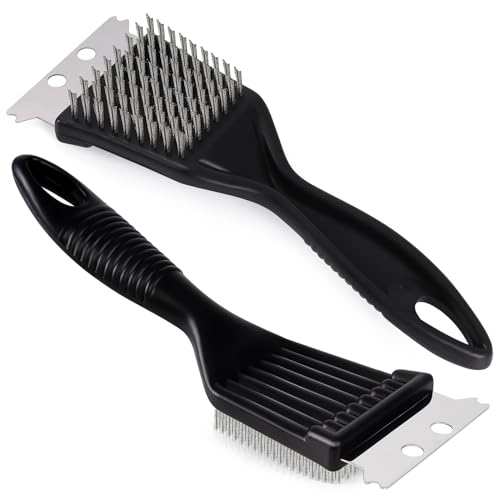
Once the burners are lit, observe the flame pattern. A healthy flame should be blue and even across the length of the burner. Yellow or orange flames indicate incomplete combustion, which can be caused by a dirty burner or a clogged orifice. If you see yellow flames, turn off the grill and clean the burner tubes with a wire brush. This simple maintenance step can restore proper combustion and improve heat distribution.
Charcoal Grill Setup and Airflow Management
Starting a charcoal grill requires patience and proper airflow management. The Weber Rapidfire Chimney Starter is a popular tool for this task, designed to heat coals quickly and evenly without the use of lighter fluid. Fill the chimney with briquettes and place it on a stable surface. Light the newspaper underneath and wait for the coals to catch fire. The chimney design allows air to flow upward, accelerating the combustion process.
Once the coals are glowing and covered in gray ash, pour them into the grill bowl. Spread them evenly for direct heat cooking or pile them on one side for indirect heat. Adjust the bottom vent dampers to control the airflow into the grill. Opening the vents increases the oxygen supply, which raises the temperature. Closing the vents reduces the oxygen, lowering the temperature. This control is essential for managing the heat level during cooking.
The One-Touch Cleaning System Kit is another important component for charcoal grills. It allows you to control the bottom vents and clean out ash easily. If the dampers are stuck or rusted, the airflow may be restricted, leading to uneven heating or difficulty maintaining temperature. Replacing the cleaning system kit can restore proper function and make maintenance easier. Ensure the kit fits your specific grill model before purchasing to avoid compatibility issues.
When lighting charcoal, avoid using excessive lighter fluid, as this can impart an unpleasant taste to your food and increase the risk of flare-ups. A chimney starter is a safer and cleaner alternative that provides consistent heat. If you do use lighter fluid, apply it sparingly and allow it to soak into the coals for a few minutes before lighting. Never add more lighter fluid after the coals are already lit, as this can cause a dangerous flare-up.
Troubleshooting Common Ignition Failures
If your gas grill fails to ignite, the most common causes are a dead battery, a clogged burner, or a faulty igniter.
- Start by checking the battery in the igniter button and replace it if it is old or weak.
- Next, inspect the burner tubes for blockages caused by debris or insect nests and use a wire brush to clear any obstructions.
- If the igniter itself is damaged, consider replacing the igniter kit to restore functionality to the grill.
For charcoal grills, ignition failures are often related to poor airflow or wet coals. Ensure the bottom vents are fully open when starting the grill. If the coals are damp, they will be difficult to light and may produce excessive smoke. Use dry, high-quality briquettes for the best results. If the grill still does not reach temperature, check the top vent damper to ensure it is not blocked. Proper airflow is critical for maintaining a consistent fire.
Another common issue is a gas leak, which can prevent the grill from igniting and poses a safety risk. Perform a soapy water test on the hose and regulator connections. Apply a mixture of water and dish soap to the joints and turn on the gas. If bubbles form, there is a leak that must be repaired immediately. Tighten the connections or replace the hose and regulator kit if necessary. Never ignore a gas leak, as it can lead to serious accidents.
If you are using a natural gas grill, ensure the main gas line is not shut off. Sometimes, the valve at the house or the grill itself may be accidentally turned off. Check both valves to confirm they are in the on position. If the gas supply is correct but the grill still does not light, the problem may lie with the internal gas valve or the igniter. In such cases, consulting a professional technician is recommended to diagnose and repair the issue safely.
Maintenance Tips for Reliable Ignition
Regular maintenance is key to ensuring your Weber grill ignites reliably every time. Clean the burner tubes and ports after each use to prevent clogs. Use a wire brush to remove any debris or carbon buildup. This simple task takes only a few minutes and can prevent ignition problems down the line. Also, check the igniter wires for any signs of damage or wear. Frayed wires can cause intermittent ignition failures.
For charcoal grills, keep the bottom vents and dampers clean and free of ash. Ash buildup can restrict airflow and make it difficult to control the temperature. Use the One-Touch Cleaning System to remove ash easily and keep the vents functioning properly. Lubricate the damper handles with a high-heat grease if they become stiff or hard to turn. This ensures smooth operation and precise temperature control during cooking.
Store your grill in a dry, covered area to protect it from the elements. Moisture can corrode the igniter components and rust the metal parts, leading to ignition failures. If you live in a humid climate, consider using a grill cover to keep the equipment dry. Before using the grill after a long period of storage, perform a quick inspection of the fuel lines, igniter, and vents to ensure everything is in good working order.
By following these maintenance tips, you can extend the life of your grill and ensure reliable ignition. Regular cleaning and inspection prevent most common issues and help you avoid costly repairs. Take a few minutes after each use to clean the grates and burners, and your grill will be ready for the next cookout. Consistent care is the best way to enjoy a smooth and safe grilling experience.
For more information on maintaining your grill equipment, check out our guide on griddle and smoker combo maintenance. Understanding how different fuel types interact with your equipment can help you make better decisions about upkeep and replacement parts.
Always prioritize safety when starting and using your grill. Follow the manufacturer’s instructions and use the appropriate tools for the job. By mastering the ignition process and maintaining your equipment, you can enjoy reliable and safe grilling for years to come. The key is to be patient, thorough, and attentive to the specific needs of your grill model.


Write Your Review
No reviews yet. Be the first to share your experience!