


Firing up a premium outdoor cooking station requires a solid grasp of fuel management, ignition safety, and zone heating. Learning how to work a bull gas grill helps backyard cooks extract maximum culinary performance from commercial-grade components like heavy cast stainless steel burners and solid grates. Whether you cook on a freestanding cart or a built-in barbecue island setup, understanding your appliance safeguards your outdoor kitchen while delivering repeatable searing power.
Operating these heavy-duty units involves straightforward steps, starting with thorough gas line verification and hood clearance before ignition. Mastering the flame controls allows you to transition smoothly from intense high-heat searing to delicate roasting across spacious cooking surfaces. By following proper operating routines, you protect internal parts from premature wear, reduce grease flare-ups, and keep every cookout safe and enjoyable.


Pros
- Indestructible 304 stainless steel build resists corrosion and withstands year-round outdoor elements.
- Five independent cast burners provide precise multi-zone temperature control for simultaneous searing and roasting.
- Included heavy-duty rotisserie kit expands your outdoor cooking repertoire for succulent whole birds and roasts.
- Direct natural gas connection eliminates the need to transport and swap propane tanks during cookouts.
- Twin halogen internal lights make low-light grilling and nighttime outdoor dinner parties practical.
Cons
- Requires a dedicated outdoor kitchen island cutout and professional natural gas line hookup.
- Weighs 233 pounds, requiring at least two people for safe lifting and drop-in installation.
- Permanent built-in design offers zero portability for tailgating, camping, or mobile cooking.
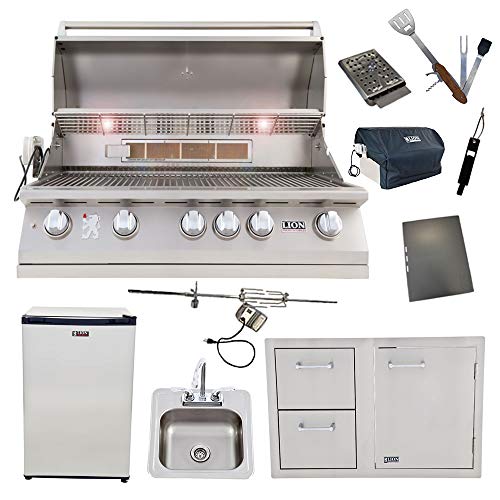
The Bull Brahma 38-Inch Natural Gas Grill Head is a commercial-grade, drop-in outdoor cooking center designed specifically for custom backyard kitchen islands. Built for passionate backyard grillers, patio cooks, and serious outdoor entertainers who frequently host large gatherings, this unit serves as the focal point of a permanent outdoor cooking setup. If you want a dependable grill that delivers searing heat day after day while standing up to rain, sun, and winter weather, this heavy-duty workhorse delivers.
Performance across the grates is where the Brahma shows its pedigree. Powered by five cast stainless steel bar burners pushing out a combined 90,000 BTUs, it heats up remarkably fast and creates an intense searing zone across the primary grates. The expansive 760 square inches of main cooking space lets you set up authentic multi-zone heat profiles, allowing you to sear thick ribeyes over direct flame while gently roasting vegetables or smoking poultry over indirect warmth. The rear infrared burner works alongside the motor-driven rotisserie kit, self-basting whole chickens to a crisp, golden finish.
Durability matches the intense cooking output. Bull constructs the Brahma using 14-gauge 304 stainless steel throughout the body, cooking grates, and dual-lined hood. That double-walled lid is critical for patio cooking, preventing exterior heat tinting while trapping thermal energy inside on breezy days. The solid stainless steel rod grates hold exceptional thermal mass for defined grill marks and resist pitting over time. Unlike basic stamped sheet-metal burners that rust through, these cast stainless steel burners are built to survive years of high-heat cycles.
Operation and maintenance are thoughtfully engineered for everyday ease. Individual Piezo spark igniters fire each burner directly without relying on corroding electrical wires or dead batteries. Integrated twin halogen lights bathe the grates in clear light, keeping evening cookouts stress-free. For grease management, a full-size drip tray catches excess runoff beneath the burners and slides out smoothly from the front, reducing hot-spot flare-ups and keeping your island cabinetry clean.
This grill is strictly designed for permanent outdoor kitchen builds. At 233 pounds and requiring a hard-plumbed natural gas supply, it demands accurate cutout dimensions and careful planning before installation. You cannot toss this into a truck for tailgating or a campsite cookout. For homeowners building a dedicated patio retreat who demand restaurant-level heat, endless fuel supply, and rock-solid durability, the Bull Brahma is an outstanding centerpiece that will anchor your backyard cooking for years to come.
With 90,000 BTUs generated across five cast burners, the Bull Brahma delivers exceptional heat distribution across all 1,026 square inches of cooking space. Preheating takes only minutes, and the thick stainless grates transfer intense contact heat for steakhouse-level sear marks without drying out your meats.
The dedicated rear infrared rotisserie burner provides focused radiant heat that locks in natural juices while fat renders smoothly away. Multi-zone heat setups perform reliably, letting you maintain a gentle 275-degree indirect roasting zone right next to an aggressive high-heat sear station.
Routine maintenance on the Brahma is straightforward thanks to its 304 stainless steel surfaces and full-width grease management system. The large grease pan slides forward effortlessly from underneath the control knobs, letting you empty drippings and replace liners without reaching into the island structure.
The heavy-gauge stainless steel grates release baked-on grease easily after a quick high-heat burn-off. Running a standard stainless grill brush across the cooking surface while warm is all it takes to keep the grates pristine and ready for your next backyard feast.

Step-by-Step Guide to Operating a Bull Gas Grill
Operating a Bull gas grill requires a methodical routine that balances fuel safety, rapid ignition, and precise temperature regulation. These outdoor appliances feature cast stainless steel burners that generate considerable thermal output, requiring cooks to respect basic gas dynamics and airflow principles. Learning how to work a bull gas grill ensures reliable startup, protects burner components, and delivers steady heat across all cooking grates. The following sections walk through every phase of operation, from fuel inspections to safe shutdown procedures.
Pre-Ignition Inspection and Gas Line Safety
Every cooking session should begin with an inspection of the gas supply line and fuel fittings. Flexible propane hoses and hard-plumbed natural gas connections can degrade over time due to weather exposure, pests, or physical vibration. Inspect the rubber line for abrasions, deep cracking, or pinching before opening any valves. If you suspect a loose fitting, keep all flames away and check connections using a soapy water solution that produces visible bubbles at leak points.
Confirming your fuel supply pressure prevents frustrating ignition failures and dangerous gas buildup inside the firebox. Standard propane cylinders require an intact bulk tank valve and a tightly seated handwheel or quick-connect collar at the regulator. Natural gas installations must have their dedicated manual shutoff valve turned parallel to the pipe run to allow full volume flow to the manifold. Never attempt to ignite the grill if there is any lingering gas odor around the cooking cabinet or island structure.
The Step-by-Step Lighting Sequence
The single most critical safety rule before sparking any gas grill is opening the lid completely. Trapped gas vapors underneath a closed hood can ignite violently, creating a dangerous fireball that risks severe personal injury and equipment damage. Lift the heavy stainless steel hood until it rests securely in its fully open position before touching any control dials. This simple step ensures adequate airflow and allows any pooled gas fumes to dissipate harmlessly into the open air.
Bull grills utilize independent Piezo igniters integrated directly into each valve stem, allowing cooks to ignite burners individually without external electrical power. Push the selected burner knob inward firmly to depress the internal gas valve spring. While maintaining inward pressure, slowly rotate the knob counterclockwise toward the high flame setting until you hear a sharp mechanical snap. This click indicates that the internal Piezo crystal has discharged an electrical spark at the burner electrode to ignite the flowing fuel.
Observe the burner surface through the cooking grates immediately after the mechanical click to verify that a blue flame has caught. If the burner fails to light within five seconds, immediately turn the control knob back to the off position. Leave the grill hood open and wait at least five full minutes for unburned gas fumes to clear completely before repeating the lighting attempt. Rushing a second ignition cycle without waiting can cause sudden flash combustion of accumulated vapors.
Manual Lighting Methods for Igniter Failures
Mechanical igniters can occasionally fail to create a spark if electrodes become coated with grease or misaligned during cleaning. Bull fireboxes feature designated manual lighting access ports near the front edges of the cooking grates. When manual ignition becomes necessary, always secure a long fireplace match or an extended butane wand lighter before opening the gas flow. Never insert a standard pocket lighter or short paper match directly between hot cooking grates.
Hold the active flame source near the lighting hole adjacent to the specific burner you intend to fire up. Once the flame is in position, push and rotate that individual burner knob to the high position. The gas should catch immediately from the sustained external flame, producing a continuous ring of fire along the burner ports. Once the first burner is operating, you can light adjacent burners using crossover channels or by repeating the manual lighter process at each valve.
Preheating and Establishing Temperature Zones
Preheating allows the heavy 304 stainless steel grates and firebox walls to absorb heat and reach thermal equilibrium before food touches the metal. After lighting all primary burners, close the hood and allow the internal temperature gauge to climb for ten to fifteen minutes. High-output models like the Bull Outdoor Products BBQ 57569 Brahma 90,000 BTU grill head generate intense thermal energy across their five cast stainless steel bar burners, reaching searing temperatures rapidly. Preheating burns away residual oils and guarantees crisp grill marks on meats.
Creating distinct direct and indirect cooking zones provides the thermal flexibility needed to handle diverse menus without burning delicate ingredients. For direct high-heat searing of steaks and chops, keep two or three burners set to medium-high while leaving adjacent burners on low or completely off. Placing an indirect cooking zone on one side gives you a safe retreat where thicker roasts can finish cooking gently by convective hot air. Organizing your food staging on a mobile outdoor prep station keeps raw and finished platters organized as you work between different heat zones.
Adding subtle wood smoke to gas grilling expands your culinary options when preparing slow-cooked cuts like pork roasts. Because clean-burning gas generates minimal natural smoke, positioning a sturdy smoker box accessory directly above a lit burner produces aromatic hardwood vapors. The heat from the cast stainless steel burner smolders wood chips inside the metal box, circulating rich smoke across the unlit indirect zone. This dual-zone technique allows gas grill owners to enjoy traditional barbecue notes without tending a charcoal fire.
Managing High-Output Cast Stainless Steel Burners
Cast stainless steel bar burners behave differently than thin stamped sheet metal burners found on entry-level backyard grills. The thick metal walls of cast burners store considerable thermal mass, meaning they retain heat longer and respond more gradually when dial adjustments are made. When reducing the dial from high to low, allow two or three minutes for the metal castings to stabilize at the lower thermal level. Anticipating this thermal inertia prevents accidental scorching when you switch from a fast sear to a gentler finish.
Flame appearance provides immediate feedback on whether your air shutters and burner ports are functioning properly. A healthy burner flame burns crisp blue with tiny yellow tips, indicating complete combustion and a balanced fuel-to-oxygen ratio. If the flames appear lazy, noisy, or predominantly bright orange, burner ports may be clogged with grease deposits or insect debris. Turn the grill off, allow the firebox to cool completely, and clear the burner ports with a stiff wire to restore balanced flow.
Fuel Conversions and Component Matching
Converting a gas grill between liquid propane and natural gas requires exact component matching because the two fuels operate at fundamentally different pressures. Propane operates under higher pressure and contains more energy per cubic foot, requiring tiny burner orifices to meter the fuel properly. Natural gas operates under much lower utility line pressure, requiring significantly larger valve orifices to deliver equivalent heating performance. Operating a grill with mismatched orifices can produce dangerously high flames or weak, soot-heavy combustion that ruins food.
Grill owners adapting their system must use verified factory-specified parts rather than attempting to drill out existing fittings manually. The Bull Conversion Kit for Angus is designed specifically for Angus, Lonestar Select, and Outlaw models to execute this fuel transition safely. This kit supplies four dedicated natural gas valves, a converted natural gas regulator, and a specialized orifice for the rear infrared rotisserie burner. Matching these calibrated valves to your specific grill frame ensures consistent manifold pressure and trouble-free flame modulation.
Utilizing Drop-In Griddle Plates for Flat-Top Cooking
Switching from open cooking grates to a flat-top griddle surface broadens what you can prepare outdoors on a high-output gas grill. The Bull Stainless Steel Pro Grill Griddle (97020) drops into the firebox after simply removing two standard grate sections. Crafted from chromium-plated 304 stainless steel, this accessory provides a solid, uniform griddle plate measuring 15.1 inches by 19.5 inches with an integrated full-sized grease trough. This heavy plate handles delicate foods like eggs, smash burgers, sliced vegetables, and breakfast pancakes that would otherwise slip between open grates.
Operating a drop-in griddle requires careful heat calibration because solid metal plates trap burner heat directly beneath the cooking surface. Keep burner dials set to low or medium-low to prevent burning cooking fats on the chromium plate. The built-in forward grease trough collects excess fat and drippings, keeping rendered grease away from the open flames underneath. Always use broad metal spatulas with rounded corners to manipulate food across the surface without gouging the polished finish.
Operating the Rear Infrared Rotisserie Burner
The rear infrared back burner found on models like the Brahma grill head delivers intense radiant heat ideal for slow-turning whole poultry and roasts. Infrared ceramic tiles glow red-hot, projecting radiant energy directly into the meat without creating direct flare-ups from falling drippings. When setting up the rotisserie spit rod, center the whole bird or roast and lock it securely with the heavy prongs. Mount a shallow drip pan directly onto the lower grates underneath the meat to capture rendered fat before it contacts unlit lower burners.
Never operate the lower bottom burners at high heat while the rear infrared burner is actively firing with the rotisserie running. Excessive heat pooling under a closed hood can overheat the rotisserie motor assembly and cause the infrared ceramic tile to crack prematurely. Keep the bottom burners turned completely off or at their lowest setting to let the rear infrared burner do the primary radiant roasting. Balance the spit rod counterbalance weight carefully so the electric drive motor turns smoothly without straining or hesitating during rotation.
Proper Post-Cook Shutdown Sequence
Executing a disciplined shutdown routine preserves internal gas components and eliminates lingering fire hazards once your meal is cooked. Always turn off all individual burner control dials on the front control panel first by rotating them clockwise to the off position. Once the burner flames are extinguished, immediately close the primary gas cylinder valve or the manual natural gas shutoff handle. Turning off the appliance dials before the supply valve prevents line depressurization issues and verifies that each valve seat seals tightly.
Allow the residual heat inside the grill to soften surface grease on the heavy stainless steel grates for a few minutes before brushing. Use a quality grill brush or scraper to remove charred food remnants while the metal is still warm to the touch. Once the grates are clean, let the entire unit cool down naturally with the hood closed to protect the firebox from moisture. Never fit an outdoor weather cover over the grill until the exterior metal surfaces have cooled to ambient outdoor temperature.
Routine Maintenance and Grease Management
Regular maintenance keeps gas delivery balanced and drastically reduces the potential for dangerous firebox grease fires. Beneath the burners, Bull grills feature a full-width pull-out grease tray and a removable grease catch cup designed to collect drippings. Inspect and scrape this tray every few grilling sessions to prevent accumulated animal fat from igniting during high-heat searing. Line the catch cup with disposable foil inserts or clean it regularly with warm soapy water to ensure smooth grease flow.
Periodically inspect the flame tamers and burner tubes for signs of heavy grease encrustation or insect nesting. Spiders frequently build nests inside open venturi tubes during off-season storage, creating physical blockages that force gas backward toward the control valves. Remove the cast stainless steel burners annually, brush the exterior surfaces, and run a flexible pipe cleaner through the internal tubes to clear obstructions. Keeping these passages clear ensures steady fuel flow and protects the front control panel from excessive back heat.
Critical Safety Boundaries and Flare-Up Control
Gas grills are built strictly for open-air outdoor operation and must never be fired up indoors, inside a garage, or under an enclosed patio canopy. Operating a fuel-burning outdoor appliance in an enclosed area generates deadly carbon monoxide gas and creates an extreme fire risk to nearby structures. Opening a garage door or running an exhaust fan does not provide safe ventilation for combustion fumes or radiant heat. Maintain generous clearances from vinyl siding, wooden deck railings, and overhead eaves in accordance with manufacturer instructions and local fire codes.
When unexpected grease flare-ups occur while grilling fatty cuts of beef or marinated poultry, resist the urge to pour water on the firebox. Pouring water over hot grease causes explosive steam bursts that scatter burning oil and can warp hot stainless steel grates. Instead, immediately move the meat to an unlit indirect heat zone and turn the underlying burner knobs down to low or off. Close the grill hood for thirty to sixty seconds to starve the localized fire of fresh oxygen until flames subside naturally.
Practical Takeaway for Long-Term Grill Performance
Consistent, safe operation comes down to following a disciplined routine every time you approach your outdoor cooking station. Taking thirty seconds to inspect fuel hoses, opening the hood before clicking the Piezo igniters, and allowing grates to preheat properly guarantees dependable culinary results. Pairing high-output burners with versatile accessories like drop-in griddles or rotisserie spits unlocks the full potential of your outdoor kitchen. Treat your gas connections with respect, maintain clean grease channels, and your Bull grill will deliver reliable searing heat for countless meals.



Write Your Review
No reviews yet. Be the first to share your experience!