


Tackling an enormous bone-in ribeye can feel intimidating when you step up to an open flame, especially when the meat measures more than two inches thick. Standard direct grilling methods often scorch the exterior long before the cold center warms up, leaving backyard cooks with a burnt crust and a raw middle. Learning how to cook a tomahawk steak on a gas grill requires a controlled, two-stage thermal technique rather than blast furnace heat from start to finish. Staging your heavy cut, coarse seasonings, and instant-read thermometer on a dedicated rolling prep table keeps your outdoor workstation completely organized before the lid ever closes.
By establishing distinct cooking zones on your propane or natural gas burners, you can gently roast the thick beef to an exact target before applying a screaming-hot sear. This two-zone reverse sear method renders the rich intramuscular fat evenly while preserving the tender texture of the ribeye cap. With a reliable temperature probe and steady airflow, you eliminate the guesswork and avoid the massive flare-ups that often ruin prized cuts. A patient approach transforms this massive showpiece cut into a tender, juicy meal with a crisp, mahogany crust.

Complete Guide to Reverse Searing a Tomahawk on Gas Grates
Cooking a massive tomahawk ribeye on a gas grill relies on the reverse sear method, which separates the gentle warming phase from aggressive surface browning. Because this cut carries an extended rib bone and heavy marbling, exposing it to direct flames immediately burns the outer muscle fibers while leaving the inner core raw. Moving the steak through a low-temperature indirect roast first brings the entire cut to a uniform temperature from edge to center. Once the core reaches your initial target, a rapid blast of direct flame creates a flavorful crust without overcooking the tender beef underneath.
Understanding the Tomahawk Cut and Marbling Dynamics
A tomahawk steak is a thick-cut ribeye with five or more inches of rib bone left intact and french-trimmed for presentation. Butchers typically cut these steaks between two and three inches thick, creating a piece of meat that weighs between thirty and forty-five ounces. The large ribeye cap, known as the spinalis dorsi, wraps around the central eye and contains substantial intramuscular fat. Cooking such a dense volume of beef requires gentle heat because aggressive flames contract outer fibers prematurely and force out natural juices.
The bone serves both an aesthetic purpose and a slight functional role during the cook. While the dense bone conducts heat slower than muscle tissue, it helps shield the adjoining meat from rapid temperature spikes on the grate. Thick marbling throughout the ribeye eye requires sustained warmth to soften and liquefy, which enhances the tenderness and flavor of the beef. Rushing the process over high heat leaves this intermuscular fat rubbery and unrendered.
Preparing the Meat with Dry Brining Techniques
Moisture is the primary enemy of a deep, caramelized crust, making prep work the foundation of a successful cook. Unpack your tomahawk and blot every surface thoroughly with dry paper towels to lift residual surface moisture. Season the meat generously on all sides, including the thick edges and around the bone base, using coarse kosher salt. Placing the salted steak uncovered on a wire rack inside your refrigerator for twelve to twenty-four hours allows the salt to penetrate while drying the exterior surface.
If you lack time for an overnight dry brine, let the salted steak rest at room temperature for forty-five to sixty minutes before cooking. This brief window helps temper the dense core slightly and gives the salt time to dissolve into the surface moisture. Avoid using fine table salt, which dissolves too quickly and can easily over-season such an expensive piece of beef. Coarse salt crystals distribute evenly across the wide surface area without creating harsh, overly salty spots.
Coarse black pepper and garlic granules can be added just prior to cooking, though moderation is essential. High heat during the eventual searing phase can scorch fine spices, imparting an acrid, bitter flavor across your beef. A light wipe of neutral cooking oil with a high smoke point, such as avocado oil, helps coarse seasonings adhere firmly. Keep the seasoning profile simple to highlight the rich, beefy profile inherent to a quality ribeye.
Setting Up Two-Zone Indirect Heat on Your Gas Grill
Configuring a two-zone cooking environment is mandatory when cooking thick-cut meats on any propane or natural gas system. On a standard three-burner grill, ignite only one of the outer burners, leaving the middle and opposite burners completely off. If your grill features two burners, light one side on low and dedicate the unlit side entirely to gentle indirect cooking. Close the lid and monitor your chamber until the ambient temperature stabilizes between 225 and 250 degrees Fahrenheit.
Do not rely strictly on the analog thermometer mounted in the grill hood, as these dials often read inaccurate temperatures. An ambient probe clipped directly to the cooking grate where the meat will sit provides a true reading of the circulating heat. Adjust your active burner control knob in small increments to maintain a steady convection airflow beneath the closed lid. Maintaining low ambient heat ensures the steak warms gradually, giving the intramuscular fat plenty of time to render.
Managing Probe Placement and the Low-Temperature Roast
Accurate internal temperature monitoring prevents overcooking and eliminates the need to cut into the meat prematurely. Insert a leave-in digital probe horizontally into the thickest section of the ribeye eye, taking care not to touch the bone. Bone conducts heat at a different rate than meat, which can cause the thermometer sensor to register a false reading. Place the prepared tomahawk flat on the unlit side of the grill grates, pointing the protruding bone toward the lit burner to act as a heat shield.
Close the grill lid immediately to establish stable convective airflow around the beef. Resist the temptation to open the lid frequently, as lifting the hood releases trapped heat and causes the burner flame to compensate erratically. For a target finish of medium-rare, maintain the indirect roast until the digital probe registers roughly 110 to 115 degrees Fahrenheit at the core. If you prefer a medium finish, hold the steak in the indirect zone until the core reaches approximately 120 to 125 degrees Fahrenheit.
Cooking times during the indirect phase typically range from forty-five to seventy minutes depending on weather and steak thickness. Never use elapsed time as your primary measure of doneness because wind conditions and fuel pressure cause gas grills to fluctuate. Always rely strictly on internal probe readings to govern your cooking decisions. Once the meat hits your target pre-sear temperature, transfer the tomahawk temporarily to a clean platter and tent it loosely while preparing the high-heat zone.
Executing the High-Heat Direct Sear
The searing phase triggers the Maillard reaction, developing the deep brown, savory crust that defines a steakhouse-quality ribeye. Turn all burners on your gas grill to their highest setting, close the lid, and allow the cooking grates to preheat thoroughly for ten to fifteen minutes. The grates need to absorb intense energy so they can transfer heat rapidly across the meat’s surface without extending internal cook time. Clean the grates thoroughly with a quality grill brush to remove any residual debris from previous cooks.
Place the tomahawk directly over the hottest burner zone and press down gently with heavy tongs to ensure maximum surface contact. Sear the steak for approximately sixty to ninety seconds before rotating it forty-five degrees to produce distinct crosshatch grill marks. Flip the steak to the reverse side and repeat the process, watching closely for dripping fat that could ignite below the grates. Sear the thick vertical edges as well by holding the steak upright with tongs, rendering the exterior fat strip along the cap.
Ribeye cuts contain high concentrations of rendered tallow, which easily drips into burner tubes and flame tamers during intense searing. If a persistent grease flare-up erupts, slide the steak sideways toward the cooler edge of the grill rather than allowing soot to coat the meat. Acrid yellow flames produce an unpleasant taste on the crust that overpowers the natural beef flavor. Quick adjustments and attentive flame management ensure you achieve an amber, crisp crust in less than four total minutes of direct heat exposure.
Resting, Carryover Cooking, and Slicing the Ribeye
Resting allows expanded muscle fibers to relax and reabsorb moisture throughout the steak. Once you pull the tomahawk off the searing grates, transfer it to a warm carving board with a juice groove to catch any runoff. Internal temperatures continue to climb between five and eight degrees Fahrenheit during the first several minutes off the fire due to carryover heat. Tent a sheet of aluminum foil loosely over the beef to retain warmth while preventing trapped steam from softening the crisp crust.
Allow the steak to rest undisturbed for ten to fifteen minutes before making your initial cut. Pairing the finished ribeye with hearty sides such as smoky barbecue baked beans rounds out the outdoor dinner while the steak rests. This rest window ensures that liquid pressures within the muscle equilibrate, retaining rich savory juices inside each slice rather than spilling them across your cutting board. Rushing this stage inevitably leads to dry meat despite accurate grill temperatures.
Carving a tomahawk requires a sharp chef’s knife or slicing blade to navigate around the large bone cleanly. Run your knife smoothly along the contour of the curved rib bone to separate the entire boneless ribeye roast in one continuous cut. Once separated, slice the meat across the grain into thick medallions roughly one-half inch wide. Slicing perpendicular to the muscle fibers shortens the grain length, guaranteeing an extraordinarily tender bite that melts effortlessly on the palate.
Troubleshooting Gas Temperature Drops and Flare-Ups
Backyard wind gusts represent one of the most common challenges when operating gas grills on open patios, as cross breezes can blow out low burner settings. Dedicated outdoor kitchens featuring a built-in barbecue island provide sheltered staging room to hold the heavy beef before carving and shield your burners from turbulent cross drafts. If you notice your chamber temperature plummeting during the indirect stage, check burner flames immediately to confirm they have not extinguished. Relight any snuffed burner cautiously following standard manufacturer safety steps, keeping the grill lid open during ignition to prevent gas accumulation.
Inaccurate internal temperature readings often occur when the probe tip rests too close to the bone or penetrates an internal pocket of melting fat. If your meat thermometer registers an abrupt, unrealistic temperature jump, carefully slide the probe back half an inch to sample the surrounding muscle core. Taking a secondary measurement with a handheld instant-read thermometer across different sections of the eye confirms true doneness. Trust verifiable thermal readings across multiple points rather than relying on a single fixed sensor that might sit in an unrepresentative hot zone.
Post-Cook Burner Maintenance and Grease Safety
Thick ribeye steaks release substantial volumes of melted tallow that settle onto your grill heat tents and base grease pans. Leaving this pool of grease unaddressed creates a severe fire hazard during your subsequent high-temperature outdoor cooking sessions. Once your steak has been pulled and the meal concludes, run your burners on medium-high for ten minutes with the lid closed to carbonize remaining drippings. Allow the grill to cool down completely, then scrape the heat deflectors and empty the bottom grease catcher into a safe disposal container.
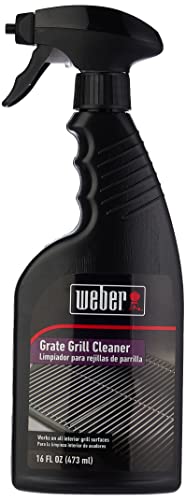
Brush the cooking grates while they are still slightly warm to lift loosened carbon particles easily. Applying a light wipe of high-heat cooking oil across cast-iron grates after cleaning prevents ambient moisture from inducing surface corrosion between grilling sessions. Maintaining clean burner ports ensures balanced fuel delivery, preventing irregular cold spots that complicate future indirect roasting setups. Routine inspection of burner tubes keeps debris from disrupting the fuel-air mixture required for clean combustion.
Outdoor Clearances and Safe Fuel Operation
Gas grills produce carbon monoxide and intense radiant heat, meaning they must operate exclusively in open, well-ventilated outdoor settings. Never operate a propane or natural gas grill inside a garage, breezeway, shed, or screened porch, even if the overhead doors are rolled wide open. Fire safety guidelines and grill manufacturers dictate maintaining at least ten feet of clearance from combustible walls, wooden railings, and low-hanging eaves. Ensure your propane cylinder sits securely in its designated bracket and check gas hoses periodically for leaks using soapy water before lighting.
Executing the two-zone reverse sear on your gas cooker unlocks the full culinary potential of a prime tomahawk ribeye without requiring commercial equipment. Combining gentle indirect roasting with a brief, high-heat sear delivers a uniform edge-to-edge pink center framed by an authentic flame-kissed crust. Diligent temperature tracking, mindful grease management, and proper slicing technique ensure every cookout yields tender, flavorful results. Fire up your burners with confidence, trust your internal thermometer readings, and enjoy one of the most rewarding steaks outdoor grilling has to offer.






Write Your Review
No reviews yet. Be the first to share your experience!