


Getting consistent heat from a charcoal grill can feel intimidating when you first step away from the convenience of gas burners. When enthusiastic backyard cooks search for how to use a charcoal grill reddit discussions offer some of the most practical, no-nonsense advice available online. Experienced community members consistently emphasize that charcoal cooking is not about luck or constant tinkering, but rather about understanding airflow, fuel placement, and patience. Whether you are searing steaks or preparing a flavorful Korean beef barbecue recipe, mastering these fundamental fire management principles will completely change your outdoor cooking results.
Many beginners make the mistake of soaking briquettes in chemical fuel or scattering glowing coals randomly across the bottom bowl. Online grilling forums frequently debunk these common pitfalls by teaching rookies to harness natural airflow and zone cooking. A properly configured kettle or portable grill allows you to achieve blistering sear marks while keeping a safe zone ready for delicate foods. By learning the core techniques endorsed across outdoor cooking communities, you can turn any standard charcoal cooker into a reliable, versatile backyard kitchen.


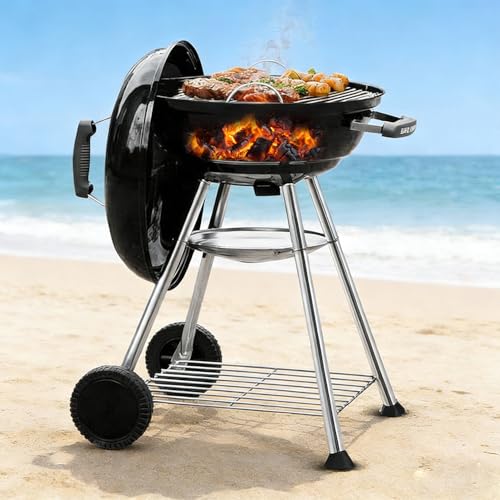
The Complete Guide on How to Use a Charcoal Grill
Learning how to run a charcoal grill successfully comes down to controlling a few physical variables rather than relying on guesswork. Reddit communities dedicated to outdoor cooking continually emphasize three core pillars: lighting coals cleanly, setting up distinct heat zones, and adjusting dampers to regulate combustion. Once you master these fundamental steps, you can cook everything from quick burgers to thick roasts with predictable precision. This comprehensive breakdown walks you through the entire process from fuel selection to post-cook cleanup.
Selecting Fuel: Briquettes Versus Lump Charcoal
The choice between charcoal briquettes and hardwood lump charcoal is one of the most debated topics among outdoor cooks. Briquettes consist of compressed sawdust, coal dust, and natural binders molded into uniform pillow shapes. They burn at a steady, moderate temperature and offer predictable burn times, making them the standard recommendation for beginners who need consistent heat. The uniform size also makes it easy to measure your fuel load reliably across multiple cooking sessions.
Lump charcoal is made from pure charred hardwood logs that retain their natural branch and block shapes. It ignites faster, burns hotter, and leaves behind noticeably less ash than briquettes, which helps maintain clear airflow in smaller grills. However, the irregular sizes of lump pieces can cause minor temperature variations across the coal bed. Many cooks prefer lump charcoal for quick, high-heat sears on steaks or chops where maximum surface temperature is the primary goal.
Your choice of fuel should match the style of food you plan to cook and the design of your grill bowl. Long, slow roasting sessions generally benefit from the steady burn rate and endurance of quality briquettes. Quick weeknight grilling sessions often favor lump charcoal because the pieces light quickly and reach cooking temperatures in less time. Storing either fuel in a moisture-free container is essential because damp coals produce excessive smoke and struggle to stay lit.
Ditching Lighter Fluid for the Chimney Starter Method
If there is one universal rule across Reddit barbecue communities, it is to avoid petroleum-based lighter fluid completely. Chemical starters leave an unpleasant residual odor and flavor that readily transfers onto food. Furthermore, lighter fluid burns off quickly, frequently leaving the center of the coal pile unlit and causing frustrating flameouts. Investing in a simple metal chimney starter eliminates these headaches and provides a faster, cleaner ignition process.
A chimney starter uses a hollow metal cylinder with a wire grate in the lower section to funnel natural draft upward. You fill the upper chamber with your desired amount of charcoal and place one or two fire starter cubes or sheets of crumpled paper underneath. Drizzling a small amount of cooking oil on crumpled paper towels can help them burn long enough to catch the bottom coals reliably. Once lit from below, the intense updraft ignites the coals rapidly without any petroleum additives.
Knowing when to dump the coals is just as important as how you light them. Coals are ready when the top pieces begin developing gray ash around their edges and a clear heat column rises from the cylinder. Dumping too early leaves partially lit coals that struggle to maintain temperature, while waiting too long consumes valuable fuel before food ever hits the grates. Always wear heat-resistant barbecue gloves and use smooth, deliberate motions when pouring glowing coals into your grill bowl.
Mastering Airflow: Intake and Exhaust Vent Dynamics
Charcoal fires require oxygen to burn, which means your grill vents function as your primary temperature controls. The bottom damper, located beneath the charcoal grate, serves as the air intake and directly dictates how hot the coals burn. Opening the bottom damper wide feeds more oxygen into the fuel bed, accelerating combustion and raising cooking temperatures. Restricting the intake reduces oxygen, which slows the fire and cools the cooking chamber.
The top exhaust vent on the lid functions as an engine draft that pulls air through the grill and vents exhaust smoke. Keeping the exhaust vent at least partially open is critical to maintain positive draft and prevent foul, stale smoke from settling on your food. Experienced cooks frequently leave the top exhaust wide open and perform the vast majority of temperature adjustments using the bottom intake damper. Positioning the exhaust vent directly over your food also directs flavorful convective heat across the cooking surface.
Making small, gradual damper adjustments is the secret to stable temperature management. When you adjust a vent, wait ten to fifteen minutes for the charcoal bed to stabilize before assessing the change. Closing all dampers completely starves the fire of oxygen and will extinguish the coals, which is useful when shutting the grill down. Avoid making drastic adjustments back and forth, as wild swings in airflow lead to uneven heat and charred food.
Building the Essential Two-Zone Fire Setup
Dumping hot coals in an even layer across the entire bottom grate is a frequent novice error that leaves no room for error. The community standard for charcoal cooking is the two-zone fire setup, which divides the grill into a direct heat zone and an indirect heat zone. To create this arrangement, bank all your lit coals onto one half of the lower charcoal grate, leaving the opposite side completely empty. This simple configuration provides unmatched control over diverse ingredients and cooking speeds.
The direct zone sits directly above the glowing coals and provides intense radiant heat. This side is ideal for searing thin steaks, crisping burger patties, and achieving rich grill marks in just a few minutes. Because radiant heat drops off rapidly with distance, the direct zone works best for quick cooks that do not require extended lid-down roasting. Keeping food moving over direct coals prevents sugars in glazes from scorching prematurely.
The indirect zone on the empty side relies on circulating convective heat, functioning much like an outdoor oven. This area is where you place thicker items like bone-in chicken thighs, pork loins, or sausages that require gentle roasting to cook through. If you are glazing ribs or poultry with a tangy cranberry barbecue sauce recipe, the indirect zone allows the sauce to caramelize slowly without burning over open flames. The indirect side also acts as a vital holding area for resting cooked meats.
A two-zone layout provides an instant safety net whenever rendered fat drips and sparks sudden grease flare-ups. Instead of spraying water on the coals, which kicks up dirty ash and cools your fire, you simply move the food to the indirect zone using long-handled tongs. Once the flare-up subsides, you can shift the meat back over the direct heat to finish the sear. This proactive management strategy protects your meal from bitter, soot-covered crusts.
Cooking Sequence from Grate Prep to the Final Sear
Once you pour your lit coals and arrange your heat zones, place the cooking grate into position and put the lid on for five to ten minutes. Allowing the grates to preheat thoroughly burns off grease residues from prior sessions and ensures food releases cleanly. Scrub the hot metal bars with a bristle-free grill scraper or grill brush to remove debris. Finishing with a light wipe of high-smoke-point cooking oil on a folded paper towel helps create a naturally slick surface.
Grilling with the lid closed is almost always preferable to cooking with the lid off, especially for cuts thicker than one inch. Closing the lid traps radiant heat, controls oxygen intake to suppress flare-ups, and promotes even convective air movement around the meat. If you enjoy deeper smoke character during your cook, incorporating dedicated accessories such as smoker boxes for extra wood aroma on top of the coals can elevate the overall flavor profile. Only leave the lid off when actively searing thin cuts that require constant turning.
Relying on built-in dome thermometers or visual cues can easily mislead you regarding internal doneness. Lid thermometers measure air temperature near the top of the dome rather than the true temperature at grate level. Always use an instant-read digital food thermometer inserted into the thickest part of the meat away from bones to verify doneness. Removing foods according to internal temperature guidelines ensures safe, juicy results without cutting into the meat and losing moisture.
Managing Heat on Compact and Portable Charcoal Grills
Smaller charcoal cookers present distinct advantages and challenges when compared to full-sized patio kettles. Because a compact bowl has less internal air volume, temperature changes happen much faster when you adjust the dampers or open the lid. A modest amount of fuel can create an intense fire in a tight cooking chamber, making careful coal measurement essential. Understanding your specific equipment design helps you achieve consistent results whether cooking in the backyard or at a campsite.
The GasOne 14-inch Portable Charcoal Barbecue Grill demonstrates how compact engineering handles heat distribution. Featuring a 14-inch diameter that provides 150 square inches of cooking surface, this unit uses a 3-point locking lid to trap heat and circulate warmth evenly. Its dual ventilation system provides continuous airflow to sustain coals, while an integrated under-grill ash catcher captures falling debris. Banking coals to one side in a 14-inch bowl still allows for a compact two-zone setup suitable for smaller skewers or burgers.
The GasOne Charcoal Grill with 4-level flame control offers an alternative approach focused on adjustable cooking heights. Measuring 14 by 14 by 16 inches with a 150-square inch cooking grid, this lightweight model relies on an open-grill design with a dual venting system. The tight-gapped cooking grid prevents smaller vegetables and sliced meats from dropping through into the fire bowl. Having four distinct grid height settings lets you raise or lower your food relative to the coals, providing direct mechanical heat regulation without relying on a lid.
Cooks needing greater cooking capacity often choose an 18-inch kettle design like the BEAU JARDIN Premium 18 Inch Charcoal Grill. Offering 255 square inches of plated steel cooking surface across an 18-inch diameter, this unit provides generous room for a true two-zone fire. Its 1mm porcelain-enameled bowl and lid retain heat efficiently, while the rust-resistant adjustable aluminum air vent damper allows precise airflow management. An integrated ash leak and collection system under the bowl streamlines post-cook disposal while keeping lower airflow passages clear of obstruction.
Outdoor Charcoal Safety and Fire Hazards
Safety is an absolute priority whenever burning solid fuels like lump charcoal or briquettes. Charcoal grills must strictly be operated outdoors in open-air environments away from combustible structures. Operating a charcoal grill inside a garage, carport, covered breezeway, or screened porch is exceptionally dangerous due to carbon monoxide accumulation and structural fire hazards. Even leaving a garage door wide open does not provide sufficient air exchange to prevent deadly carbon monoxide gas from accumulating indoors.
Always position your grill on a stable, level, non-combustible surface such as concrete, patio pavers, or packed gravel. Maintain a clear clearance zone of at least ten feet from vinyl siding, wooden deck railings, dry vegetation, and low-hanging tree branches. Pay close attention to ambient wind conditions, as gusty breezes can blow hot embers out of bottom vents and ignite surrounding dry leaves. Keeping a bucket of water or an approved household fire extinguisher nearby is standard outdoor cooking best practice.
Handling hot embers during and after your cooking session demands proper tools and care. Never attempt to move a hot grill while coals are burning inside the bowl, especially on models with wheeled carts or lightweight folding legs. Avoid placing hot grill lids directly onto wooden tables, plastic patio furniture, or dry grass where scorch marks or ignition can occur. Use heat-resistant barbecue mitts whenever adjusting hot dampers or handling cooking grates to prevent severe accidental burns.
Extinguishing Coals and Routine Grate Maintenance
When you finish cooking your meal, shutting down the grill properly allows you to conserve unburned fuel for future use. Close both the top exhaust damper and bottom intake vent tightly to completely cut off oxygen flow to the fire bowl. Within thirty to forty-five minutes, the lack of air will snuff out the fire, cooling the metal bowl safely. Never pour cold water directly onto hot coals, as the resulting thermal shock can crack porcelain enamel finishes and generate blinding clouds of scalding steam.
Any charcoal remaining in the bowl after the fire dies down can be reused on your next cooking session. Before lighting new coals, gently shake the charcoal grate to knock loose ash down into the collection pan. Sift through the leftover pieces and leave them banked against one side of the grill. You can then pour a freshly lit chimney starter directly over the unspent fuel, significantly reducing charcoal waste over a grilling season.
Routine ash cleanup is critical for preserving your grill and ensuring steady airflow on future cooks. Charcoal ash is hygroscopic, meaning it absorbs moisture from ambient air and forms a corrosive paste that rapidly rusts through steel bowls. Empty the ash catcher into a dedicated metal disposal bin once the embers are completely cold to the touch. Wiping your cooking grates with a thin coat of oil after scraping keeps them conditioned and ready for your next outdoor meal.
Consistent charcoal grilling is all about patience, deliberate adjustments, and respecting the basic physics of fire. By ditching chemical starters, adopting a reliable two-zone setup, and using vents instead of lid removals to control heat, you gain predictable control over your cook. Take time to observe how your specific cooker responds to minor airflow tweaks, verify food temperatures with an instant-read probe, and enjoy the rich, authentic flavor that only live charcoal fire can produce.


Write Your Review
No reviews yet. Be the first to share your experience!