


Pulling off a weather cover after months of damp weather often reveals an unwelcome layer of orange oxidation across the cooking surface. Surface oxidation turns once-slick steel or cast iron into a rough, flaky surface that ruins delicate proteins and causes stubborn sticking. Learning how to restore rusty grill grates enables cooks to salvage their existing setup without rushing to buy costly replacement parts. Moisture, lingering salt, and acidic food residues readily break down bare metal when protective oil layers wear away. Restoring that surface creates a dependable foundation whether you are searing burgers directly over hot coals or using smoker boxes for outdoor grilling to infuse rich hardwood aroma into low and slow roasts.
Restoration involves stripping away loose iron oxide, neutralizing surface corrosion, and sealing bare metal with heat-polymerized cooking oils. Different cooking surfaces require distinct approaches because porous cast iron demands continuous seasoning while porcelain-enameled steel requires gentle abrasive contact to avoid chipping fragile coatings. Dedicated maintenance accessories, such as the Grate Armor® Grill Grate Oiling Brush for Even Oil, help outdoor enthusiasts apply uniform coats of cooking oil or tallow after completing heavy rust removal. Regular upkeep safeguards your metal from humidity and extends the working lifespan of your entire cooking chamber. Taking the time to properly clean, re-season, and store your cooking grids ensures safe, flavor-pure results every time you fire up the burners.

Comprehensive Guide to Restoring and Reseasoning Rusty Grill Grates
Restoring oxidized grill grates requires an orderly process of breaking down iron oxide, clearing loose particles, and creating a fresh protective patina. Rust forms when bare metal meets moisture and oxygen, an unavoidable reality for outdoor cooking gear exposed to changing seasons. Tackling this buildup early preserves cooking performance and prevents flaky residue from transferring onto your grilled food. By following proven cleaning methods matched to your specific grate metal, you can return neglected cooking grids to reliable service.
Assessing the Damage: Surface Rust Versus Structural Corrosion
Before investing physical effort into scrubbing, examine the depth of corrosion across the cooking bars. Light surface rust appears as a powdery reddish-orange film that rests on top of the metal without altering its structural shape. Heavy corrosion, in contrast, creates visible pits, flaking metal scales, and noticeable thinning of individual grate bars. You can test grate condition by scraping a small section with a putty knife or stiff scraper to see if solid metal remains underneath.
Restoration makes sense when the metal beneath the rust remains thick, level, and structurally solid. If severe pitting has hollowed out the core of cast iron bars or snapped weld points on steel grids, cleaning will not restore structural stability. Weakened grates can bow or collapse under the weight of heavy cast iron Dutch ovens or large cuts of meat during cooking. In those severe situations, replacing the grate assembly is the safer and more practical choice for your grill.
Identifying Grate Materials Before Cleaning
Different grill grates react differently to abrasives and chemical cleaning agents depending on their core metallurgy. Uncoated cast iron is exceptionally durable and holds heat well, but its porous surface oxidizes quickly if water sits on bare metal. This material tolerates heavy mechanical scrubbing, stiff wire brushes, and acid soaks without losing its basic cooking capabilities. Once stripped clean, cast iron must receive an immediate application of cooking oil to halt fast-forming flash rust.
Stainless steel grates resist corrosion naturally due to the presence of chromium in the metal alloy. When stainless steel does develop surface rust, it is usually because carbon steel particles from a wire brush rubbed off onto the surface or high heat broke down the passive oxide layer. These grates respond best to non-metallic abrasive pads, stainless steel wool, or mild acidic baths that lift discoloration without gouging the metal. Avoiding harsh carbon-steel brushes on stainless steel prevents cross-contamination that invites future corrosion.
Porcelain-enameled grates feature a protective glass glaze baked over an inner core of steel or cast iron. If rust appears on porcelain grates, the outer ceramic enamel has chipped, cracked, or worn away to expose raw iron below. You must handle porcelain coatings gently because aggressive chiseling, harsh power tools, or metal scrapers will expand the chipped areas and cause more coating loss. Soft nylon scrub pads, mild cleaning pastes, and gentle wiping are the safest cleaning options for damaged porcelain surfaces.
Safe and Effective Rust Removal Methods
A gentle vinegar bath is one of the most reliable ways to dissolve persistent rust across neglected cooking grids. Acetic acid in household white vinegar reacts chemically with iron oxide, converting stubborn rust into a soft paste that easily wipes away. Submerge the affected grates in a shallow plastic bin filled with equal parts white vinegar and warm water for two to four hours. Avoid soaking cast iron for more than six hours, as excessive acid exposure can degrade the underlying metal.
For localized rust patches or grates that cannot fit into a soaking tub, a baking soda slurry provides practical abrasive scrubbing power. Mix baking soda with a small amount of warm water or liquid dish soap until it forms a thick paste resembling wet mortar. Spread this paste generously across the rusted bars and let it sit for twenty minutes to loosen grease and grime. Scrub the bars firmly using a non-metallic abrasive scouring pad or brass-bristled brush, working along the length of each bar until bare metal appears.
High-heat thermal cleaning can also loosen stubborn, baked-on rust and carbonized grease before manual scrubbing begins. Place the grates inside your grill, close the lid, and set the burners to high heat for approximately fifteen minutes. The intense heat carbonizes residual oils and causes differing rates of thermal expansion between rust flakes and the core metal. Once the grill cools down to a warm, workable temperature, scrape away the loosened debris with an abrasive wooden scraper or a brass brush.
Neutralizing Acids, Washing, and Complete Moisture Removal
After acid-based treatments like vinegar soaks, neutralizing lingering chemical residue is a mandatory step before re-seasoning. Acetic acid trapped in cast iron micro-pores will continue reacting with the metal and generate fresh rust underneath new oil coatings. Rinse the grates thoroughly with clean water, then wash them down using a solution of one gallon of water mixed with two tablespoons of baking soda. This basic solution quickly neutralizes residual acid and prepares the metal for final cleaning.
Wiping the grates with a clean cotton towel removes pooled surface water, but air drying alone leaves microscopic moisture behind. Raw iron develops flash rust in as little as ten minutes when exposed to humid outdoor air. To eliminate every trace of moisture, place the washed grates into an indoor oven set to two hundred degrees Fahrenheit for fifteen minutes, or light your outdoor grill on low. Heating the metal drives trapped water out of the porous bar texture and leaves bone-dry surfaces ready for seasoning.
Re-Seasoning Restored Grates to Prevent Recurrent Oxidation
Re-seasoning creates a slick, polymerized barrier that protects bare metal from oxygen, salt, and humidity. During this chemical process, liquid unsaturated fatty acids bond together under high heat to form a hard, plastic-like protective layer across the metal. Bare cast iron and carbon steel cannot resist weather without this barrier, which also delivers natural non-stick cooking qualities. Building several micro-thin coats of polymerized oil yields far superior rust protection compared to one thick, sticky puddle of unheated grease.
Choosing the right cooking fat determines the durability and heat resistance of your newly restored grate patina. High smoke-point cooking oils rich in unsaturated fats, such as canola oil, grapeseed oil, or rendered beef tallow, work exceptionally well. Low smoke-point fats like unrefined butter or extra virgin olive oil should be avoided because they scorch, smoke excessively, and leave bitter, brittle carbon crusts. A proper seasoning oil forms a slick, resilient glaze that expands and contracts with the metal without flaking.
Applying oil evenly across hot, narrow cooking bars requires tools that prevent pooling and keep your hands safe from heat. Dedicated oiling accessories, like the Grate Armor® Grill Grate Oiling Brush for Even Oil, use heat-resistant silicone applicators to spread uniform coats of oil or tallow directly onto the grate surface. Once the metal receives a paper-thin film, heat the grates to four hundred degrees Fahrenheit for forty-five minutes to complete polymerization. Repeating this oil-and-heat cycle two to three times builds a resilient barrier capable of resisting moisture and grease.
Routine Maintenance Habits to Keep Grates Rust-Free
Keeping your restored grates clean after every cookout stops new corrosion long before it gains a foothold. Once you finish cooking and remove your food, turn the grill to medium heat for five minutes to char lingering meat remnants. Brush the warm bars with a stiff nylon or brass brush to knock off carbonized food particles while the metal remains warm. Finishing the cleaning routine by applying a rapid, thin swipe of fresh oil shields the warm metal as it cools down overnight.
Be cautious when cooking with sticky, sugar-dense glazes or acidic marinades that easily erode delicate seasoning layers. For example, preparing caramelized skewers coated with a Filipino pork barbecue marinade introduces vinegar and soy sauce that can strip seasoning if left on hot iron. Similarly, brushing meats with a tart cranberry barbecue sauce leaves acidic fruit sugars that cling stubbornly to the cooking bars. Scraping and lightly re-oiling grates immediately after cooking these flavorful, acid-rich dishes maintains protective patina integrity.
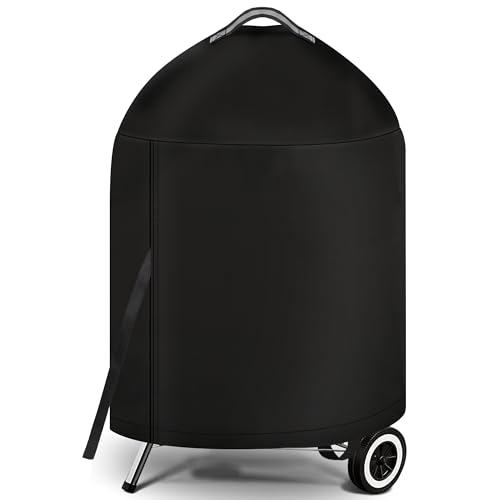
Proper outdoor storage habits protect clean cooking grids from humidity, fog, and seasonal rain showers. Always keep your grill lid closed and covered with a breathable, water-resistant grill cover when the unit sits idle on an open patio. Ensure bottom cookbox grease drains and air dampers remain unobstructed so trapped condensation does not create a humid microclimate inside the firebox. If you plan to store the grill away for winter, remove the seasoned grates and keep them in a dry indoor utility room.
Essential Safety Guidelines for Grill Operation and Upkeep
Safety must remain a top priority whenever cleaning, inspecting, or maintaining outdoor cooking equipment. Traditional steel wire grill brushes carry serious health hazards because thin wire bristles can break free, stick to greasy grate bars, and embed inside grilled food. Ingested wire bristles pose severe digestive risks, making brass-bristle brushes, wooden scrapers, or coil-style cleaners much safer options. Always inspect the grate surface with a bright flashlight or wipe it with a paper towel before placing food over the heat.
Never operate an outdoor grill inside a garage, carport, breezeway, or enclosed porch, regardless of weather conditions. Burning charcoal, wood pellets, or propane gas generates toxic carbon monoxide, a colorless and odorless gas that can quickly prove fatal in enclosed spaces. Opening an overhead garage door or window does not supply adequate air exchange to eliminate deadly gas buildup or prevent structural fire hazards. Grills must always stand outdoors in a well-ventilated open area at a safe distance away from exterior walls, vinyl siding, and combustible roof overhangs.
High-heat seasoning cycles also demand caution regarding grease collection and flare-up management. Before heating your cooker to cure new oil coats, thoroughly empty and clean the bottom grease drip pan and catch cup. Residual grease pooled in the bottom tray can ignite into an uncontrolled firebox blaze when the burners run at maximum output. Keep an approved fire extinguisher nearby, maintain active supervision over the grill, and never leave hot seasoning cycles unattended.
Taking the time to remove corrosion and re-establish a durable oil patina extends the life of your cooking grates for years of reliable outdoor meals. Inspecting grate bars regularly catches minor discoloration before oxidation causes irreversible surface pitting or structural weakness. Pair thorough cleaning with immediate drying, careful seasoning using high smoke-point cooking oils, and sensible outdoor storage. Consistent post-cook maintenance keeps your grill ready for delicious backyard feasts while protecting your equipment investment season after season.





Write Your Review
No reviews yet. Be the first to share your experience!