


Building a steady fire outdoors provides unmatched flavor, yet managing live coals often intimidates cooks who are accustomed to turning a gas knob. Learning how to cook using a charcoal grill starts with understanding that heat regulation relies entirely on oxygen flow and coal arrangement rather than dial adjustments. Setting up dedicated heat zones allows you to sear steaks over fierce briquettes while roasting delicate items gently on the indirect side. Having adequate workspace next to your cooker, such as a dedicated rolling outdoor food station, makes handling hot grates and raw meats significantly safer and more organized.
Reliable results also come from choosing the right starting method, such as a chimney starter, rather than soaking fuel in chemical lighter fluid that ruins food flavor. Whether you plan to grill quick weeknight burgers or tackle a flavorful barbecue chicken wings recipe on the weekend, charcoal offers versatility across high-heat searing and slow roasting. Mastering damper adjustments and internal meat temperatures ensures your food cooks evenly without burning the exterior. With standard equipment and proper technique, outdoor charcoal cooking transforms from unpredictable guesswork into an intuitive, rewarding cooking routine.
Pros
- Comprehensive recipe library covering virtually every protein, vegetable, and marinade
- Clear instructions on setting up two-zone heat and managing live flames
- Convenient digital format fits easily on a phone or tablet right at the grill station
- Straightforward ingredient lists focused on authentic flavor without unnecessary filler
Cons
- Requires keeping a phone or tablet nearby, which exposes your screen to grease and smoke
- Digital layout lacks full-color photos for every individual recipe
- Cannot replace physical hardware like grill thermometers or meat probes
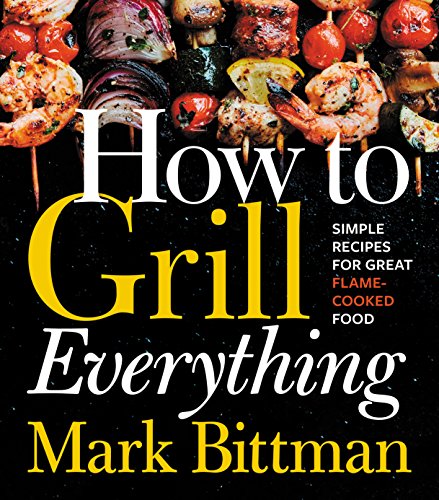
How to Grill Everything functions as a practical instructional blueprint for outdoor cooks rather than a standard piece of cooking hardware. Operating as a digital reference manual, it is built to bridge the gap between basic flame roasting and true temperature mastery across charcoal grills, gas burners, and backyard smokers.
This guide is best suited for backyard barbecue enthusiasts, patio cooks, campers, and tailgaters who want quick, reliable recipe blueprints without flipping through bulky, sauce-splattered hardcovers. Whether you are firing up a compact portable grill at a tailgate or running an all-day smoking session on your patio, the instructions focus heavily on practical fire management and fundamental outdoor techniques.
The instructional content emphasizes real-world cooking performance, guiding you through hot-and-fast searing, indirect baking, and gentle smoke infusion. It breaks down essential skills such as establishing dual-zone heat, managing airflow to maintain steady temperatures, and timing meat correctly to lock in juices and avoid burnt crusts caused by uncontrolled flare-ups.
In terms of usability and outdoor convenience, the Kindle format proves remarkably functional around a working barbecue station. You can pull up cook times, ingredient ratios, and sauce recipes instantly on your smartphone or a weather-resistant tablet stand, keeping your prep tables clean and free of heavy book stands that can tip over in windy weather.
A realistic limitation is that navigating a digital screen with barbecue tongs or sauce-covered hands can get messy, requiring you to wipe your fingers or protect your device from stray grease splatters. Visual cooks may also notice that not every recipe features a finished color photograph, prioritizing sheer recipe density and technique instruction instead.
For anyone serious about improving their backyard barbecues, weeknight patio dinners, or outdoor campsite menus, this digital grilling guide offers tremendous practical value. It takes the guesswork out of fire cooking and serves as a dependable companion beside any grill setup.
The core strength of this outdoor cooking guide lies in its focus on thermal dynamics and fire control. It teaches grillers how to read flame intensity, organize charcoal piles for indirect baking, and dial in gas burner valves to prevent food from scorching.
Readers learn how to achieve crisp exterior sears on thick steaks while keeping the center tender, along with techniques for sustaining steady low heat for tender ribs and pulled meats. The advice on using wood chips and wood chunks also helps patio cooks extract clean, aromatic smoke flavor without over-smoking their food.
This recipe guide excels in backyard barbecue settings where you need versatile menu options that please a crowd, from simple flame-broiled burgers to seasoned grilled vegetables and fish. Its streamlined layout makes meal planning painless during weekend cookouts.
It is equally useful for tailgating and campsite adventures where space and weight are strictly limited. Storing hundreds of recipes directly on your mobile device leaves your vehicle trunks and camp bins open for coolers, fuel, and grilling gear.

Pros
- Super convenient setup and no cleanup required
- Lightweight and easy to carry anywhere
- Heats up quickly with even cooking performance
- Great for small gatherings or solo grilling
Cons
- Single-use only, so not suitable for regular backyard cooking
- Limited cooking space – best for 2-4 burgers or a few skewers
- Charcoal burns for about 1 hour, so longer cooks aren't possible
If you've ever found yourself craving a grilled burger at a campsite or tailgate but didn't want to haul a full-size charcoal grill, the Oppenheimer USA Disposable Charcoal Grill is exactly what you need. This is a lightweight, portable, single-use grill that comes pre-loaded with easy-light charcoal – just remove the wrapper, light the corners, and you're ready to cook in minutes. It's designed for outdoor enthusiasts who value convenience above all else.
This grill is best suited for campers, tailgaters, RV owners, and anyone who enjoys spontaneous outdoor cooking without the hassle of cleanup. It's also a solid pick for beach days, park picnics, or even emergency cooking during power outages. The 9x13 inch cooking grate gives you enough space for a few burgers, hot dogs, or skewers – perfect for 2-4 people. Just don't expect to smoke a brisket or feed a crowd.
In terms of real-world cooking performance, the easy-light charcoal lights quickly and reaches a decent grilling temperature within 10-15 minutes. The heat distribution is fairly even across the grate, though you might notice slightly cooler spots near the edges. Searing is possible for thin cuts like burgers and chicken thighs, but you won't get the same crust as a heavy cast-iron grate. Smoke flavor is present but mild – it's enough to satisfy a casual griller but not a BBQ purist. The fuel burns for about an hour, which is fine for quick grilling sessions but not low-and-slow cooking.
Build quality is what you'd expect from a disposable product – sturdy enough to hold up during cooking, but not meant for long-term use. The aluminum tray feels solid, and the wire grate supports food without sagging. There are no wheels, folding legs, or weather-resistant features because this grill is designed to be used and tossed. Portability is its strong suit: at 3.5 pounds and dimensions of 9x13x2 inches, it slips into a backpack or car trunk easily.
Setup is incredibly simple – no tools, no assembly, no charcoal to pour. Just remove the plastic wrap, place the grill on a non-flammable surface, and light the corners through the designated ignition strips. Cleanup is even easier: once the charcoal has cooled completely, you can dispose of the entire grill. Just make sure to follow local disposal guidelines for charcoal and ash. The biggest limitation is that it's single-use, so if you grill often, the cost adds up compared to a reusable portable grill.
Overall, the Oppenheimer USA Disposable Charcoal Grill is a fantastic solution for outdoor cooks who prioritize convenience and portability. It's not meant to replace your backyard kettle grill, but it's a lifesaver for camping, tailgating, or any on-the-go cooking scenario. If you're looking for a no-mess, no-fuss way to enjoy grilled food anywhere, this pack of two is a smart buy.
At just 3.5 pounds and 9x13x2 inches, this grill is incredibly easy to transport. It fits in a backpack, car trunk, or even a large tote bag. No need to worry about charcoal bags or lighter fluid – everything is built in. The lightweight design makes it a top choice for hikers, campers, and tailgaters who want to travel light.
This grill shines in scenarios where convenience and portability matter most. Use it for camping trips, tailgate parties, beach outings, park picnics, or even as a backup grill during power outages. It's also great for small gatherings where you only need to cook a few items. Not ideal for large BBQs or smoking.


Pros
- Covers all major outdoor cooking methods in one easy-to-follow guide
- Practical, hands-on advice from trusted America's Test Kitchen experts
- Portable digital format allows instant reference while cooking outdoors
- Strong focus on heat management, smoke infusion, and flavor techniques
- Accessible for beginners yet valuable for experienced grill enthusiasts
Cons
- Digital only - no physical copy for quick reference in smoky or wet conditions
- Requires a device to read near the cooking area, which may be inconvenient
- Technique-focused rather than a recipe book, so not ideal for those seeking only recipes
If you've ever wanted to truly master outdoor cooking beyond just flipping burgers on a gas grill, The Outdoor Cook from America's Test Kitchen is the guide you need. This isn't another recipe collection. It's a practical, technique-driven manual that teaches you how to cook anything outside using a grill, fire pit, flat-top griddle, or even a campfire. Whether you're a backyard BBQ enthusiast, a weekend camper, or a dedicated tailgater, this book helps you understand the how and why behind great outdoor food.
One of the biggest strengths of this guide is its focus on real-world cooking performance. You'll learn how to manage heat consistency across different types of equipment. Want perfect sear marks on a steak? It covers that. Hoping to get that deep smoke flavor from a charcoal kettle or a pellet grill? The techniques are laid out clearly. The book doesn't just tell you to cook low and slow. It explains how to control airflow, manage charcoal layers, and position food for even heat. For flat-top griddle fans, there's solid advice on seasoning, oil control, and getting that crispy crust on smash burgers.
The guide is built for versatility. It suits everyone from the patio cook who fires up a propane grill twice a week to the RV owner who cooks over a campfire. Each method is broken down with tips that apply to common gear brands and sizes. You'll find practical notes on fuel efficiency, like how to get the most from a charcoal chimney or how to maintain steady temps in a pellet hopper during long smokes. There's even advice on cooking in windy conditions and managing flare-ups on gas grills.
Since this is a digital Kindle edition, portability is a huge plus. You can keep it on your phone or tablet right next to your grill or inside your camping kit. The searchable format makes it easy to find a specific technique without flipping pages. While the lack of a physical copy might be a drawback for those who prefer a grease-proof book on the picnic table, the digital version is lightweight and always accessible.
Limitations? It's technique-centric, so if you're looking for hundreds of step-by-step recipes, this might not satisfy that craving. The focus is on method and skill building. Also, using a device near a hot grill or fire pit requires care. But for the outdoor cook who wants to level up their game, this guide is a valuable investment. It's like having a patient instructor next to you, explaining why your chicken always dries out or how to get that perfect crust on a brisket.
Overall, The Outdoor Cook earns a strong recommendation for anyone serious about outdoor cooking. From campfire coffee to smoked ribs, from flat-top breakfasts to tailgate sliders, this book gives you the knowledge to cook confidently in any outdoor setting. Pair it with your favorite grill or fire pit, and you'll see real improvement in your results.


Pros
- Innovative trapdoor trigger drops lit fuel accurately into charcoal grates or fire baskets
- Effective ventilation pulls draft quickly for rapid, even coal lighting
- Sturdy heat shield provides safe barrier against high radiant heat
- Eliminates the need for foul-smelling lighter fluids that spoil food flavor
Cons
- Trapdoor release mechanism requires occasional ash brush-out to maintain smooth operation
- Rigid cylinder body takes up more trunk space than collapsible fabric or folding starters
- Bare steel cylinder naturally discolors after regular exposure to high flames
Lighting charcoal without lighter fluid petroleum odors is essential for authentic barbecue, and the Char-Griller Charcoal Grill Chimney Starter with Quick Release Trigger makes coal ignition both faster and substantially safer. Designed as a dedicated charcoal firing canister, this 12-inch accessory is built for backyard grillers, weekend BBQ enthusiasts, tailgaters, and campsite pitmasters who want ready-to-cook coals without hassle. Rather than lifting and inverting a top-heavy cylinder of flaming embers, this model uses a bottom trapdoor trigger that drops the fuel right where you want it.
In real-world barbecue setups, dependable fuel management sets the tone for your cook. This chimney utilizes natural vertical convection to draw oxygen upward from a single fire starter cube or crumpled paper base. Within fifteen to twenty minutes, an entire load of briquettes or lump charcoal glows with an even grey ash layer. Fast startup times mean you reach searing temperatures quickly for thick steaks and smash burgers, or establish a clean-burning coal bed for smoking ribs and brisket without chemical contamination.
Build quality focuses heavily on operator safety and heat management. The steel body measures 12 inches tall by 7.75 inches wide, holding sufficient fuel to power a two-zone kettle arrangement or prime an offset smoker firebox. A heavy-duty heat shield is placed between the metal barrel and the molded ABS handle, preventing skin exposure to blistering radiant temperatures. The trigger mechanism functions securely, ensuring the bottom grate stays shut while carrying coals and drops open cleanly upon trigger squeeze.
Handling and cleanup remain straightforward. Operation takes zero assembly: place a paraffin cube or wood wool on your grill grate, fill the chimney with charcoal, light the base, and let physics do the rest. Once lit, position the cylinder over your fuel grate and pull the handle trigger. Cleaning only requires tapping out leftover ash and keeping the hinge free of debris. While its fixed cylindrical shape does not fold flat for ultra-compact packing, the 2.9-pound weight transports effortlessly inside an outdoor gear bin or grill cart shelf.
A practical limitation involves the moving release door, which needs a quick visual check before loading unlit coals to ensure the latch is fully caught. For patio pitmasters, offset smoker fans, and tailgaters seeking a cleaner and far less clumsy way to dump red-hot coals, this Char-Griller quick-release chimney is an affordable, practical upgrade for your outdoor cooking routine.
Efficient charcoal management begins with an even, thorough burn. The Char-Griller chimney relies on continuous bottom-to-top airflow that accelerates combustion across every piece of fuel. Whether you prefer dense hardwood lump charcoal for high-heat searing or uniform briquettes for consistent kettle cooking, the chimney ensures uniform ember development across the entire load.
Lighting fuel without petroleum accelerants preserves pure wood smoke flavor on poultry, pork, and beef. Because the unit drops fuel straight down through the bottom door, you can easily target charcoal baskets, vortex funnels, or split fire zones without scattering hot ashes across your clean grilling grates.
Traditional charcoal chimneys require twisting your wrists and inverting an open canister of thousand-degree coals, which frequently produces floating sparks and erratic spills. The integrated trigger release on this model keeps the canister oriented upright at all times, drastically reducing flare-up hazards and accidental coal scatter.
A thick metal heat shield blocks direct thermal radiation from reaching your fingers, while the ergonomic ABS handle provides a confident grip even while wearing heavy leather barbecue gloves. This stable design makes pouring fuel into deep smokers, ceramic cookers, or small portable tailgating grills far safer and more predictable.


Pros
- Classic Weber kettle design delivers great charcoal flavor in a portable package
- Solid build with porcelain-enameled steel resists rust and weather
- 22-inch grate offers enough space for 13 burgers using a Weber press
- Two dampers allow excellent temperature control for searing or smoking
Cons
- No built-in thermometer means you'll need an external one for accurate temps
- Relatively heavy at 28.5 lbs, not ideal for long hikes
- A bit small for cooking for large parties of more than 6-8 people
The Weber Jumbo Joe Premium Charcoal Grill is essentially a portable version of the legendary Weber kettle, and that alone makes it a compelling option for outdoor cooks who value real charcoal flavor on the go. With a 22-inch diameter cooking grate, it bridges the gap between a full-sized backyard grill and a small portable unit, making it perfect for tailgating, camping, patio dinners, or weekend BBQs. If you've ever wished you could take that classic kettle experience with you, this is the grill you've been waiting for.
Who is the Jumbo Joe built for? Honestly, it suits a wide range of outdoor enthusiasts. Backyard grillers will appreciate the familiar Weber cooking performance, while campers and RV owners will love the portability and durable build. Tailgaters can fire it up in the parking lot and serve up burgers and brats for a crowd, and patio cooks can keep it handy for quick weeknight dinners without needing a massive grill setup. The 22-inch grate holds up to 13 burger patties (using a Weber press) or a small brisket, so it's practical for small gatherings and family meals.
In terms of real-world cooking performance, the Jumbo Joe delivers the same heat consistency and smoke flavor you'd expect from a larger Weber kettle. The porcelain-enameled lid and bowl retain heat exceptionally well, which means you can sear steaks hot and fast or close the dampers down for low-and-slow smoking. The rust-resistant aluminum dampers allow precise airflow control, so managing temperatures for different cooking styles is straightforward. Expect good charcoal efficiency too - with proper damper management, a single load of charcoal will handle most cooking sessions without needing to add more fuel. Flare-ups are generally manageable with the adjustable dampers, though as with any charcoal grill, keep a close eye on fatty meats.
Build quality here is typical Weber: sturdy, weather-resistant, and built to last. The porcelain-enameled steel lid and bowl resist rust and peeling, so the grill can sit outside in the elements without falling apart quickly. The plated steel cooking grate is durable and easy to clean, and the aluminum ash catcher makes ash disposal tidy and efficient. The lid hook is a nice touch - slide the lid onto it instead of laying it on the ground, which keeps dirt and debris away. The heat shield on the lid handle is practical for adjusting or checking food without burning yourself. Portability is aided by all-weather wheels, but note that at nearly 29 pounds, it's not a lightweight backpacking grill. It rolls easily on level ground, so moving it around the patio or rolling it to the car is manageable.
Setting up the Jumbo Joe is straightforward - it comes mostly assembled, with just a few parts to attach. Transport is aided by the two wheels and a sturdy handle, but you'll need some space in your vehicle for the 24 x 38 x 10 inch box. Cleanup is largely thanks to the removable ash catcher and the smooth porcelain surfaces that wipe down easily. Storage isn't too demanding either; it can be left on the patio or stored in a garage or shed without taking up a huge footprint. Realistically, the main limitation is the lack of a built-in thermometer, so you'll want to invest in a quality external thermometer to monitor cooking temperatures, especially for smoking. Also, while it's portable, it's not ideal for backpackers or long hikes due to the weight. For car camping, tailgating, or patio use, though, it's perfect.
Overall, the Weber Jumbo Joe Premium Charcoal Grill offers a fantastic balance of cooking performance and portability. It's a versatile tool that can handle everything from quick burgers to a slow-smoked pork shoulder, and its build quality means it will serve you for many seasons. If you love the flavor of charcoal and want a grill that can travel with you, this is a smart investment. It's not the cheapest option out there, but for the combination of Weber reputation, heat retention, and durable construction, it's well worth the price. Whether you're tailgating at the game, camping at the lake, or just cooking on the patio, the Jumbo Joe delivers real BBQ results.
The Jumbo Joe excels at high-heat searing - the porcelain-enameled bowl and lid hold heat well, and with the dampers fully open, you can get the coals roaring hot for a perfect crust on steaks and burgers. For low-and-slow cooking, close the dampers down to about a quarter open; the grill will maintain a steady 250-300F range suitable for ribs, chicken, or a small brisket. Smoke flavor is excellent because you're using real charcoal, and you can add wood chunks for extra aroma. The 22-inch grate gives you a two-zone cooking setup - pile coals on one side for direct heat and leave the other side cooler for indirect cooking. This flexibility lets you sear then finish, or cook larger items like a whole chicken without direct flame. Fuel efficiency is good; with a full chimney of charcoal, you can cook for 2-3 hours at low temps before needing to add more briquettes.
Essential Steps and Techniques for Charcoal Grilling
Cooking over live coals requires managing fire through airflow rather than relying on automated burner valves. The fundamental principle behind charcoal cooking is establishing distinct heat zones across the cooking grate so you can control both searing and gentle roasting. Before lighting a single briquette, you must ensure your grill sits outdoors on a level, non-combustible surface well away from structures. Understanding how oxygen feeds the fire gives you complete command over grate temperatures and prevents burned food.
Choosing Fuel: Lump Charcoal Versus Charcoal Briquettes
Selecting the appropriate charcoal fuel significantly influences burning temperature, burn duration, and the amount of residual ash left behind. Hardwood lump charcoal consists of natural charred wood pieces that light rapidly, burn at intense temperatures, and produce relatively little ash. Because lump pieces vary widely in shape and size, they can create uneven heat pockets if not arranged carefully across the fuel grate. Many outdoor cooks favor lump charcoal for quick, high-heat searing sessions on steaks, chops, or thin cuts of meat.
Charcoal briquettes provide a uniform alternative made from compressed charred wood scraps combined with natural mineral binders. Briquettes ignite more slowly than lump charcoal, but they burn with predictable consistency and sustain an even temperature for longer cooking periods. This consistent burn makes briquettes the practical choice for roasting larger roasts, poultry, or dense root vegetables over indirect heat. The trade-off is that briquettes generate more ash volume, which requires adequate airflow clearance beneath the charcoal grate during extended cooking sessions.
Safe Lighting Methods: Chimney Starters Over Lighter Fluid
Petroleum-based lighter fluids should be avoided because they produce unpleasant chemical fumes that can taint the flavor of your ingredients. A dedicated metal charcoal chimney starter offers a cleaner, faster, and far more reliable way to ignite coals without liquid accelerants. Chimney canisters rely on natural convective airflow, drawing fresh oxygen through bottom vents while channeling heat upward through the column of fuel. Using paper or paraffin fire-starter cubes at the base of the chimney ignites the lower coals, which then ignite the fuel above them.
Models such as the Char-Griller® Charcoal Grill Chimney Starter incorporate an integrated bottom-release trigger, allowing cooks to deposit glowing coals into the grill basin without tilting the hot container. Alternatively, standard galvanized steel cylinders like the Charcoal Chimney Starter BBQ Grill Lighter utilize generous side perforations and a protective heat shield to facilitate rapid venting. Coals are fully ready when the top layer turns light gray with white ash, which typically takes ten to fifteen minutes. Pouring coals before they ash over results in lower temperatures and acrid smoke that negatively affects the final flavor of your food.
Mastering Airflow: How Intake and Exhaust Dampers Control Heat
Temperature control on a charcoal grill depends almost entirely on the volume of oxygen entering and exiting the cooker. Bottom intake dampers draw cool, fresh air into the bowl directly beneath the burning coals to sustain combustion. The top exhaust damper on the grill lid pulls hot combustion gases up past the cooking grate, creating a natural vacuum draft. Opening both dampers fully provides maximum oxygen, driving coals to their hottest operating temperatures for intense searing.
Restricting the airflow slows the burn rate and lowers the ambient temperature inside the cooking chamber. If your grill runs too hot, closing the bottom intake damper by half reduces the oxygen supply and gently cools the coals over several minutes. You should rarely close the top exhaust damper completely during active cooking because trapping stale smoke produces a bitter, creosote-like flavor on food. Making small, gradual damper adjustments allows temperatures to stabilize before you decide to add or remove additional fuel.
Establishing Direct and Indirect Two-Zone Cooking
Pouring lit charcoal evenly across the entire bottom grate is one of the most common mistakes new grillers make. Spreading coals across the whole basin creates a single high-heat zone, leaving you with nowhere to move food if flare-ups occur or meat chars too quickly. A two-zone configuration solves this issue by concentrating all burning coals onto one half of the lower grate while leaving the opposite half completely empty. This setup creates a direct radiant zone for fast searing alongside an indirect convection zone for gentle, oven-like roasting.
Direct heat excels at producing crisp crusts on burgers, sausages, and quick-cooking skewers within minutes. Indirect heat allows thicker items, such as bone-in chicken thighs or whole roasts, to cook through without scorching their outer seasoning. When preparing delicate items or rich marinades, such as a traditional marinated Korean beef barbecue, moving meat between direct searing and indirect resting keeps sugars from burning. Cooking with the grill lid closed turns the indirect zone into a steady convection chamber where hot air circulates evenly around the food.
Managing Flare-Ups and Internal Temperatures Safely
Fat dripping directly onto red-hot coals can ignite sudden flame flare-ups that scorch meat. When flare-ups happen, avoid spraying the coals with water because this creates dangerous steam and scatters powdery ash. The safest response is to slide the food immediately over to the indirect side of the grill grate using long-handled tongs. Closing the lid for sixty seconds restricts oxygen access and quickly smothers active flames without extinguishing your fuel bed.
Judging meat doneness solely by exterior color or cooking time often leads to undercooked centers or unpleasantly dry proteins. A reliable digital instant-read thermometer provides the only accurate way to verify that meat has reached safe internal temperatures. Follow authoritative food safety guidelines: ground beef must reach 160 degrees Fahrenheit, poultry needs 165 degrees Fahrenheit, and pork or beef steaks should reach at least 145 degrees Fahrenheit with a three-minute rest. Keep the probe centered in the thickest part of the meat without contacting bones or the metal grate surface.
Step-by-Step Cooking Walkthrough: From Preheating to the Final Rest
Begin by clearing accumulated ash from the bottom of the grill bowl to ensure unrestricted intake airflow. Next, ignite your charcoal in a chimney starter and allow the fuel to ash over completely before pouring it into your chosen two-zone layout. Place the cooking grate on the cooker, replace the lid, and let the entire grill preheat for ten minutes. Preheating sterilizes the cooking surface and ensures grates become hot enough to prevent delicate proteins from sticking.
Scrub the hot grate using a bristle-free grill scraper or grill brush to remove lingering debris from prior meals. Lightly oil the grate using a folded paper towel dipped in high-smoke-point oil held securely with grilling tongs. Lay your seasoned food onto the grate, leaving at least an inch of space between cuts to permit uniform air circulation. Cook with the lid on as much as possible, lifting the dome only to rotate, flip, or reposition meat across your heat zones.
Monitor the color and texture of your food, transferring items to the cooler side whenever exterior browning outpaces internal progress. For larger cuts or multi-rack roasts, using an accessory like a dedicated rib rack for smokers and grills maximizes grate efficiency while keeping meat elevated. Remove meat from the grill when your digital food thermometer reads within five degrees of target doneness to account for carryover cooking. Let the meat rest on a warm cutting board for several minutes so natural juices redistribute through the muscle fibers.
Equipment Features to Look For: Compact, Kettle, and Tabletop Grills
Cookers come in diverse shapes and sizes, and choosing the right setup depends on your available patio space and intended cooking style. Classic kettle units, such as the Weber Jumbo Joe Premium Charcoal Grill, 22‑Inch, feature a porcelain-enameled bowl, rust-resistant aluminum dampers, and a wide twenty-two-inch diameter grate capable of feeding larger gatherings. The porcelain coating withstands intense thermal cycles, resists rust, and retains heat effectively during extended roasts. Built-in lid hooks and heat-shielded handles also provide crucial convenience when managing hot equipment in tight backyard quarters.
Mobile cooks who frequent campgrounds or tailgate events may prefer compact designs that pack easily into vehicle trunks. The GasOne 14-inch Portable Charcoal Barbecue Grill offers a 150-square-inch cooking surface equipped with a three-point locking lid, integrated thermometer, and removable lower ash catcher for contained cleanup. Similarly, the Portable Charcoal Grill, Portable Tabletop BBQ folds down into a compact profile, allowing outdoor enthusiasts to prepare burgers and vegetables over live coals without cumbersome assembly. For quick single-use situations, items like the Oppenheimer USA Disposable Charcoal Grill provide an all-in-one package containing pre-measured charcoal, eliminating the need to haul heavy equipment.
Expanding your culinary knowledge often involves consulting trusted outdoor cooking literature alongside reliable hardware. Reference manuals like How to Grill Everything: Simple Recipes for Great detail accessible techniques for handling variable flame heat. Detailed guides such as The Outdoor Cook: How to Cook Anything Outside examine coal management across multiple outdoor cooking formats. Combining instructional resources with sturdy equipment helps novice grillers build repeatable cooking habits.
Cleaning, Ash Management, and Safe Shutdown Practices
Shutting down a charcoal grill safely requires suffocating the fire by closing all intake and exhaust dampers completely. Cutting off the oxygen supply extinguishes burning coals over thirty to sixty minutes without requiring water quenching. Never dump water directly into a hot ceramic, enameled, or steel grill body because rapid thermal shock can crack enamel finishes and warp metal grates. Once the fire is extinguished, allow the entire grill to cool completely before attempting any ash disposal.
Disposing of ash is a critical fire-prevention task that must be handled with appropriate containers and patience. Charcoal embers can stay hot and retain rekindling potential inside a dense pile of ash for more than twenty-four hours after cooking. Always shovel cooled ashes into a dedicated metal bucket equipped with a tight-fitting metal lid rather than placing them in plastic trash cans or paper bags. Store the sealed metal container outdoors on concrete or dirt surfaces away from combustible walls, wooden decks, and dry vegetation.
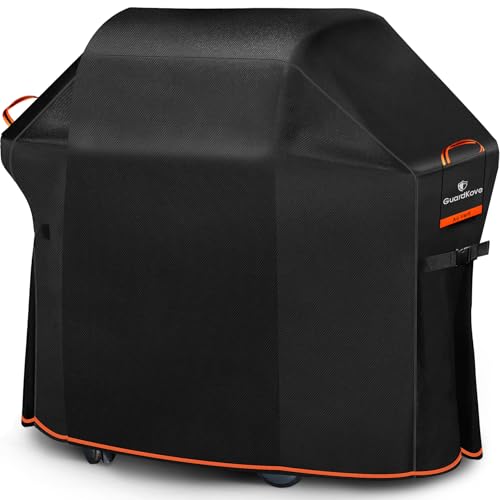
Routine maintenance keeps your grill grates performing smoothly and prevents stubborn grease buildup from creating unwanted smoke. Brush the grates while they remain slightly warm, which softens baked-on food residues and makes manual removal effortless. Periodically scrape the lower bowl interior with a plastic putty knife to prevent accumulated fat and carbon flakes from clogging the bottom ventilation holes. Storing your cooker beneath a weather-resistant vinyl cover shields the metal from rain, snow, and ambient humidity between outdoor sessions.
Outdoor Safety Rules: Clearances and Carbon Monoxide Prevention
Operating charcoal grills safely requires strict adherence to outdoor ventilation and structural clearance guidelines. Charcoal combustion produces high concentrations of carbon monoxide, a colorless, odorless, and potentially lethal gas that accumulates rapidly in enclosed spaces. You must never operate a charcoal grill inside a garage, porch, breezeway, camper, tent, or home, even if the overhead garage door or exterior windows remain open. Keeping the door open does not provide adequate airflow to prevent toxic gas buildup or protect against rapid fire spread.
Position your grill outdoors on a sturdy, stable, non-flammable surface such as concrete, flagstone, or brick pavers. Maintain a clearance perimeter of at least ten feet from house walls, wooden railings, low-hanging eaves, tree branches, and vinyl siding. Keep a multi-purpose dry chemical fire extinguisher or a bucket of clean sand accessible nearby whenever you ignite coals outdoors. Supervising the lit grill continuously ensures children and pets stay clear of scorching exterior bowl surfaces and flying windblown embers.
Practical Techniques for Long-Term Grilling Success
Consistent charcoal grilling success comes down to careful planning, patience, and mastering heat management through damper adjustments. Lighting your fuel with a chimney starter ensures clean-burning heat that highlights the natural flavors of your food rather than petroleum fumes. Arranging your coals into a distinct two-zone setup gives you the safety net required to handle sudden flare-ups and roast thicker cuts to perfection. With proper safety precautions, a reliable food thermometer, and routine equipment upkeep, you can approach every outdoor meal with complete confidence.


Write Your Review
No reviews yet. Be the first to share your experience!