


Opening the hood of an outdoor barbecue after months of neglect often reveals a stubborn buildup of old carbon, hardened grease, and surface oxidation. If you are preparing for your first cookout of the season, understanding how to clean a grill that’s been sitting is essential for both flavor and basic food safety. Leaving leftover char and residues inside the firebox not only invites mold and insects, but it also increases the risk of dangerous grease flare-ups once the burners ignite. Having a dedicated rolling prep table nearby gives you an ideal staging area to organize scrapers, brushes, and cleaning solutions before tackling the mess. A systematic approach ensures that you sanitize the cooking surfaces without damaging delicate burner tubes or porcelain enamel coatings.
Most outdoor cookers suffer primarily from stagnant moisture and neglected grease traps when left idle on the patio. Rather than blasting the cookbox with harsh industrial solvents or relying exclusively on a wire brush, modern maintenance favors safe degreasers and non-wire abrasive pads. Citrus-based cleaners and heavy-duty nylon tools allow you to break down congealed fats on a completely cool grill. This cold-cleaning method avoids the inhalation risks of smoking chemical fumes and protects your family from stray wire bristles in their food. With a few focused steps, you can restore your grates and firebox to safe, reliable working condition.

Pros
- Safe cleaning without wire bristles, protecting your family from accidental ingestion.
- Powerful citrus-based cleaner easily cuts through baked-on grease and carbon buildup.
- Kit includes everything you need: spray, brush, scrubber pads, scraper, and towel, no extra purchases required.
- Works on both hot and cool grills, offering flexibility for different cleaning routines.
Cons
- For extremely charred grates, some elbow grease may still be needed; the cleaner alone won't dissolve heavy creosote instantly.
- Scrubber pads are refillable but replacements are sold separately, adding ongoing cost over time.
- The cookbox scraper is best used on cool surfaces; it may scratch delicate porcelain coatings if used aggressively.
The Citrusafe Complete Grill Cleaning Kit is not your average grill cleaner. It is a thoughtfully assembled set designed to replace the dangerous wire brushes and harsh chemical sprays that many BBQ enthusiasts rely on. Instead, this kit uses a citrus-based degreaser, a nylon brush, heavy-duty scrubber pads, a cookbox scraper, and a microfiber towel to clean your grill safely and effectively. Whether you own a charcoal kettle, a propane gas grill, a smoker, or even a flat top griddle, this kit has the tools to handle the mess.
This kit is built for anyone who takes outdoor cooking seriously. Backyard grillers who fire up the Weber every weekend, campers who throw a grate over an open fire, tailgaters who need a quick cleanup between games, and RV owners who don't want wire bristles scratching their portable grills will all appreciate the safety-first approach. The stars are the Citrusafe Grill Cleaner spray, which uses natural degreasing power from citrus peels to break down grease, and the nylon brush and scrubber pads that work on a cool grill. No more burning off residue or worrying about stray bristles in your burger.
In real-world use, this cleaner shines on moderately soiled grates and cookboxes. Spray it on, let it sit for a few minutes, then scrub with the nylon brush or the heavy-duty pads. The grime dissolves quickly, and the included cookbox scraper reaches into corners that brushes miss. For a neglected grill that has months of caked-on grease, you may need to repeat the process, but the result is a cookbox that looks nearly new. The microfiber towel lifts away remaining residue without scratching porcelain or stainless steel surfaces.
Build quality of the tools is solid. The nylon brush handle is heavy-duty plastic with a comfortable grip, and the scrubber holder accepts the replaceable pads firmly. The scraper has a slim profile that fits into the tight gaps of most grills and smokers. The spray bottle has a trigger that produces a fine mist, covering grates evenly without waste. Everything in the kit is designed to be reused, cutting down on disposable grill wipes and paper towels.
Setup is simple: unpack the items and start cleaning. The spray works right out of the box, and all tools are ready to go. Transport is not an issue since it is a cleaning kit, but the spray bottle and tools fit easily in a garage cabinet or a camping tote. Storage is straightforward: keep the spray away from direct sunlight, and hang the brush and scraper to dry.
Limitations are minor. For grills with extremely heavy carbon buildup (think years of neglect), you may still need to use a metallic scraper or a second application. The scrubber pads are effective but wear out after several uses, and replacement packs are sold separately. Additionally, the nylon brush is not as stiff as wire, so it may take a bit more scrubbing on stubborn spots. Nonetheless, for routine maintenance and even deep-cleaning, this kit is a safe and effective choice. It earns a strong recommendation for any outdoor cook who wants to eliminate the risk of wire bristles and keep their cooking gear in top shape.
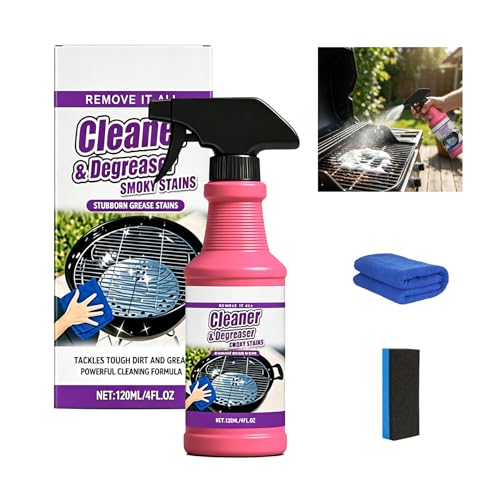
The Citrusafe Complete Grill Cleaning Kit comes with five essential items to tackle every part of your grill or smoker. You get a 16oz bottle of Citrusafe Exterior Grill Cleaner (also safe for interior use), a heavy-duty nylon brush with an integrated cookbox scraper, a scrubber handle plus three replaceable scrubber pads, a separate cookbox scraper for tight areas, and a premium microfiber cleaning towel (color may vary). Together, they cover cleaning from grates to hoods to side tables. Everything is manufactured in the USA by Bryson Brothers, a brand focused on safer outdoor cooking products.
For best results, clean your grill when it is cool to the touch. Spray the Citrusafe cleaner liberally onto grates and cookbox surfaces, let it sit for 3-5 minutes to loosen grease, then scrub with the nylon brush or scrubber pads. Use the cookbox scraper for baked-on residue in corners. Wipe away residue with the microfiber towel, then rinse with water if desired. For routine maintenance after each cook, a quick spray and wipe keeps grates looking new. The scrubber pads can be replaced when they become worn; replacement pads are available separately. The spray lasts through many cleanings, making this kit a great value for frequent grillers.
Restoring an Idle Grill: Complete Deep-Cleaning and Inspection Guide
Bringing a neglected grill back to life requires more than just firing up the burners and scraping the grates. When a cooker sits unattended through wet winter or humid summer months, grease decomposes, carbon flaking develops on the lid, and moisture triggers oxidation. Addressing this accumulated residue before lighting the burners prevents dangerous grease fires, eliminates unpleasant odors, and keeps contaminants out of your food. Following an orderly cleaning process restores sanitary cooking conditions while protecting the mechanical integrity of your cooker.
Initial Safety Inspection and Fuel Line Verification
Before applying any cleaners or removing internal hardware, conduct a thorough visual assessment of the entire structure. Sitting outdoors exposes grill components to rodent nesting, insect intrusion, and weather-related corrosion. Check the cabinet interior, lower shelf, and grease tray for evidence of pests, which frequently chew through electrical wiring on electronic igniters. Structural rust on the frame, cart legs, or firebox mounting brackets also demands attention, as compromised metal can make the unit unstable during operation.
Fuel delivery systems require strict verification after any extended period of disuse. Inspect rubber propane hoses for dry rot, surface cracks, or signs of rodent damage. To confirm fuel system integrity, prepare a solution of equal parts liquid dish soap and water, then coat the regulator connection, hose, and burner valves with the tank valve open. If expanding bubbles appear, an active gas leak exists, requiring immediate replacement before introducing any heat source.
Outdoor fuel-burning cookers must operate exclusively in open outdoor environments with ample natural ventilation. You must never operate, test, or store a gas or charcoal grill inside a residential garage, carport, enclosed porch, or utility shed, even if the vehicle doors remain open. Combustible exhaust gases produce dangerous carbon monoxide, while fuel leaks inside enclosed spaces create severe fire hazards. Position your cooker at least ten feet away from vinyl siding, wooden railings, and overhanging branches before testing.
Why Cleaning a Cold Grill Is Safer and More Effective
A widespread backyard myth suggests that running burners on maximum heat for an hour will incinerate all old grease and leave grates sterile. While extreme thermal energy carbonizes some surface drippings, it also bakes animal fats into stubborn enamel and releases acrid smoke fumes. High heat does not remove accumulated debris inside the cookbox. Instead, it frequently ignites built-up drippings in the catch pan, creating uncontrolled grease fires that ruin delicate internal burner components.
Cold cleaning provides a much safer, more thorough alternative for equipment that has been dormant. Using citrus-based degreasers formulated with natural citrus peel extracts allows active solvents to break down solidified lipids chemically without applying heat. Specialty maintenance products like the Citrusafe Complete Grill Cleaning Kit from BrysonBrothers are designed around this cold-cleaning philosophy, pairing natural d-limonene degreasing sprays with specialized non-wire scrubbers. This approach eliminates the risk of accidental thermal burns and stops harmful chemical fumes from wafting across your patio.
Eliminating wire bristle brushes is another major health consideration during seasonal refurbishments. Traditional wire grill brushes frequently shed thin steel needles that lodge between grate bars and stick to food, creating severe internal health hazards if swallowed. Modern cleaning kits substitute recyclable abrasive pads and durable nylon bristle brushes that scrub aggressively without shedding hazardous metallic fragments. Because nylon bristles melt under high heat, cleaning on a completely cool grill surface ensures that your scrubbing tools retain their structural integrity.
Disassembling Internal Grates and Heat Diffusers
Comprehensive decontamination requires clearing out all modular internal parts so you can reach the bare metal firebox below. Begin by lifting out secondary warming racks and primary cooking grids, setting them aside on a flat surface. Next, extract the heat tents, also known as flavorizer bars or burner shields, which sit directly over the burner tubes. In charcoal cookers, lift out the cooking grate followed by the charcoal grate, clearing out all spent ash.
Organizing these parts on a spacious patio workspace or adjacent built-in outdoor barbecue island keeps your patio stones clean and speeds up scrubbing tasks. Inspect each heat tent carefully for structural holes or severe rust flaking. While surface discoloration on heat shields is normal from continuous flame exposure, large holes or brittle edges cause uneven heat distribution and let meat juices foul the burners. Replace any severely degraded heat diffusers to protect your burner tubes.
Scraping the Cookbox and Removing Carbonized Buildup
Opening the hood of an older barbecue often reveals what looks like peeling black paint hanging from the interior lid. Barbecue lids are almost never finished with interior paint; that peeling material is actually a delaminated crust of carbonized grease and vaporized fat that condensed during past grilling sessions. If left unaddressed, these brittle carbon flakes will loosen during heating and drop onto your fresh food. A sturdy plastic cookbox scraper lifts this layered deposit away without scratching protective powder coats or aluminum castings.
Once the lid is cleared of loose flakes, direct your attention to the interior walls and sloped floor of the lower firebox. Push accumulated ash, charred fat deposits, and insect debris down toward the central drain aperture using short, firm scraping strokes. Avoid using steel putty knives or sharp screwdrivers, which gouge soft cast-aluminum housings and create crevices where rust takes hold. After removing the thickest solids, coat the inner walls thoroughly with citrus degreaser spray before wiping.
Restoring Grates Based on Metal Type and Surface Rust
Different grate materials require distinct cleaning methods to restore their cooking surface without compromising durability. Stainless steel grates handle aggressive scrubbing remarkably well, making them relatively simple to revive after months in storage. Spray them generously with an outdoor degreaser and scrub the individual rods using an abrasive synthetic scrubbing pad or stiff nylon brush. Rinse the grates with clear water to wash away loosened grit, then dry them thoroughly with a clean microfiber towel.
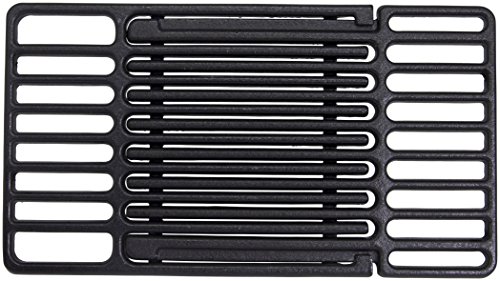
Cast iron cooking surfaces demand a more measured approach because exposed iron oxidizes rapidly when moisture penetrates its oily seasoning layer. If your cast iron grates show bright orange surface rust, scrub the affected areas with a coarse abrasive pad and citrus cleaner until the bare metal shows through. Avoid soaking cast iron grates in standing water baths, as deep water submersion encourages flash rust to spread. Once clean, dry the grates thoroughly with paper towels and coat them with high-smoke-point cooking oil.
Porcelain-enameled grates feature a glass-like coating baked over a metal core, providing excellent rust resistance as long as the enamel remains intact. When handling porcelain coatings, never use steel wool, brass bristle brushes, or metal scrapers, which chip the glassy barrier and expose underlying steel to rapid rust decay. Use exclusively non-metallic scrubber pads, mild degreaser sprays, and warm soapy water to clean porcelain bars. If you notice large areas where the porcelain has chipped away, replace the grates.
Clearing Burner Ports and Venturi Tubes
Burner tube obstructions represent one of the most common operational issues in gas grills that have remained idle over the winter. Small insects, particularly spiders, are attracted to the smell of gas, frequently spinning dense nests inside the air-shutter openings of venturi tubes. These webs create severe air blockages that prevent fuel from flowing toward the burner ports. Instead, gas backs up and ignites behind the control panel, producing a dangerous flashback fire that can melt control knobs and burn fuel valves.
To inspect and clear these passages, remove the burner mounting hardware and gently detach the burner tubes from the control valve orifices. Feed a flexible venturi cleaning brush, a long pipe cleaner, or a straightened wire hanger through the full length of each tube, sweeping out all spider webs. Next, examine the small gas flame ports lining both sides of the burner tube. Use a small soft brush or an unbent paperclip to poke through each individual port, clearing out mineral deposits.
Decontaminating the Grease Pan and Catch Tray
The grease management system situated beneath the firebox represents the highest fire hazard on any barbecue that has sat neglected. Over time, fats, marinades, and meat juices settle into the wide drip tray and funnel toward the central catch cup, turning into a solid, rancid layer of grease. Pull the slide-out grease tray forward and use your plastic cookbox scraper to lift out the sludge into a lined trash container. Empty the small catch cup completely.
Thorough cleaning of grease channels is equally vital if you cook on outdoor equipment like combination griddle and smoker units, where heavy fat runoff collects rapidly in rear grease cups. Wash the collection tray with a concentrated degreasing spray, scrub the corners with a scouring pad, and wipe it dry before reinstalling it in the chassis. Line your grease catch cup with a fresh, disposable aluminum liner to catch future drippings cleanly.
Exterior Cabinet Care and Protective Finishing
Restoring the exterior body of your barbecue preserves aesthetic appeal and prevents atmospheric pollution from etching into painted or stainless surfaces. Outdoor grills accumulate pollen, tree sap, bird droppings, and rain spots that bake onto the lid when exposed to direct sunlight. Avoid using abrasive scrubbing powders, bleach solutions, or harsh scouring pads on outer panels, as these products leave fine swirl scratches. Instead, mist a streak-free exterior cleaner or mild citrus degreaser across the outer hood and shelves.
When wiping down stainless steel surfaces, always guide your cleaning cloth in the direction of the metal grain rather than making circular motions. A premium, lint-free microfiber towel lifts away greasy fingerprints and dirt without leaving streaks across polished panels. For painted steel cabinets or cast aluminum side caps, a soft microfiber cloth dampened with warm water and mild detergent cleans safely without damaging the finish. Applying a light coat of stainless steel polish protects the metal against moisture spotting.
Reassembly, Burn-In, and Pre-Cook Sanitization
With all individual assemblies thoroughly cleaned, dried, and inspected, reinstall the internal components in reverse order of removal. Seat the burner tubes securely onto their valve orifices, ensuring that the air shutter lines up perfectly without any gaps. Secure the burner retention hardware, place the heat diffusers squarely over the tubes, and set the clean cooking grids back onto their support ledges. Verify that the slide-out drip tray and grease cup are properly positioned beneath the firebox drain.
Before placing any food on your newly refurbished grates, perform a controlled high-heat burn-in to finalize the cleaning process. Open the grill lid, open your fuel supply valve, and ignite all burners according to the manufacturer lighting instructions. Close the hood and allow the cooker to run on medium-high heat for ten to fifteen minutes in a safe outdoor location. This thermal cycle evaporates any residual wash water, burns off lingering cleaner vapors, and cures freshly oiled cast iron grates.
Practical Maintenance Habits to Prevent Future Buildup
Establishing simple routine cleaning habits after each backyard barbecue keeps you from ever facing a difficult, time-consuming restoration job again. After finishing a cookout, give the grates a brief brush while they are still warm to remove sticky food particles before they solidify into hardened carbon. Once the unit cools down completely, wipe down the perimeter of the lid and check the grease pan to ensure fat drippings have not accumulated. Storing a quality non-wire nylon brush nearby makes quick maintenance effortless.
Investing in a heavy-duty, water-resistant grill cover protects internal metal parts from rain, snow, and ultraviolet degradation throughout long periods of inactivity. Ensure that your cooker has cooled down completely before sliding the cover over the hood to prevent trapped heat from creating condensation. If you store your grill in an unheated outdoor shed during the winter, remember that propane cylinders must always remain outdoors in a well-ventilated area. Taking proactive care of your equipment ensures that every cookout begins with a clean, dependable fire.






Write Your Review
No reviews yet. Be the first to share your experience!