


You head outside with a platter of food ready for dinner, turn the control knob, press the ignition button, and hear only hollow clicking or complete silence. A failed spark generator can stall your dinner plans, leaving you wondering how to get your burners firing without calling a technician. Home cooks facing this issue frequently ask: can i use a lighter to light a gas grill safely, or does manual ignition introduce unnecessary danger? The direct answer is yes, you can use a lighter to start a gas grill, provided you follow the proper sequence and use an ignition tool designed for outdoor cooking.
Every reputable grill manufacturer incorporates manual ignition pathways into their equipment, including the high-end units integrated into a custom backyard grill island setup. Grill builders understand that electronic spark generators, wires, and battery contacts will eventually wear out or fail over time. However, reaching into a gas-filled firebox with a standard pocket lighter or a tiny match creates serious burn hazards. Using a designated long-reach wand lighter and keeping the hood wide open ensures you ignite the fuel safely without risking a sudden flare-up.


Safe Manual Ignition for Gas Grills: Procedures, Risks, and Best Practices
Manual ignition serves as an essential fallback skill whenever an automated piezo or battery-powered push button refuses to spark. Liquid propane and natural gas require a precise mix of oxygen and a source of heat to produce a controlled cooking flame. While the internal spark module typically supplies this heat, an external flame from a reliable utility lighter works just as effectively. The key to preventing accidents lies in understanding gas density, maintaining proper ventilation, and executing each step in the correct chronological order.
The Unbreakable Rule: Always Open the Grill Lid First
Opening the grill lid before touching any gas valve is the single most critical safety precaution in outdoor cooking. When the hood remains closed, any propane or natural gas released from the burner tubes becomes trapped inside the firebox. Even a few seconds of unignited gas flow beneath a closed lid can fill the entire cooking chamber with combustible vapor. Introducing an open flame to an enclosed pocket of gas causes an explosive flash that can blow the hood open and cause severe burns.
Understanding the physical properties of your fuel highlights why proper airflow is mandatory. Liquid propane is heavier than air, meaning it sinks to the bottom of the grill body, settles below the burners, and pools in the grease tray. Natural gas is lighter than air and rises, but it still concentrates dangerously beneath a closed lid. Both fuels require active ventilation to ensure excess gas dissipates freely into the open air. If you ever realize gas was flowing with the hood down, shut off the valves immediately and wait before attempting ignition.
Step-by-Step Procedure for Lighting with a Wand Lighter
Preparing the grill properly sets the stage for a smooth, uneventful manual start. Start by opening the main hood all the way back until it rests securely against its hinges. Inspect the front panel to confirm all burner control knobs are turned to the off position. Open the main valve on your propane cylinder by turning the handwheel counterclockwise, allowing pressurized fuel to fill the line up to the manifold.
The most critical procedural step is to ignite your lighter before introducing fuel into the burner tubes. Hold a long utility lighter near the primary burner port, either through the dedicated matchlight hole on the casting or directly through the cooking grates. Activate the lighter mechanism so a steady flame burns right next to the burner ports. Never turn on the gas knob first while fumbling for a lighter, as every second of delay releases unburned fuel into the air.
With the lighter flame actively burning near the burner holes, push in and turn the primary burner knob to the high setting. The escaping gas will catch the open flame almost instantaneously, creating a soft whoosh as the blue flame travels along the metal tube. Release the lighter trigger once you see the flame establish itself across the burner, then withdraw the wand carefully. If you are searing sweet marinated ribs, creating distinct direct and indirect heat zones prevents delicate marinades from burning while ensuring thorough cooking.
Why Pocket Lighters and Standard Matches Create Burn Hazards
Reaching for a standard pocket cigarette lighter or a wooden kitchen match is one of the most common mistakes backyard cooks make. Pocket lighters require your fingers to stay within two or three inches of the spark wheel and fuel nozzle. Because gas burner ports sit beneath thick grates, a short lighter forces your entire hand deep into the firebox. This placement puts delicate skin directly inside the zone where fuel mixes with ambient air.
When gas ignites manually, it naturally expands outward in a brief micro-envelope before settling into a uniform flame along the burner tube. If your hand is hovering directly above that ignition point, that sudden expansion of heat can scorch arm hair, singe fingers, and cause painful blistering in a fraction of a second. Sudden heat also triggers an instinctive flinch that can cause cooks to drop burning tools into greasy trays. Dedicated multipurpose lighters with extended metal wands provide between nine and sixteen inches of clearance, keeping knuckles and sleeves well outside the ignition zone.
The Five-Minute Purge Rule for Failed Ignition Attempts
Even with careful technique, a burner may fail to catch within the first few seconds of turning the knob. If the fuel does not ignite within three to five seconds of turning the gas valve to high, you must stop immediately. Continuing to pump raw gas across an open lighter fills the firebox with an expanding cloud of fuel. That accumulating cloud turns what should be a minor startup into a significant flare-up risk.
The standard safety protocol across all grill manufacturers is the strict five-minute purge rule. Immediately turn the burner control knob back to the full off position and release the lighter trigger. Keep the grill hood wide open and step away from the equipment for at least five full minutes. This waiting period allows outdoor air currents to naturally dilute and blow away the accumulated propane or natural gas. Only after the full five minutes have elapsed should you resume the manual lighting sequence from the beginning.
Diagnosing and Fixing a Non-Functional Built-In Igniter
While using a utility lighter provides an effective workaround, repairing your built-in ignition system restores push-button convenience. The most frequent reason an electronic igniter stops functioning is simply a dead or corroded dry cell battery. Most push-button modules unscrew from the front panel to reveal a single AA or AAA battery compartment. Inspecting this chamber often reveals rusted contacts or expired batteries that need cleaning and replacement.
Grease, carbon buildup, and sugary marinades dripping onto the spark electrode also prevent the igniter from firing properly. The ceramic spark probe sits right next to the primary burner, placing it directly beneath falling food residue. If a layer of grease coats the metal tip, the electrical voltage cannot jump the gap to create an ignition spark. Gently scrubbing the metal tip and ceramic insulator with an old toothbrush dipped in rubbing alcohol frequently restores spark production.
Misalignment between the spark electrode and the burner tube is another mechanical issue that prevents reliable ignition. Heat expansion and regular grill cleaning can accidentally bend the thin metal probe away from the burner surface. The electrode tip should typically sit roughly one-eighth to three-sixteenths of an inch away from a gas port. If the gap becomes too wide, the electrical charge dissipates into the air instead of jumping to the grounded burner tube.
Lighting Subsequent Burners and Managing Crossover Channels
Modern multi-burner gas grills rarely require you to light every individual burner tube with an external flame. Most designs incorporate a crossover channel or carryover tube that spans horizontally across the burner assemblies. Once the primary burner is burning, gas entering an adjacent tube flows through the crossover channel and ignites automatically from the existing flame. You simply push and rotate the second knob to high, and the flame hops smoothly across the bridge.
Over time, however, crossover tubes can rust through or accumulate carbon crust and spider webs. When a crossover channel is blocked, opening an adjacent burner knob simply vents raw gas into the grill without igniting it from the neighbor flame. If the adjacent burner does not catch fire within three seconds, turn it off immediately and light it manually with your wand lighter. Many cooks also place stainless steel smoker boxes over active primary burners while leaving adjacent burners off, using indirect heat to gently infuse roasts with rich wood smoke.
Enclosed Space Warnings: Grills Must Never Be Used in Garages
Under no circumstances should you ever attempt to light or operate a fuel-burning gas grill inside a garage, carport, breezeway, or enclosed porch. Some homeowners mistakenly believe that opening a double-car garage door provides sufficient ventilation to operate a gas grill safely on a rainy day. This assumption is extremely dangerous and violates fire safety guidelines established by national fire protection agencies. Enclosed or semi-enclosed spaces trap dangerous fumes and present intense structural fire hazards.
Fuel combustion consumes oxygen and produces toxic carbon monoxide, a colorless, odorless gas that builds up rapidly in confined quarters. Carbon monoxide poisoning can cause dizziness, loss of consciousness, and fatal asphyxiation before anyone inside realizes an issue exists. Drafts entering an open garage door can paradoxically blow toxic exhaust deeper into adjoining living areas through interior doorways. Grills must always be positioned outdoors on a stable surface at least ten feet away from house walls, eaves, deck rails, and overhangs.
Practical Features to Look for in an Outdoor Grill Lighter
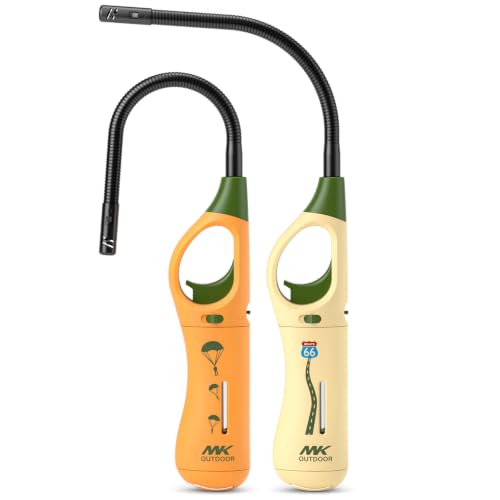
Having a reliable utility lighter stored near your outdoor cooking station makes unexpected igniter failures completely stress-free. When selecting an ignition tool, nozzle length is the most significant specification for backyard safety. Models featuring an extended wand, such as a nine-inch reach, keep your fingers well away from the heat while allowing you to probe deep through side match holes. Fully flexible wands provide additional agility, letting you angle the flame underneath heat diffusers and cast iron grates without awkward wrist angles.
Evaluating fuel delivery and reservoir construction helps ensure the lighter remains ready whenever you need to fire up dinner. Refillable utility lighters equipped with standard bottom butane valves eliminate the waste of tossing empty plastic bodies every few months. Look for models with visible fuel level windows so you never carry an empty lighter out to the patio. Flame adjustment switches are also valuable, letting you dial up a taller flame to resist gusty backyard breezes.
Routine Maintenance to Ensure Safe Ignition
Regular cleaning and maintenance of your grill components prevents both manual lighting struggles and electronic spark failures. At least once a season, disconnect the propane tank and remove the cooking grates and flavorizer bars to expose the burner tubes. Use a stiff brass wire brush to clean grease deposits off the burner ports, brushing across the holes rather than along them to avoid packing debris into the openings. Clear burner openings allow gas to flow evenly along the entire tube length for instant ignition.
Inspect the venturi tubes connecting the front valves to the main burner bodies for spider webs and insect cocoons. Small insects love nesting inside venturi tubes because they are drawn to the scent of the odorant added to fuel gas. A blocked venturi tube forces fuel backward toward the control knobs, causing a dangerous condition known as a flashback fire. Running a flexible venturi brush through these channels clears obstructions and ensures proper fuel-air blending.
Final Verification and Safe Operating Takeaway
Using a lighter to start your gas grill is a safe, standard procedure that every grill owner should master. Always treat manual ignition with respect by opening the hood wide, using an extended long-reach lighter, and striking the flame before cracking open the gas valve. If the burner fails to catch within five seconds, shut everything off and wait five full minutes for the vapor to disperse completely. Keeping a quality refillable utility lighter on hand ensures that an unexpected igniter failure will never derail your cooking plans.



Write Your Review
No reviews yet. Be the first to share your experience!