

Stepping out onto the patio to cook dinner should feel straightforward, but dealing with pressurized fuel can make anyone pause before striking a flame. Learning how to turn on a propane grill correctly protects your food, prevents equipment damage, and keeps your cooking area safe. Whether you use a full-size backyard cart or a compact tabletop burner, the lighting sequence demands deliberate valve checks and proper airflow. Setting up your cook on a dedicated rolling barbecue prep table gives you a clean, organized staging area before you ever crack open a gas valve. Once you understand the physical relationship between the tank regulator and the burner control knobs, lighting your grill becomes second nature.
Gas grills rely on balanced vapor pressure, so opening valves in the wrong order often trips a built-in safety mechanism that restricts heat output. Knowing how to verify a secure hose connection, open the grill lid, and initiate spark ignition prevents dangerous fuel pockets from accumulating under the hood. It also saves you from the frustration of weak yellow flames and low temperatures caused by a tripped regulator surge valve. Taking a few moments to inspect your fuel supply and master the standard ignition sequence ensures your burners catch smoothly every single time you cook.


Essential Steps and Safety Rules for Lighting a Propane Grill
Lighting an outdoor gas grill requires a consistent sequence that respects the high pressure stored inside your liquid propane tank. Rushing through the startup process or skipping essential inspections can lead to unburned gas buildup, stubborn ignition failures, or sudden regulator lockouts. By understanding how propane flows from the cylinder through the regulator into the burner manifold, you can ignite your grill smoothly and establish precise temperature control every time. Following proven outdoor safety standards ensures a reliable flame while protecting you and your equipment.
Inspecting Fuel Lines, Valves, and Tank Connections First
Before you introduce any spark, you must confirm that the entire fuel delivery pathway remains sealed and undamaged. Flexible rubber hoses can develop small surface cracks over time, while outdoor rodents may gnaw on exposed lines during winter storage. Examine the black Type 1 QCC nut on the regulator to ensure it threads cleanly onto the external threads of the cylinder valve. If you notice any warping, debris, or damage to the internal rubber O-ring inside the connection, replace the fitting before continuing.
A simple leak check using equal parts liquid dish soap and water offers immediate peace of mind for any outdoor cook. Spray or brush this soapy mixture over the tank valve stem, the regulator connection, and along the entire length of the hose assembly. Open the cylinder valve slightly while keeping all grill burner control knobs turned to the off position. If growing soap bubbles appear around any fitting, close the cylinder valve immediately and tighten the connection, replacing worn components like the GasSaf 5FT Propane Adapter Hose with Propane Grill if leaks persist.
The Critical Reason to Always Open the Grill Lid Before Striking a Flame
Never attempt to ignite a gas grill with the cookbox lid closed. Propane vapor weighs significantly more than ambient air, which causes it to sink and pool along the bottom of the firebox rather than dispersing into the sky. If you turn on the burner knobs while the lid remains shut, raw propane quickly fills the closed chamber within seconds. Introducing a spark into that trapped pocket creates a sudden, violent deflagration that can blow the heavy lid open and singe your hands or face.
Keeping the grill hood raised wide allows fresh air to circulate across the burner tubes during the ignition sequence. This open ventilation prevents dangerous vapor concentrations from gathering beneath the grates if the first spark fails to light the fuel immediately. If your initial ignition attempt does not produce a steady blue flame within a few seconds, leave the lid open and step back. Allowing the firebox to vent for at least five full minutes clears out any residual gas before you attempt to spark the burner a second time.
Step-by-Step Sequence for Opening the Propane Tank Valve
The sequence in which you open your valves dictates whether your grill reaches searing temperatures or gets stuck in a sluggish low-flame state. Start by verifying that every individual burner control knob on the grill control panel rests firmly in the off position. When the burner knobs remain sealed, the gas manifold maintains closed back-pressure that prevents sudden fuel rushes. Locate the handwheel on top of your propane cylinder, which operates standard right-handed threads.
Turn the tank handwheel counterclockwise slowly and steadily rather than cranking it open with sudden force. Modern propane tanks contain an internal safety valve designed to choke gas flow if it senses a sudden, unrestricted surge through the hose. Spinning the valve wide open too quickly can trigger this safety ball into its seat, tricking the regulator into thinking a major leak has occurred. Opening the handwheel gently gives the internal line pressure time to equalize smoothly between the tank and the grill regulator.
Firing Up Main Burners Using Built-In Push-Button and Rotary Igniters
Once the cylinder valve is fully open and the fuel line is pressurized, select the primary ignition burner on your grill. On most multi-burner grills, this is the burner closest to the ignition electrode, typically marked with an ignition symbol on the far left or center. Push the designated burner knob inward to release the safety lock and rotate it to the HIGH position. This action opens the internal gas orifice and releases a controlled stream of propane into the burner venturi tube.
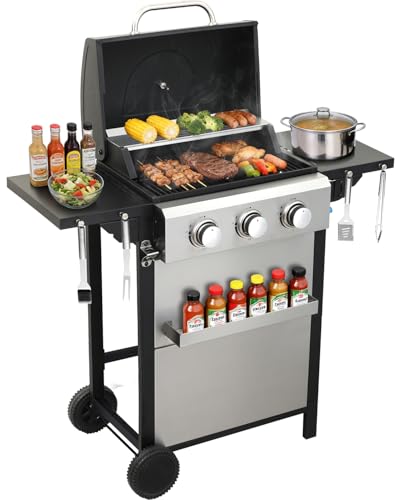
Immediately press your electronic ignition button or rotate the knob past the spark click, depending on your grill mechanism. You should hear a sharp snap followed by a soft whoosh as the fuel catches across the burner ports. Look directly through the cooking grates to confirm the flame has established a steady blue ring along the tube. Multi-burner units, such as the 4-Burner Gas Grill, Stainless Steel Outdoor from mouhtfao, feature independent switches that allow you to ignite the remaining three burners sequentially off the first flame without repeatedly pressing the starter.
How to Safely Light a Propane Grill with a Match or Long Lighter
Piezo igniters and battery-powered spark generators eventually wear out or gather grease, leaving you needing an alternative lighting method. Manual lighting is entirely safe when you follow the correct physical order of flame first, fuel second. Most quality gas grills feature a dedicated lighting hole punched into the side or bottom panel of the lower casting. If your model does not have a designated hole, you can insert a long fireplace match or extended butane lighter directly down between the grate bars.
Always strike your match or ignite your long lighter wand before turning on any gas knob. Position the active flame directly beside the burner ports of the primary ignition tube while keeping your head and arms away from the cookbox opening. Once the flame is steady beside the burner, push and turn that specific control knob to the HIGH position. The gas will ignite instantly upon contact with the open flame, eliminating any risky buildup of unignited vapor in the firebox.
Diagnosing Low Flames and Resetting a Tripped Excess Flow Valve
One of the most frequent complaints among gas grill owners is a grill that refuses to heat past two hundred degrees. This issue almost always stems from the excess flow safety device inside the QCC1 regulator rather than a defective burner. If you open the tank valve while a burner knob is slightly ajar, the regulator detects an apparent line rupture and restricts fuel output to roughly ten percent of normal volume. The resulting flame appears tiny, weak, and yellow, barely producing enough heat to warm the cooking grate.
Resetting this safety bypass takes only two minutes but requires following an exact reset protocol. Turn all grill control knobs to the off position, then close the propane tank handwheel completely by turning it clockwise until snug. Disconnect the regulator coupling nut from the cylinder to release residual pressure, wait thirty seconds, and rethread the nut securely by hand. Crack the cylinder handwheel open very slowly to let pressure equalize, then light your primary burner following the standard ignition procedure.
Adapting Portable Grills and Tabletop Units to Bulk Propane Tanks
Small portable camping grills and tabletop griddles typically run on disposable one-pound green propane cylinders. While convenient for tailgating, small cylinders freeze up during long cooking sessions and run out of fuel quickly. Many cooks choose to connect their compact appliances to standard twenty-pound tanks using specialized conversion hoses. Heavy-duty hoses with integrated dials, such as the DOZYANT 6 Feet Stainless Braided Hose Adapter, offer flexible routing and durable brass fittings designed to withstand outdoor weather.
When using an adapter hose on portable gear or griddle and smoker combo appliances, the same lighting rules apply with extra care for line length. Because a six-foot hose holds a larger volume of ambient air than a tiny one-pound bottle, gas takes several seconds longer to reach the burner assembly. Open the large tank slowly, allow the longer hose to pressurize fully for ten seconds, and only then turn the burner control dial to ignite. Checking built-in color-coded pressure dials helps you verify that fuel is flowing before you strike a spark.
Safe Propane Refilling Practices for Small Portable Cylinders
Refilling small one-pound cylinders from a bulk twenty-pound tank has become popular among campers seeking to reduce canister waste. Dedicated solid brass adapters, such as the Propane Refill Adapter for 1 Lb. Tanks from Igaper, feature ninety-degree elbows and integrated control valves. Other designs, like the 4-foot hose model from Detoypapa, feature overflow protection and night-vision pressure gauges to monitor transfer flow. Using these tools demands strict mechanical care, because liquid propane expands rapidly under temperature fluctuations.
Perform all refilling operations outdoors in open air, completely away from open flames, pilot lights, or potential electrical sparks. Invert your donor tank safely, attach the adapter securely, and vent residual air from the small canister before opening the transfer valve. Never fill small cylinders past their rated capacity, and use a digital kitchen scale to confirm you do not exceed the net weight limit. Thread secure protective caps onto your refilled cylinders immediately to protect the Schrader valves from dirt and accidental leakage.
Strict Operating Clearances and Why Garages Are Never Safe
Operating a propane grill inside a garage, breezeway, shed, or enclosed patio is exceptionally dangerous and should never be attempted. Even with the overhead garage door fully open, natural air currents cannot reliably disperse the toxic combustion gases produced by burning propane. Liquid propane combustion generates invisible, odorless carbon monoxide that quickly builds up to life-threatening concentrations in partially sheltered spaces. In addition, radiant heat from high-output burners and sudden grease flares can easily ignite dry drywall, overhead wooden rafters, or stored household chemicals.
Outdoor safety codes and grill manufacturers universally require that gas grills operate strictly in open-air environments. Position your cooking cart at least ten feet away from house walls, wooden deck railings, vinyl siding, and low-hanging tree branches. Keep the surrounding deck clear of flammable decorations, plastic patio furniture, and dry yard debris. Always ensure your grill rests on a level, non-combustible surface so hot grease drains properly into the collection cup rather than pooling near the burners.
Preheating, Flame Calibration, and Transitioning to Cooking
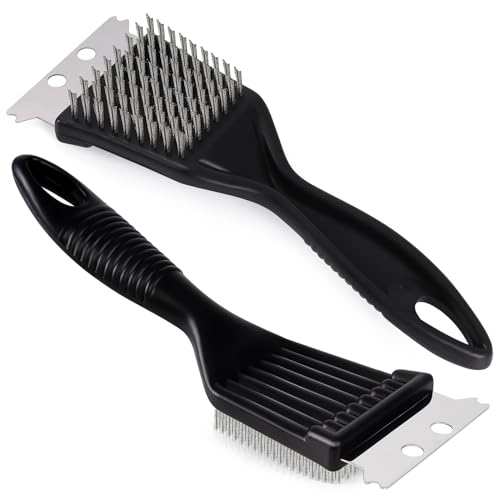
After confirming that all burners have ignited with clean, steady blue flames, close the grill lid to begin the preheating stage. Allow the cooking grates to heat on high for ten to fifteen minutes until the internal hood thermometer indicates your target cooking zone. This thorough preheating burns off grease residue from previous cooks, sterilizes the grate surface, and ensures optimal heat retention across the metal. Once the grates are hot, brush them clean with a brass or nylon grill brush before adjusting your knobs for cooking.
Calibrating your burner controls creates distinct temperature zones that allow you to balance high direct heat with gentle indirect roasting. For example, preparing an authentic barbecue wings recipe benefits from setting two outer burners on medium while leaving center burners completely off to prevent flare-ups. Always verify the doneness of your meats using a calibrated digital probe thermometer inserted into the thickest part of the food, following food safety temperature standards. Mastering proper lighting procedures gives you total command over your grill, ensuring safe outdoor cooking throughout the grilling season.





Write Your Review
No reviews yet. Be the first to share your experience!