


Using a coal grill effectively starts with understanding how airflow and fuel density affect heat output. Most beginners struggle not with the cooking itself, but with getting a consistent, manageable bed of coals that holds temperature for the duration of the meal. The core process involves lighting the fuel, arranging it for direct or indirect heat, and monitoring the internal temperature of the grill to ensure food cooks safely and evenly.
Unlike gas grills, which offer instant ignition and precise dial control, charcoal grills require a bit more patience and physical setup. You need to account for the time it takes for coals to catch and stabilize, which can range from ten to twenty minutes depending on the lighting method.
This delay is offset by the unique flavor profile that carbon-based fuels impart to food, a characteristic that many cooks prefer for steaks, burgers, and smoked items. Understanding the mechanics of coal grill operation helps you avoid common pitfalls like uneven heating or flare-ups caused by grease management errors.

Pros
- Incredibly high heat boost sears food faster and locks in juices better than gas alone.
- All-natural maple wood adds a pleasant, subtle smoke flavor without any chemical aftertaste.
- Drastically reduces ash compared to lump or briquette charcoal, so cleanup is minimal.
- Versatile use can be added to gas grills, charcoal grills, or even camp stoves for extra heat.
- Compact 2lb bag is easy to store in a pantry, RV, or camping gear without taking up much space.
Cons
- Only comes in a 2lb bag, which may not be enough for large gatherings or multiple cooks.
- Requires a gas grill or another heat source to ignite and maintain heat not a standalone charcoal fuel.
- May need careful placement on grates to avoid clogging burner ports or causing flare-ups.
FlavrQ Charcoal Chips are a unique outdoor cooking accessory that lets you add the intense heat and smoky flavor of charcoal to any gas grill. Unlike traditional briquettes or lump charcoal, these chips are made from 100% pure Canadian sugar maple wood with no binders, fillers, or chemicals. They come in a convenient 2lb bag and are designed to be sprinkled directly onto your gas grill grates or placed in a smoker box for an instant temperature surge.
This product is best suited for backyard grillers who want to elevate their gas grill's searing ability, BBQ enthusiasts looking for a quick way to add wood-fired flavor, and campers or tailgaters who need a portable, low-mess charcoal solution. RV owners will appreciate the compact bag size and the fact that it produces up to 90% less ash than standard charcoal, meaning less cleanup at the campsite. Patio cooks and outdoor entertainers will love how easily it transforms a weekday burger night into a steakhouse-quality experience.
In real-world cooking, FlavrQ chips deliver on their promise. When added to a preheated gas grill, they can raise the internal temperature by over 100°F, allowing you to sear steaks, burgers, chicken, and chops about 50% faster than gas alone. The high heat creates a beautiful crust while locking in juices, and the natural maple wood imparts a mild, sweet smoke flavor that complements beef, pork, and poultry. Heat consistency is impressive the chips burn evenly and hot, though you may need to add more for longer cooks. For fast grilling like burgers or kebabs, a single handful is plenty. For low-and-slow cooking, these chips work best as a finishing sear after smoking.
Build quality is simple but effective. The chips are uniformly sized, dry, and ready to use right out of the bag. There's no lid, grate, or wheels to worry about the product is just the fuel. Portability is excellent the 2lb bag is lightweight and fits easily in a camping bin, RV cupboard, or tailgate cooler. Weather resistance isn't an issue since the chips are stored dry, but once exposed to moisture they may clump, so keep the bag sealed.
Setup is as easy as opening the bag and sprinkling a layer of chips over your gas grill grates after the grill is hot. No lighter fluid, no chimney starter, no waiting for coals to ash over. Cleanup is where these chips really shine the ash residue is minimal, and what little there is can be brushed off or vacuumed away in seconds. Storage is hassle-free the bag reseals easily and takes up little space.
A realistic limitation is the bag size. At 2lb, you might go through it quickly if you're cooking for a crowd or doing multiple searing sessions. Also, because these chips are meant to be used with an existing heat source, they won't work on their own you need a gas grill, camp stove, or similar burner. Some users may find that the chips can clog small burner ports if piled too thick, so a light, even layer is best. Overall, FlavrQ Charcoal Chips are a smart buy for anyone who wants to add charcoal-level searing and smoke flavor to their gas grill without the mess and time of traditional charcoal. They're especially practical for quick weeknight dinners, tailgate parties, and camping trips where convenience and performance matter most.
FlavrQ Charcoal Chips deliver exceptional searing performance by boosting your gas grill's temperature by over 100°F. This means you can achieve a restaurant-quality crust on steaks, burgers, and chops in about half the time. The chips burn clean and hot, producing a consistent heat that helps lock in juices while adding a subtle maple wood smoke flavor. For fast grilling, they're ideal; for longer cooks, use them as a finishing sear after low-and-slow smoking. The low ash output also means less flare-ups and easier cleanup.
One pound of FlavrQ chips delivers the heating power of four pounds of traditional charcoal, making them incredibly fuel-efficient. You use less fuel to achieve higher temperatures, which saves money and reduces storage needs. The chips produce up to 90% less ash than standard charcoal, so you're not wasting fuel on inert material. This efficiency is especially valuable for campers and tailgaters who want to pack light and cook hard.
These charcoal chips shine in several outdoor cooking scenarios: backyard grilling for quick weeknight steaks, tailgating when you need high heat for burgers and sausages, camping where portability and low mess are key, and RV cooking where storage space is tight. They also work great for adding a smoky finish to grilled vegetables, fish, or chicken. For best results, use them on a gas grill preheated to medium-high, sprinkle a thin layer over the grates, and cook immediately.

Pros
- Fast and consistent ignition with excellent airflow design.
- Built like a tank – premium ductile iron means years of reliable service.
- Compact and lightweight enough to toss in a camping kit or tailgate gear.
- Works for both charcoal and firewood, adding versatility for different outdoor cooking setups.
Cons
- Small capacity – best for small to medium charcoal loads; not ideal for large offset smokers or huge campfires.
- Takes time to cool down after use – you can't immediately pack it away.
- May require practice to get the lighting technique down perfectly with different fuel types.
The Brutal BBQ Fireguard is a simple but brilliantly effective tool for anyone who regularly lights charcoal or firewood. Instead of fumbling with lighter fluid, chimney starters, or newspaper, this compact ductile iron device lets you stack your fuel inside and light a small fire beneath it. The built-in air inlet feeds oxygen directly into the base, creating a powerful updraft that gets your charcoal glowing in about 10 to 15 minutes. It works equally well with lump charcoal, briquettes, and even small pieces of firewood for a fireplace or campfire.
This fire starter is built for real outdoor use. The high-grade ductile iron casting feels solid in your hands and resists the kind of warping or rusting you see with cheaper steel chimneys. You don't need any maintenance beyond shaking out the ashes once it's cool. That ruggedness makes it a great companion for backyard grillers who want a dependable tool every weekend, as well as campers and tailgaters who need something that can survive being tossed in a truck bed or gear bin.
When it comes to cooking performance, the Fireguard shines at getting your coals ready fast and evenly. Because the airflow is optimized, you get a consistent bed of hot embers without cold spots. That means better searing ability on steaks or burgers and more reliable heat for low-and-slow smoking if you're using a charcoal smoker. It's also great for patio cooks who want to avoid chemical starters that can leave off-flavors on the food.
Portability is a big plus. The Fireguard measures just over nine inches tall and about four inches wide – small enough to fit inside most kettle grills, portable camp grills, or even your camping stove bag. It doesn't take up much space in your trunk for tailgating or in an RV storage compartment. The only limitation is capacity: it can hold enough charcoal for a two-burger grill session or a small campfire, but if you're running a large offset or cooking for a big crowd, you may need to do two batches.
Cleanup is about as easy as it gets. Once the Fireguard cools completely (and you should definitely wait until it's at room temperature before handling), just give it a shake to remove the ash. No water, no soap, no scrubbing. The iron may develop a natural patina over time, but that doesn't affect performance. Just avoid getting it wet while it's hot to prevent any thermal shock.
Overall, the Brutal BBQ Fireguard is a smart upgrade for anyone who lights charcoal or firewood regularly. It's not a complete grill or a huge chimney starter – it's a focused tool that does one job very well. If you're a backyard BBQ enthusiast who wants to ditch lighter fluid, a camper looking for a compact fire starter, or a tailgater who wants quick hot coals, this is a solid buy. Just keep its size in mind and you'll appreciate the simplicity and durability it brings to your outdoor cooking routine.
The Brutal BBQ Fireguard is most useful for small to medium grilling sessions. Use it to light charcoal for a Weber kettle, a portable camping grill, or a fire pit in your backyard. It's also perfect for camping trips when you want a quick campfire for cooking or warmth without messing with liquid starters. Tailgaters will appreciate how fast you can get coals ready for burgers and brats before kickoff. It even works as a decorative piece on a mantle or patio table when not in use – just be sure the fire is out and it's cool before bringing it inside.


The foundation of successful charcoal grilling is proper fuel preparation. You must ensure your coals are dry and free of moisture, as wet fuel produces excessive smoke and fails to reach the necessary temperature for searing. Before lighting, check the ventilation dampers on your grill; both the bottom intake and top exhaust should be fully open to allow maximum oxygen flow during the ignition phase. This initial airflow is critical for establishing a strong, even fire that will sustain itself once the coals are fully lit.
| Stage | Action | Estimated Time |
|---|---|---|
| Preparation | Arrange coals in chimney or starter | 5 minutes |
| Ignition | Light newspaper or cubes | 1-2 minutes |
| Stabilization | Wait for ash coating to form | 10-15 minutes |
| Arrangement | Place coals in grill for heat zone | 2 minutes |
Once the coals are ready, indicated by a white ash coating and glowing red centers, you can transfer them to the grill. The method of arrangement depends on your cooking style. For direct heat, spread the coals evenly across the entire grate. This setup is ideal for thin cuts of meat, vegetables, and items that cook quickly.
For indirect heat, push the coals to one side or both ends of the grill, leaving the center empty. This creates a cooler zone where you can place the food and close the lid, allowing the grill to function like an oven for thicker cuts or items requiring longer cook times.
- Ensure the grill grates are clean and oiled to prevent sticking.
- Open all vents fully while lighting the coals for maximum airflow.
- Wait until coals are covered in white ash before placing them in the grill.
- Use a long-handled brush to clean the grate after the coals are placed.
- Preheat the grill with the lid closed for ten minutes before adding food.
Lighting Methods and Safety Considerations
Choosing the right lighting method impacts both the speed of preparation and the flavor of your food. Lighter fluid is a traditional option but can leave a chemical taste if not allowed to evaporate fully. A safer and cleaner alternative is the chimney starter, which uses newspaper or fire cubes to ignite the coals without adding any chemicals to the fuel.
This method provides a more consistent burn and eliminates the risk of igniting liquid fuel, which can be dangerous if handled incorrectly. Always place the chimney starter on a non-flammable surface, such as concrete or brick, to prevent accidental fires.
Safety is paramount when working with open flames and high temperatures. Keep a fire extinguisher or a bucket of sand nearby in case of emergencies. Never leave a lit grill unattended, and ensure that children and pets are kept at a safe distance.
The grill should be placed on a stable, level surface away from overhanging branches, siding, or other flammable materials. Carbon monoxide is a serious risk if grilling in enclosed spaces; always use a coal grill outdoors in a well-ventilated area. Following these safety protocols ensures a enjoyable and secure grilling experience for everyone involved.
Managing Heat and Airflow
Airflow control is the primary mechanism for adjusting temperature on a charcoal grill. The bottom vents regulate the amount of oxygen entering the firebox, while the top vent allows smoke and hot air to escape. Closing the vents restricts oxygen, which lowers the temperature, while opening them increases the burn rate and raises the heat.
For high-heat searing, keep both vents wide open. For lower-temperature cooking, partially close the bottom vents and keep the top vent slightly open to maintain a steady draft. Adjusting these vents allows you to fine-tune the cooking environment to suit different types of food.
Monitoring the internal temperature is essential for consistent results. A reliable grill thermometer, placed in the center of the upper grate, provides an accurate reading of the cooking zone. If the temperature drops, you may need to add more coals or open the vents slightly.
If it rises too high, close the vents to reduce the airflow. Understanding how to read these cues helps you maintain the desired heat level throughout the cooking process. This skill is particularly important for larger meals where maintaining a stable temperature over a longer period is necessary.
Cooking Techniques for Different Foods
Different foods require different heat levels and cooking times. Thin items like burgers, hot dogs, and vegetables cook quickly over direct high heat. Thicker cuts like steaks, chops, and whole chickens benefit from a combination of direct and indirect heat.
Start by searing the food over the direct heat zone to create a flavorful crust, then move it to the indirect zone to finish cooking through without burning the exterior. This two-zone method is a versatile technique that allows you to cook a wide variety of foods on a single grill. It maximizes the utility of your equipment and ensures that each item is cooked to perfection.
- Use direct heat for thin cuts and vegetables that cook in under ten minutes.
- Apply indirect heat for thick cuts, poultry, and ribs that need longer cooking.
- Preheat the grill with the lid closed to stabilize the internal temperature.
- Use a meat thermometer to check the internal temperature of the food.
- Let the food rest for a few minutes after cooking to retain juices.
Cleaning and Maintenance
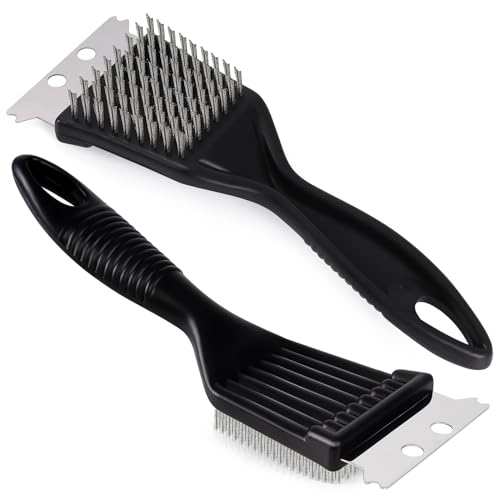
Proper cleaning extends the life of your grill and improves the flavor of future meals. After each use, wait for the coals to burn down completely and the grill to cool slightly. Use a stiff wire brush to scrape off any food debris from the grates. Empty the ash catcher regularly to prevent buildup that can obstruct airflow.
Wipe down the exterior of the grill with a damp cloth to remove grease and dirt. Covering the grill when not in use protects it from the elements and prevents rust. Regular maintenance ensures that your equipment remains in good working condition and ready for your next grilling session.
If you are looking to expand your grilling capabilities, consider exploring other fuel types or grill formats. Our guide to griddle and smoker combos offers insights into versatile equipment that can handle multiple cooking styles. Understanding the differences between charcoal, gas, and pellet grills helps you choose the right tool for specific tasks. Each fuel type has its own advantages and limitations, and knowing how to use them effectively allows you to cook a wider variety of dishes with confidence and precision.
Mastering the use of a coal grill is a skill that improves with practice. By focusing on proper lighting, airflow management, and heat control, you can achieve consistent results that rival professional kitchens.
Pay attention to the details, from the condition of your coals to the placement of your vents, and you will soon find that charcoal grilling becomes a intuitive and rewarding part of your outdoor cooking routine. The key is to stay patient, follow safety guidelines, and enjoy the process of creating delicious meals with the unique flavor that only charcoal can provide.


Write Your Review
No reviews yet. Be the first to share your experience!