


Starting an outdoor cooker for the first time can feel intimidating when you face unfamiliar valves, vents, and fuels. Learning how to start a grill for beginners safely requires understanding how your specific fuel creates heat and maintains stable airflow. Whether you plan to sear steaks over charcoal or baste chicken with a tangy cranberry barbecue sauce on a weeknight, mastering the ignition phase prevents dangerous gas buildup and wasted charcoal. A clean setup, proper ventilation, and the right sequence of steps build cooking confidence right from the first spark.
Different cooker designs demand distinct ignition routines to achieve consistent cooking temperatures. Gas burners require open-lid safety protocols to avoid trapped vapor, while charcoal fires depend on chimney starters or natural wax cubes rather than foul-smelling chemical fluids. Once your fire bed stabilizes, you can branch out into delicate fish fillets or craft a flavorful juicy Korean kalbi meal without worrying about sudden heat spikes. Taking a systematic approach to preheating and temperature control protects your food and keeps your outdoor cooking area safe.

Pros
- Comprehensive technique coverage from beginner to advanced, with over 1,000 photos
- Recipes from around the world bring authentic global BBQ flavors to your backyard
- Trusted author Steven Raichlen is a renowned expert in live-fire cooking
- Great for learning low-and-slow smoking, fast grilling, and everything in between
- The book's layout makes it easy to find what you need quickly
Cons
- Some recipes call for specialized equipment like rotisseries or smoker boxes
- Large size (8x9.25 inches) and 3.35 pounds make it less portable for camping trips
- Advanced pitmasters may find the techniques basic, but the global recipes still offer inspiration
How to Grill is not a piece of outdoor cooking equipment, but it is the single most valuable tool you can add to your grilling arsenal. This illustrated book by Steven Raichlen is a complete guide to barbecue techniques, packed with over 500 recipes and more than 1,000 step-by-step photos. It's designed for anyone who cooks with fire, whether you're a backyard griller hosting weekend BBQs, a camper perfecting foil-packet meals, a tailgater looking to impress, or an RV owner who wants to master the campfire. The book covers everything from setting up a three-tiered fire to grilling pizza, smoking ribs, and even making fire-roasted banana splits.
Real-world cooking performance is the core of this book. You'll learn how to achieve consistent heat, perfect searing on steaks, and deep smoke flavor for low-and-slow cooks. Raichlen explains temperature control for both charcoal and gas grills, fuel efficiency tips, and how to handle different cuts of meat. Whether you're doing a quick weeknight burger or a 12-hour brisket, the techniques here are practical and tested. The book also covers grilling fish, vegetables, tofu, and fruit, so you can expand your outdoor cooking repertoire.
Build quality of the book itself is solid. It's a hardcover with a sturdy binding and thick, glossy pages that can withstand splatters and frequent flipping. The dimensions (8 x 1.06 x 9.25 inches) make it easy to prop open on a counter or picnic table. While it's not weather-resistant, the durable construction holds up well in a kitchen or garage. Portability is limited by its weight (3.35 pounds), but it's manageable for car camping or RV trips if you want a comprehensive reference.
Ease of setup is straightforward: just open the book and start reading. The step-by-step photos make complex techniques accessible, and the FAQs and problem-solving tips help troubleshoot common issues like flare-ups, uneven cooking, or dry meat. Cleanup is nonexistent for the book itself, but the knowledge you gain will help you manage grease and keep your grill in top shape. Storage is simple on a bookshelf or in a kitchen drawer.
One realistic limitation is that some recipes assume you have access to specialized gear like a rotisserie, smoker box, or specific wood chips. Beginners might need to invest in a few extra tools to fully utilize the book. Also, experienced pitmasters might find the basic techniques familiar, but the global recipes and creative twists (like grilled cocktails) still offer fresh ideas.
Overall, How to Grill is a must-have for any outdoor cooking enthusiast. If you're serious about improving your grilling game, from backyard parties to campsite dinners, this book delivers practical, tested knowledge. It's an investment in your skills that will pay off with every meal you cook over fire.


Pros
- Fast and consistent ignition with excellent airflow design.
- Built like a tank – premium ductile iron means years of reliable service.
- Compact and lightweight enough to toss in a camping kit or tailgate gear.
- Works for both charcoal and firewood, adding versatility for different outdoor cooking setups.
Cons
- Small capacity – best for small to medium charcoal loads; not ideal for large offset smokers or huge campfires.
- Takes time to cool down after use – you can't immediately pack it away.
- May require practice to get the lighting technique down perfectly with different fuel types.
The Brutal BBQ Fireguard is a simple but brilliantly effective tool for anyone who regularly lights charcoal or firewood. Instead of fumbling with lighter fluid, chimney starters, or newspaper, this compact ductile iron device lets you stack your fuel inside and light a small fire beneath it. The built-in air inlet feeds oxygen directly into the base, creating a powerful updraft that gets your charcoal glowing in about 10 to 15 minutes. It works equally well with lump charcoal, briquettes, and even small pieces of firewood for a fireplace or campfire.
This fire starter is built for real outdoor use. The high-grade ductile iron casting feels solid in your hands and resists the kind of warping or rusting you see with cheaper steel chimneys. You don't need any maintenance beyond shaking out the ashes once it's cool. That ruggedness makes it a great companion for backyard grillers who want a dependable tool every weekend, as well as campers and tailgaters who need something that can survive being tossed in a truck bed or gear bin.
When it comes to cooking performance, the Fireguard shines at getting your coals ready fast and evenly. Because the airflow is optimized, you get a consistent bed of hot embers without cold spots. That means better searing ability on steaks or burgers and more reliable heat for low-and-slow smoking if you're using a charcoal smoker. It's also great for patio cooks who want to avoid chemical starters that can leave off-flavors on the food.
Portability is a big plus. The Fireguard measures just over nine inches tall and about four inches wide – small enough to fit inside most kettle grills, portable camp grills, or even your camping stove bag. It doesn't take up much space in your trunk for tailgating or in an RV storage compartment. The only limitation is capacity: it can hold enough charcoal for a two-burger grill session or a small campfire, but if you're running a large offset or cooking for a big crowd, you may need to do two batches.
Cleanup is about as easy as it gets. Once the Fireguard cools completely (and you should definitely wait until it's at room temperature before handling), just give it a shake to remove the ash. No water, no soap, no scrubbing. The iron may develop a natural patina over time, but that doesn't affect performance. Just avoid getting it wet while it's hot to prevent any thermal shock.
Overall, the Brutal BBQ Fireguard is a smart upgrade for anyone who lights charcoal or firewood regularly. It's not a complete grill or a huge chimney starter – it's a focused tool that does one job very well. If you're a backyard BBQ enthusiast who wants to ditch lighter fluid, a camper looking for a compact fire starter, or a tailgater who wants quick hot coals, this is a solid buy. Just keep its size in mind and you'll appreciate the simplicity and durability it brings to your outdoor cooking routine.
The Brutal BBQ Fireguard is most useful for small to medium grilling sessions. Use it to light charcoal for a Weber kettle, a portable camping grill, or a fire pit in your backyard. It's also perfect for camping trips when you want a quick campfire for cooking or warmth without messing with liquid starters. Tailgaters will appreciate how fast you can get coals ready for burgers and brats before kickoff. It even works as a decorative piece on a mantle or patio table when not in use – just be sure the fire is out and it's cool before bringing it inside.


Pros
- Tailored specifically for flat-top gas griddle heat zones and oil techniques
- Diverse recipe selection spanning breakfast spreads, street food, and crowd-pleasing dinners
- Clear instructions that make high-volume backyard entertaining straightforward
- Compact paperback size fits nicely on outdoor prep tables or inside an RV pantry
Cons
- Paperback binding requires care to avoid oil splatters and outdoor moisture damage
- Focuses exclusively on flat-top griddling rather than traditional grate grilling or low-and-slow smoking
Outdoor flat-top cooking differs significantly from standard grate grilling, requiring specific heat management, spatial awareness, and oil control. Blackstone Griddling serves as a practical, hands-on recipe manual engineered specifically for outdoor gas griddle enthusiasts. Whether you are running a four-burner station on your patio, packing a tabletop griddle for a weekend campsite, or firing up breakfast outside the stadium on game day, this guide provides actionable inspiration. It caters directly to backyard cooks, RV owners, tailgaters, and outdoor entertainers who want to push their flat-top setup past the basics.
The strength of any flat-top cookbook rests on how well it translates high surface heat into exceptional food. The recipes in this collection leverage the natural strengths of cold-rolled steel griddles: intense searing capability, rapid moisture evaporation, and distinct multi-zone temperature layouts. You will find reliable techniques for creating crisp diner smash burgers, balancing high-heat stir-fries without burning the aromatics, and executing large breakfast platters with synchronized eggs, hash browns, and bacon. The guidance helps you coordinate your cooking surface so every component finishes hot at the exact same moment.
Because this is a physical paperback, bringing it out near sizzling spatulas and hot propane burners requires a bit of practical consideration. The layout is clean and legible, making it easy to read recipe ratios from a few feet away on a side prep shelf. While the paper stock feels sturdy for regular indoor kitchen use, outdoor cooks will want to protect the pages from direct oil splatters, wind gusts, and sudden patio drizzle. Stashing it under your griddle prep cart or sliding it into a protective sleeve keeps it clean and ready through continuous outdoor cooking sessions.
Beyond ingredient lists, the guide reinforces essential outdoor griddle habits. Working with flat surfaces requires attentive grease trough navigation, proper squirt-bottle water deglazing, and steady scraping technique between courses. The book teaches cooks how to stage foods across cooler burner zones while keeping hot searing zones open for fresh ingredients. This layout-focused mindset helps reduce propane waste, prevents messy boil-overs, and simplifies post-cook scrape-downs before applying your final coat of protective seasoning oil.
While pitmasters looking for low-and-slow wood pellet recipes or traditional charcoal smoking advice will need to look elsewhere, this book excels at its intended focus. It bridges the gap between novice griddle ownership and confident, restaurant-quality patio cooking. If you recently invested in an outdoor gas griddle or want to breathe fresh excitement into your weekend tailgates and campsite breakfasts, this recipe manual is a worthy and affordable addition to your outdoor culinary toolkit.
Mastering a flat top griddle requires understanding surface zones rather than open flames. This guide emphasizes how to manipulate individual propane burner controls to create hot searing zones alongside low-heat holding areas on your steel plate.
From rapid street tacos to multi-portion pancake batches, the techniques outlined highlight fast surface recovery and effective spatula work that prevent overcrowding and preserve distinct food textures.
Tailgating crews and campsite cooks will appreciate the speed and simplicity of the recipes. Cooking outside requires efficient prep and minimal dirty dishware, both of which are central to griddle-style meal planning.
Backyard entertainers feeding large family gatherings can leverage the high-yield breakfast and dinner layouts, ensuring everyone gets hot food off the steel plate simultaneously without long waits between batches.
Pros
- Odorless and clean-burning - no chemical taste or fumes during grilling or campfires.
- Reliable ignition in damp or windy conditions, making it a great backup for outdoor cooks.
- Long burn time (8-10 min) gives enough heat for coals to catch without constant tending.
- Compact size fits anywhere and the 50-pack lasts for multiple cookouts or camping trips.
- Versatile - works with charcoal grills, smokers, fire pits, fireplaces, and wood stoves.
Cons
- Only 50 pieces per pack - if you grill frequently or host large parties, you'll need to stock up.
- May not ignite larger logs directly without a good base of kindling or smaller wood pieces.
- Not reusable - each cube is single-use, so eco-conscious users might prefer a reusable electric starter.
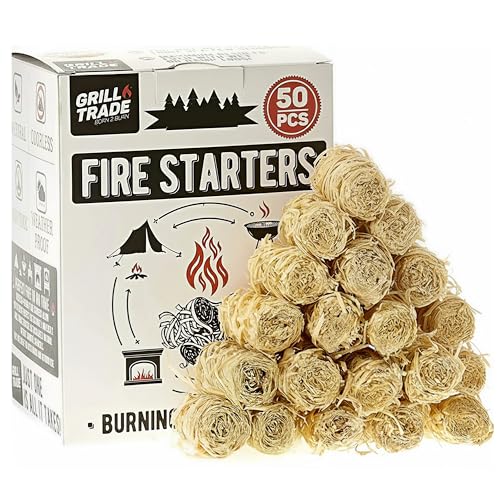
If you've ever struggled to get charcoal glowing on a damp morning or fought with lighter fluid fumes at a tailgate, you know the value of a reliable fire starter. The Grill Trade Fire Starters are small cubes made from pine wood shavings bound with food-grade wax. They light with a single match and burn steadily for 8 to 10 minutes, giving your coals or kindling enough sustained heat to catch and spread. Because they're odorless and leave no chemical residue, they work great for grills, smokers, campfires, and even indoor fireplaces or wood stoves.
These starters shine in less-than-perfect conditions. Their weatherproof coating means they'll spark up in light rain or windy gusts without sputtering out. For backyard grillers who cook year-round or campers who don't want to baby a fire, that reliability is a real plus. Each pack holds 50 cubes, and each cube is about the size of a large ice cube - easy to toss into a bag or stash in a grill caddy. You won't need to haul bulky lighter fluid cans or deal with messy electric starters.
Burn performance is straightforward: light one cube, place it under your charcoal chimney or pile of coals, and in 8-10 minutes you'll see the coals start to ash over. For smaller grills or campfire setups, a single cube is enough. For larger loads, using two cubes speeds things up. The wax and wood combination produces a steady, moderate flame that doesn't flare up aggressively, so it's safer around kids or pets than dousing coals with accelerant. And since it's food-grade, you don't have to worry about chemical off-gassing tainting your steak or burger.
Build quality is simple but effective. The cubes are firm and compact, with no loose sawdust or broken edges in the bag. They store well in the original box or any dry container, and because they're odorless, they won't perfume your camping gear with a smoky scent. The 50-piece count means you'll get several cookouts or camping trips out of one purchase. At this price point, they're competitive with other natural fire starters on Amazon, though you'll want to check the per-piece cost if you're a heavy user.
There are a couple of limitations to keep in mind. Each cube is single-use, so if you're an eco-conscious cook, you might prefer a reusable electric starter or a simple chimney method with newspaper. Also, while they light larger logs in a fire pit, you'll get best results when you have a good base of kindling or small splits. For a backyard BBQ enthusiast who cooks on weekends or a camper who wants one less thing to worry about, these starters are a practical, low-mess solution. They make a thoughtful gift for grill lovers too - something every outdoor cook can use.
Overall, the Grill Trade Fire Starters deliver on their promise: clean, fast, weather-resistant ignition without chemical odors. If you're tired of lighter fluid's aftertaste or want a reliable backup for rainy-day grilling, grab a pack. They're not flashy, but they do the job right where it matters - getting your fire going so you can focus on cooking.

Pros
- Clean burn with no chemical smell or taste – great for food-grade cooking
- Works reliably on lump charcoal, briquettes, pellets, and firewood
- Small, lightweight cubes are easy to pack for camping or tailgating
Cons
- Each cube burns for only a few minutes, so you may need two for larger charcoal loads
- Packaging is a simple box – cubes can crumble if compressed during travel
- Not wind-resistant; best used in calm conditions or with a wind guard
If you've ever wrestled with crumpled newspaper, sticky lighter fluid, or a stubborn chimney starter on a breezy day, the Grill Trade Fire Starter Squares are a breath of fresh air. These little cubes – made from refined pine wood and food-grade wax – are designed to take the guesswork out of lighting almost any outdoor fire. Whether you're firing up a charcoal kettle grill for Saturday burgers, getting your pellet smoker going for a low-and-slow brisket, or building a campfire at the end of a trail, these squares deliver a consistent, odorless flame fast.
The biggest advantage here is convenience and cleanliness. You don't need to douse your coals in chemicals or worry about that petroleum aftertaste seeping into your ribeye. Just place a cube under your charcoal or pellet mound, light the corner, and let it do its job. In about two to three minutes you'll have a steady flame that catches on lump charcoal or even larger wood logs. That means less smoke on startup, fewer flare-ups, and a cleaner cooking experience from the first sear to the last bite.
For backyard grillers and BBQ enthusiasts, these starters are a practical addition to your toolkit. They handle the everyday tasks like lighting briquettes for a three-zone fire or getting your smoker up to temp without the hassle of chimney starters and newspaper. Campers and tailgaters will appreciate the portability – the 144-count box fits in a glove compartment or tote bag, and each cube is roughly an inch square. No bulky propane torches or messy fluids required. RV owners and patio cooks can stash a box in a drawer for spontaneous cookouts at the campsite or in the backyard.
Build quality is straightforward. The cubes are solid but can crumble if you squeeze them hard, so treat the box gently during transport. They are not designed to withstand rain or strong wind; you'll want to light them in a sheltered area or use a wind guard for outdoor fire pits. That said, they are completely natural and leave behind only a fine ash, making cleanup simple. No sticky residue on your hands or grate.
One realistic limitation: each cube burns for only about three to five minutes. For a typical chimney starter full of charcoal you may need two or three cubes stacked together. For a large campfire or a smoker with a deep pellet hopper, you might want to use more. It's not a flaw – it's just something to plan for. The price per cube is quite low, so using two or three still beats the cost of a bottle of lighter fluid.
Overall, if you're someone who values clean flavor, quick ignition, and a product that works across multiple outdoor cooking scenarios – from the backyard grill to the remote campsite – these fire starter squares are a solid buy. They take the hassle out of starting fires and let you focus on cooking great food. Just keep a box in your grill caddy, your camping bin, or your tailgate box, and you'll never go back to liquid starters again.
Essential Steps and Techniques for Starting Any Grill
Lighting your first outdoor cooker marks the transition from kitchen prep to genuine live-fire cooking. Understanding the fundamentals of fuel, oxygen flow, and surface preheating removes the uncertainty that many beginners experience. Every grill style follows a specific procedural sequence designed to ensure user safety and reliable ignition. By adhering to a methodical routine, you protect your equipment, avoid sudden fuel flare-ups, and establish steady cooking temperatures.
Choosing Safe Outdoor Placement and Pre-Ignition Clearances
Safe grill operation begins long before you introduce a spark or turn a gas valve. Grills must always remain outdoors on a stable, noncombustible surface well away from wooden deck rails, low overhangs, and vinyl siding. Operating any fuel-burning grill inside a garage, breezeway, tent, or enclosed porch creates immediate fire dangers and life-threatening carbon monoxide hazards. Even with an open garage door or exterior window, toxic exhaust fumes accumulate quickly in covered spaces.
Before igniting the fire, inspect the perimeter to confirm at least ten feet of clearance from walls and outdoor structures. Check the grease collection tray or ash catcher beneath the firebox to confirm it is clean and free of leftover rendered fat. Old grease accumulations ignite rapidly when subjected to direct flame, causing intense flare-ups that can overwhelm an inexperienced cook. Verifying that the cooker rests firmly on level ground prevents accidental tipping when opening heavy lids or rearranging grates.
How to Start a Propane or Natural Gas Grill Step by Step
Gas cookers offer quick startup times and precise temperature control, making them a popular choice for outdoor cooking. The single most critical rule when lighting any gas cooker is to keep the grill lid fully open before touching the controls. If the lid remains closed during ignition, escaping propane or natural gas collects beneath the hood, creating a severe explosive hazard when a spark occurs. Keeping the lid up allows excess fuel vapor to disperse harmlessly into the open air.
Begin by slowly turning the hand wheel on your propane cylinder counterclockwise until it is fully open. Opening the tank valve too quickly can trip the internal safety excess-flow check valve, which restricts fuel pressure and limits burner output. Next, turn the designated primary burner control knob, usually marked with an ignition lightning symbol, to the high position. Immediately press the built-in push-button spark igniter or turn the rotary ignition knob until you hear a sharp snap and see the burner ignite.
Once the first burner lights successfully, ignite the adjacent secondary burners by turning their respective control knobs to high. If the fire fails to catch within five to ten seconds, immediately turn all burner knobs back to the off position. Leave the grill lid completely open and wait at least five minutes for the lingering gas fumes to clear before attempting ignition again. Once all active burners burn with steady blue flames, close the lid and allow the chamber to preheat for ten to fifteen minutes.
Lighting Charcoal with Chimney Starters and Natural Fire Cubes
Charcoal cooking produces authentic smoky flavor, but getting briquettes or lump hardwood lit requires patience and airflow. The most efficient and clean-burning method relies on an upright metal chimney starter rather than chemical lighter fluids. Petroleum-based lighter fluids emit volatile chemical odors that penetrate the porous charcoal and transfer an unpleasant chemical taste to delicate meats. A chimney starter uses natural convection to draw fresh air upward through the coals, lighting them uniformly within fifteen to twenty minutes.
To start your coals, remove the top cooking grate and place one or two all-natural fire starter squares or pine wood shaving cubes on the bottom charcoal grate. Fill the metal chimney cylinder with the desired amount of lump charcoal or standard briquettes according to your recipe needs. Light the fire starters with a long match or grill lighter, then place the loaded chimney cylinder directly over the burning starter blocks. As the flames rise through the ventilated bottom grid, the bottom coals catch fire and gradually spread heat to the top layer.
Charcoal is ready for cooking when the top coals show an even coating of gray ash and glow orange at their core. Using heat-resistant barbecue gloves, grasp the chimney handle firmly and carefully pour the glowing coals onto the lower grate. Distribute the coals with long-handled metal tongs to establish your preferred heat zones for cooking. Place the upper cooking grate back into position and close the lid for five minutes to bring the metal grates up to searing temperature.
Regulating Airflow and Managing Charcoal Heat Zones
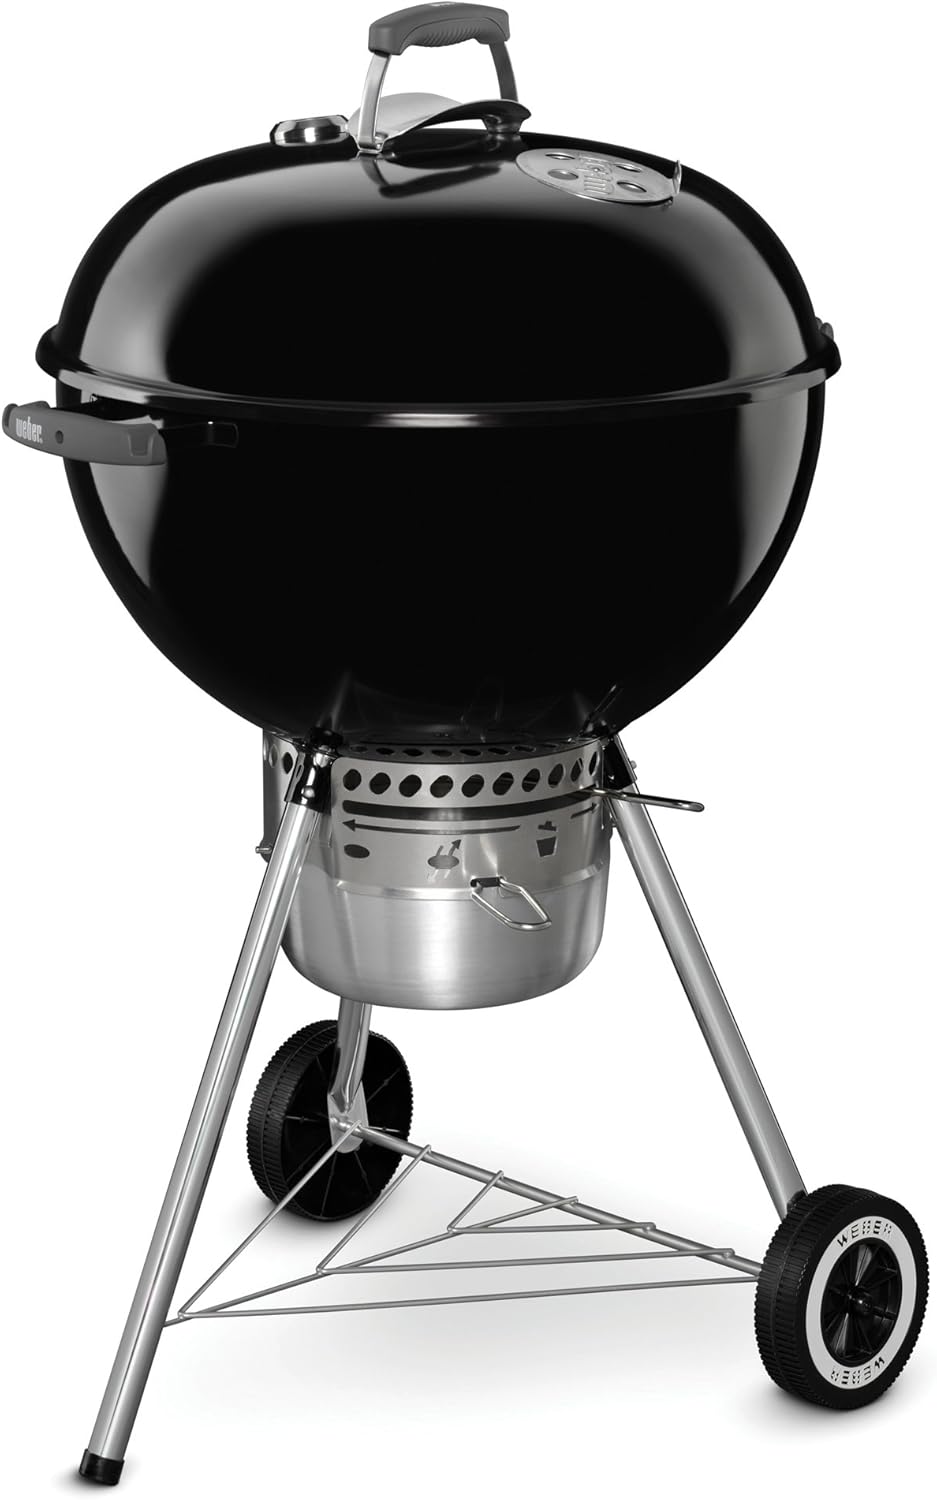
Controlling temperature on a solid-fuel cooker depends entirely on how much oxygen reaches the glowing coal bed. Every standard charcoal kettle features two sets of adjustable air dampers: an intake vent at the bottom bowl and an exhaust damper on the lid. Opening the bottom damper draws more oxygen into the combustion zone, which raises the fire temperature for high-heat searing. Partially closing the vents restricts the oxygen supply, cooling the fire bed down for gentle, slow roasting.
Beginners often make the mistake of scattering burning coals evenly across the entire lower charcoal grate. Arranging the coals into a two-zone configuration provides far superior control over flare-ups and different cooking rates. Bank all hot coals onto one half of the fuel grate to create an intense direct heat zone for searing burgers and chops. Leave the opposite half devoid of coals to form a gentle indirect heat zone where foods can cook through without scorching.
When cooking indirectly, position the lid exhaust vent directly over the food rather than over the burning coals. This alignment pulls hot air and aromatic wood smoke across the cooking surface before venting into the atmosphere. If you want to introduce extra wood flavor to poultry or pork, adding soaked chunks or using dedicated wood chips in smoker boxes can elevate the aroma without altering your base coal temperatures. Monitor the fire through external lid thermometers and make vent adjustments in small quarter-turn increments.
Wood Pellet Grill Ignition and Digital Controller Startup
Wood pellet cookers combine the rich flavor profile of hardwood smoke with the computerized convenience of modern kitchen ovens. These appliances rely on an automated electric auger that feeds compressed hardwood sawdust pellets into a small fire pot containing an electric hot-rod igniter. Before powering on the cooker, inspect the fuel storage bin to ensure the pellets remain dry and free of moisture damage. Wet pellets crumble into dense sawdust that can jam the mechanical auger tube and prevent proper fuel delivery.
To start a pellet unit, verify that the fire pot is clear of heavy ash accumulation and that the metal heat diffuser and grease drain pan sit securely in place. Open the main cooking chamber lid before switching on the power button and setting the dial to the initial smoke or startup mode. The draft induction fan begins circulating air immediately while the electric heating rod glows red hot to ignite the incoming fuel pellets. You should hear the hum of the fan motor and observe wisps of white smoke rising within three to five minutes.
Keep the chamber lid open until the thick white smoke dissipates and transforms into a lighter, bluish haze accompanied by the distinct roar of active combustion. Closing the lid too early during startup can trap unburnt wood gases that cause a sudden, forceful ignition pop when the fire finally catches. Once continuous flame is established in the fire pot, close the lid and adjust the digital controller to your target cooking temperature. For extended low-temperature smoking sessions, cooks often attach auxiliary pellet hopper extension kits to maintain an uninterrupted fuel supply without constant refilling.
Operating Portable Charcoal and Disposable Instant Grills
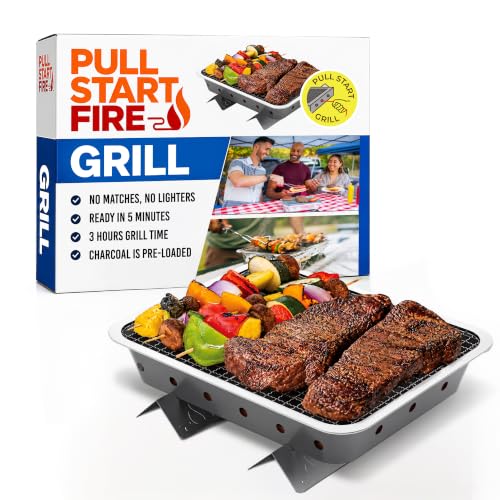
Portable charcoal models and disposable all-in-one fire kits offer outdoor cooking flexibility for tailgates, beach days, and remote camping spots. Many self-contained disposable units feature pre-loaded hardwood charcoal bricks equipped with pull-string igniters that catch fire without lighter fluid or separate matches. When setting up a portable unit, always deploy its fold-out metal stabilizing feet onto a flat, non-flammable surface such as packed earth, gravel, or concrete. Never set a hot portable charcoal unit directly on wooden picnic tables or plastic tailgate liners.
Instant single-pull charcoal units typically reach cooking heat within five minutes and sustain steady heat for several hours. Because these compact designs lack adjustable intake dampers, heat management relies on food placement and grate clearance rather than airflow throttling. Keep thicker meat cuts near the edges where heat distributes more gently, and place thin steaks or burgers toward the center for direct searing. Always keep a bucket of water or clean sand nearby when cooking on portable setups in dry outdoor environments.
Disposing of portable cooking units requires complete thermal deactivation before you leave your outdoor cooking site. Coals inside disposable aluminum trays retain intense heat and smoldering embers long after the visible flames subside. Allow the unit to cool naturally for at least one full hour, or douse the embers thoroughly with water while stirring the wet ash slurry with metal tongs. Once the metal casing and residual charcoal feel completely cool to the touch, you can safely discard the package according to local park or campsite waste disposal rules.
Preheating the Grate, Cleaning, and Surface Preparation
Lighting the fire is only the initial phase; preheating the cooking grates properly is equally essential for grilling success. Allowing your cooking grates to heat up for ten to fifteen minutes before adding food accomplishes two vital tasks. High surface heat carbonizes leftover food residues from previous cooking sessions, making them easy to scrub away with a bristle-free grill brush. Furthermore, hot grates instantly sear the surface of raw proteins, creating distinct grill marks while preventing stubborn sticking.
After scrubbing the preheated metal grates clean, wipe them with a folded paper towel lightly moistened with high-smoke-point cooking oil such as canola or grapeseed oil. Grasp the oiled towel with sturdy, long-handled barbecue tongs and rub it swiftly across the hot metal bars. This thin layer of oil creates a slick, temporary non-stick barrier that helps delicate items like fish and skin-on chicken release cleanly. Avoid spraying aerosol cooking oils directly onto hot grates, as airborne oil mists can trigger sudden, uncontrollable flare-ups.
Diagnosing Common Ignition Failures and Inconsistent Flame
Beginners often encounter minor startup snags that can stall an outdoor cooking session if not addressed systematically. On a gas cooker, a clicking piezo igniter that fails to produce a flame often indicates misaligned spark electrode wiring or spiders nesting inside the burner venturi tubes. You can test for spark presence by watching the electrode gap in low light while clicking the igniter button with the gas turned completely off. If the igniter battery is depleted, most gas models include a manual match-holder rod designed to safely guide a flame to the burner port.
If a gas flame ignites but stays weak and low even on the high setting, the regulator safety valve has likely entered bypass mode. To reset a tripped gas regulator, shut off all burner knobs and close the propane tank cylinder completely. Disconnect the regulator hose from the tank collar, wait thirty seconds, and reattach the fitting securely by hand. Reopen the tank valve very slowly to equalize internal gas line pressure before attempting the normal ignition sequence again.
Charcoal fires that struggle to stay lit or extinguish prematurely usually suffer from inadequate air circulation or damp fuel storage. Charcoal stored in unsealed bags absorbs ambient atmospheric moisture, which significantly impairs its ability to sustain a stable coal bed. Always clear out compacted gray ash from the bottom kettle bowl before lighting new coals, as blocked intake vents choke the rising fire of necessary oxygen. If your coals begin to cool, opening all vents fully and fanning the embers with a piece of cardboard will rapidly draw fresh air into the fuel bed.
Essential Fire Safety, Grease Control, and Shutdown Protocols
Practicing thorough fire safety ensures that outdoor cooking remains a fun, rewarding backyard pastime for you and your family. Never leave an active grill unattended, especially when children or pets are present in the cooking area. Keep a multi-purpose dry chemical fire extinguisher, an outdoor baking soda container, or a bucket of dry sand within arm’s reach of your cooking station. If a sudden grease fire erupts, never pour water onto the flames, as the liquid causes boiling grease to splatter and spread fire rapidly.
When extinguishing a grease flare-up on a gas cooker, turn all burner knobs off immediately, close the propane tank valve if accessible, and keep the grill hood closed to starve the fire of oxygen. On a charcoal cooker, closing both the bottom intake damper and the top lid vent completely suffocates the fire by cutting off all combustion airflow. Allow the firebox to remain sealed until the metal exterior cools down to ambient outdoor temperatures. Never attempt to move a hot grill or dump warm coals into plastic trash cans or yard waste bins.
Mastering how to start a grill for beginners is fundamentally about developing patient habits and respecting the principles of fuel combustion. By inspecting clearances, selecting clean ignition aids, and regulating airflow steadily, you build a dependable foundation for every future barbecue meal. As you become familiar with how your particular cooker responds to wind and temperature changes, lighting the fire becomes a seamless, natural first step in your cooking routine. Take your time during each startup, verify your flame stability, and enjoy the culinary rewards of outdoor cooking.


Write Your Review
No reviews yet. Be the first to share your experience!