


Struggling to reach a high searing temperature can ruin dinner when you want crisp grill marks on steaks or burgers. Understanding how to make my grill hotter starts with evaluating how fuel and oxygen interact inside your firebox. Gas burners, charcoal briquettes, and wood pellets each require specific operating conditions to generate intense heat. When airflow is choked or gas valves are restricted, surface temperatures drop quickly and leave food baking rather than searing.
Achieving maximum heat output also depends on regular maintenance and proper fuel management across every cookout. Backyard cooks running long sessions often explore accessories like pellet hopper extension setups to maintain continuous fuel delivery without opening lids unnecessarily. Simple habits like inspecting burner tubes for debris, resetting gas regulators, and managing exhaust vents can transform a sluggish cooker into a powerful searing station. Taking time to diagnose underlying heat issues ensures your equipment performs safely and delivers the intense temperatures required for quality barbecue.


Comprehensive Guide to Diagnosing and Increasing Grill Temperatures
Grill cooks often experience the frustration of a firebox that stalls before reaching optimal searing heat. Getting your cooker up to high temperatures requires a balance between adequate oxygen intake, unrestricted fuel delivery, and clean heat retention surfaces. Whether you cook over propane, charcoal briquettes, or hardwood pellets, diagnosing heat issues follows clear mechanical and thermodynamic principles. Identifying the root cause of low heat allows you to restore performance quickly while maintaining safe outdoor operating conditions.
The Core Science of High-Heat Outdoor Grilling
High-temperature grilling relies entirely on the rapid combustion of fuel supported by constant fresh air. When a fire receives plenty of oxygen, combustion efficiency peaks and creates intense radiant energy. Restricting the airflow immediately causes temperatures to plummet, turning a crisp sear into a slow steam. Maintaining clear intake and exhaust pathways ensures your firebox functions as a high-heat convective chamber rather than a stalled oven.
Preheating duration also dictates how hot the cooking surface feels during food placement. Thin grates lose heat rapidly when cold meat hits the metal, causing surface temperatures to dip significantly. Allowing adequate time for thick grates to absorb thermal energy creates sustained contact heat that survives the initial drop. Closing the lid during preheat cycles traps radiant energy inside the hood, bringing grates and internal air up to maximum cooking levels.
Troubleshooting Gas Grills and Regulator Safety Bypass
Propane gas grills frequently fail to reach high temperatures because of a tripped regulator safety bypass. Modern propane regulators feature an internal flow-limiting mechanism designed to prevent massive gas leaks if a hose ruptures. Turning on a burner valve before slowly opening the tank valve triggers this protective valve into bypass mode. When this occurs, the regulator chokes gas volume down to roughly ten percent of normal capacity, locking temperatures under three hundred degrees.
Resetting a tripped propane regulator takes only a couple of minutes and restores full burner pressure. Start by turning off all grill control knobs, followed by closing the propane tank handwheel completely. Disconnect the regulator coupler from the tank valve, inspect the brass threads, and reconnect the fitting tightly by hand. Open the tank valve very slowly over five seconds to allow line pressure to equalize, then light your main burner according to manufacturer instructions.
Low propane volume can also trick backyard chefs into thinking their equipment is broken. Liquid propane loses internal pressure as the cylinder empties, particularly during cooler autumn evenings. Cold ambient temperatures reduce the rate at which liquid propane vaporizes into usable gas, leading to weak flames. Keeping a verified spare tank on hand ensures you never run out of fuel pressure in the middle of a high-heat sear.
Burner Maintenance, Venturi Tubes, and Air Shutter Adjustments
Corroded burner ports and clogged venturi tubes are common mechanical causes of weak gas flames. Small insects like spiders frequently build dense nests inside burner tubes during periods of storage. These obstructions disrupt the air and fuel mixture, starving the flame of necessary oxygen and creating dangerous yellow flare patterns. Removing the burners twice a year and cleaning the internal passages with a flexible venturi brush restores unobstructed gas flow.
Air shutters located at the entry point of the burner control the initial air intake before combustion occurs. An improperly adjusted shutter produces either weak yellow flames that leave soot on cookware or roaring flames that lift away from the burner. Loosening the shutter screw allows you to adjust the opening until the flame burns primarily blue with tiny yellow tips. Proper flame calibration maximizes thermal efficiency, allowing gas units to reach searing thresholds above five hundred degrees.
Adding accessories like smoker boxes for outdoor grills can occasionally redirect radiant heat away from the cooking surface if placed improperly over primary burners. While wood chips deliver exceptional aromatic flavor, bulky metal containers absorb burner output until they reach equilibrium. Position supplemental smoke accessories alongside your main cooking zone rather than directly beneath thin food zones to protect your searing power. This arrangement ensures you achieve rich smoke without sacrificing the direct radiant energy required for crisp caramelization.
Maximizing Charcoal Heat: Fuel Selection and Airflow Control
Charcoal fires produce incredible direct heat when provided with superior fuel and unrestricted ventilation. Natural lump charcoal burns substantially hotter than traditional pressed briquettes because it contains pure carbonized wood without dense binding agents. Briquettes offer longer, steady burn times but generate higher ash volume that can choke lower intake grates. Choosing kiln-fired lump charcoal provides an immediate boost when you need maximum scorching heat for thick steaks.
Airflow dampers act as the mechanical accelerator pedal for any charcoal kettle or ceramic cooker. The bottom intake damper introduces fresh oxygen directly into the bed of burning coals, driving combustion intensity. The top exhaust damper creates a convective draw, pulling hot gases across food before expelling them upward. Keeping both vents fully open delivers the continuous draft required to drive internal grill temperatures past six hundred degrees.
Lighting charcoal inside a metal chimney starter creates a concentrated thermal core faster than lighter fluid or scattered starter cubes. Fill the chimney to the brim with dry lump charcoal, place ignited paper or wax fire starters beneath the wire grate, and wait until top coals develop white ash edges. Dumping fully ignited coals into the firebox creates immediate, intense radiant heat that eliminates prolonged wait times. Working with fully ignited coals also prevents chemical odors from settling onto cooking grates.
Arranging Charcoal Zones and Managing Ash Obstructions
Spreading coals evenly across the entire lower grate diffuses radiant heat and reduces your peak surface temperature. Banking coals tightly into a two-zone configuration concentrates fuel density across half the grill surface. This localized coal bed creates an ultra-high heat searing area directly above the coals while establishing a gentle indirect cooking zone on the opposite side. Concentrated fuel mass radiates far more intense thermal energy than a thin layer of scattered briquettes.
Accumulated ash in the bottom bowl is one of the most neglected culprits behind weak charcoal fires. As briquettes burn down, fine gray ash falls through coal grates and settles over intake vent openings. Even a partial layer of ash chokes intake draft, starving the coal bed of vital oxygen. Emptying the ash catcher before every cooking session guarantees an unhindered draft that keeps fires burning white-hot throughout your cook.
High heat searing is particularly useful for fast cooking dishes like grilled pork skewer recipes where caramelization must happen rapidly without drying out the meat. Thinly sliced marinated meats benefit from quick direct exposure to an intense firebed. Setting up a concentrated coal bed allows sweet marinades to crisp cleanly on the outside while preserving juiciness inside. Once the exterior develops a deep mahogany color, sliding skewers to the indirect zone finishes internal cooking safely.
Pellet Grill Temperature Troubleshooting: Pellets, Firepots, and Sensors
Pellet cookers operate via automated augers and induction fans, making them sensitive to fuel quality and internal cleanliness. Hardwood pellets absorb humidity from the atmosphere quickly if stored in damp garages or unsealed bags. Swollen or moist pellets crumble into dense sawdust, jamming the auger feed tube and reducing burn efficiency inside the firepot. Using dry, fresh hardwood pellets stored in airtight containers ensures clean combustion and steady maximum heat output.
Ash buildup inside the burn pot directly blocks combustion air forced inward by the induction fan. After several hours of low-and-slow cooking, fine pellet ash accumulates around the hot rod igniter and intake perforations. When ash restricts airflow, pellets smolder rather than burning with a fierce, clean flame. Vacuuming the firepot and heat diffuser plate clean before demanding high-heat performance prevents flameouts and thermal stalls.
The resistance temperature detector probe located inside the cooking chamber communicates ambient temperature readings to the digital controller. Over time, grease mist and creosote form a thick insulating coating over this metal sensor pin. An insulated sensor reads chamber heat incorrectly, causing the controller to slow fuel feed rates prematurely. Gently wiping the sensor clean with a soft cloth and mild degreaser ensures accurate internal thermal management.
Cooking Grate Materials and Preheating Best Practices
The material and thickness of your cooking grates determine how effectively heat transfers to food during cooking. Porcelain-coated wire grates have low thermal mass, meaning they cool down instantly when cold food is placed on them. Heavy cast-iron grates and thick stainless steel rods absorb massive amounts of thermal energy, releasing it steadily into your meat. Upgrading to heavier cooking grates provides the searing power required for deep, restaurant-quality crusts.
Allowing adequate preheating time is just as critical as choosing heavy cooking grates. Many cooks open their grill lids too early, attempting to cook before grates reach thermal saturation. A thorough preheat cycle requires ten to fifteen minutes with the lid firmly closed and burners set to maximum. Trapping hot convective air under the hood allows metal grates to match the high ambient temperature of the firebox.
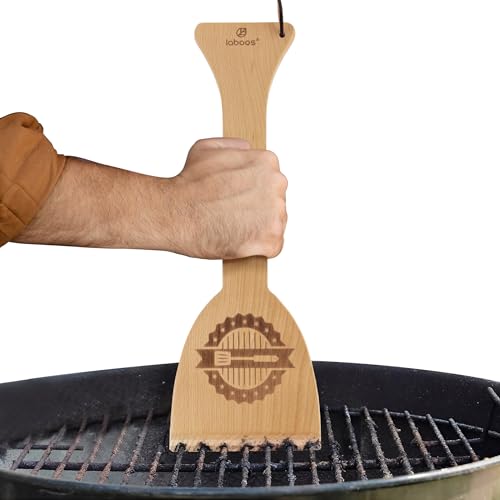
Clean grate surfaces also conduct heat substantially better than grates coated in carbonized grease and food residue. Baked-on carbon acts as a thermal barrier, slowing conductive heat transfer from the metal directly into your food. Scraping grates thoroughly with a stainless steel brush or scraper while the grill is scorching hot cleans away carbon buildup. A clean metal surface ensures immediate direct contact, producing sharp grill marks and preventing sticking.
Critical Safety Rules: Clearances, Flare-ups, and Enclosed Spaces
Pushing outdoor grills to peak temperatures requires strict adherence to fire safety protocols. Never operate any gas, charcoal, or pellet grill inside a garage, breezeway, or enclosed patio under any circumstances. Even operating a grill with the garage door wide open presents severe risks of deadly carbon monoxide accumulation and structural fire. Outdoor fuel-burning appliances must always remain outdoors in open air, positioned safely away from vinyl siding, wooden railings, and overhanging eaves.
High heat significantly increases the risk of sudden grease flare-ups from drippings accumulated in bottom fireboxes. Excess fat liquefies quickly at high temperatures, igniting into uncontrolled blazes that can damage your grill or cause personal injury. Inspect the grease tray, flavorizer bars, and bottom casting regularly, scraping away excess grease deposits before pursuing searing heat. If a grease fire erupts, turn off gas burners, close the grill lid, and never throw water onto the flames.
Protecting yourself during high-heat operation is just as vital as protecting your surrounding patio space. Cooking at extreme temperatures exposes cooks to radiant heat, spitting fats, and flare-ups when lifting heavy grill hoods. Wearing durable clothing like heavy cotton aprons with deep utility pockets keeps you shielded from heat while keeping essential tongs and thermometers close at hand. Sturdy protective gear ensures you remain comfortable and focused while managing intense fires.
Practical Verification: Monitoring Heat and Food Safety Standards
Relying on built-in dome thermometers often provides misleading readings regarding true grate temperatures. Factory lid gauges sit high inside the hood, measuring convective air heat rather than the direct radiant heat at cooking level. Grate-level temperatures can easily run fifty degrees hotter or cooler than the dome gauge suggests, depending on fire placement. Utilizing an infrared surface thermometer or a digital grate probe provides accurate real-time data on surface searing conditions.
High-temperature grilling cooks food rapidly on the exterior, making internal temperature verification essential for food safety. The United States Department of Agriculture provides authoritative temperature targets to ensure meats are safe to consume. Poultry must reach an internal temperature of one hundred sixty-five degrees Fahrenheit, while ground meats require one hundred sixty degrees. Steaks and pork chops should reach at least one hundred forty-five degrees followed by a three-minute resting period.
Never rely on cooking time or surface browning alone as a guarantee of internal doneness. Intense searing heat can char the exterior of a thick chicken breast or pork loin while leaving the center dangerously undercooked. Inserting an instant-read digital meat thermometer into the thickest part of the cut guarantees safe and tender results. Combining proper high-heat searing with accurate temperature verification delivers exceptional barbecue without sacrificing safety.
Achieving searing heat on your outdoor cooker comes down to managing airflow, clearing fuel restrictions, and maintaining clean fireboxes. Routine maintenance such as resetting propane regulators, scraping cooking grates, clearing ash pans, and vacuuming pellet firepots keeps your equipment operating at peak thermal capacity. By understanding how oxygen and fuel interact within your specific grill setup, you can consistently produce the intense temperatures needed for bold searing while keeping your backyard cooking sessions safe and enjoyable.






Write Your Review
No reviews yet. Be the first to share your experience!