


Firing up a high-performance outdoor cooking station requires a quick inspection before turning any control knobs. Built-in gas cooking stations deliver steady heat, but learning how to turn on a bull grill properly protects your equipment and ensures safe burner ignition every single time. Gas valves, piezo igniters, and proper air circulation all work together during this routine startup sequence. Opening the heavy stainless hood completely before sparking any flame prevents dangerous fuel vapor accumulation under the lid.
Many backyard pitmasters integrate these high-output cooking heads into an outdoor BBQ island with backsplash to keep heat safely managed against surrounding patio masonry. Whether your setup runs on liquid propane cylinders or a dedicated natural gas line, verifying your supply valve position is always the first step. Understanding the push-and-turn ignition knob mechanism makes lighting your main burners predictable and reliable. Once you establish the primary flame, balancing zone temperatures across your cooking grates becomes completely straightforward.


Pros
- Heavy-gauge 304 stainless steel resists rust, corrosion, and harsh weather
- Cast stainless burners hold up far longer than standard stamped burners
- Excellent heat output with 75,000 BTUs for rapid preheats and hard searing
- Dual-lined hood provides outstanding heat retention and wind resistance
- Twin internal lights make evening and nighttime cooking effortless
Cons
- Requires a dedicated outdoor kitchen island with precise cutout dimensions
- Heavy drop-in chassis requires at least two people to position safely during installation
- High BTU output burns through 20-pound propane tanks quickly during extended high-heat sessions
The Bull Angus Built-In Grill Head is a commercial-grade 30-inch liquid propane grill engineered specifically for permanent outdoor kitchens and custom patio islands. Designed for backyard entertainers, passionate home pitmasters, and patio cooks who want to move beyond portable carts, this drop-in grill serves as the focal point of a serious outdoor cooking setup.
Heat output is where the Angus excels. Packing 75,000 total BTUs across four proprietary cast stainless steel burners, it produces blistering direct heat that creates genuine steakhouse crusts. The main cooking grates offer 600 square inches of prime grilling real estate, backed by a 210-square-inch warming rack for buns and sides. This generous surface area makes multi-zone grilling simple. You can easily sear burgers and steaks over intense direct heat on one side while gently finishing bone-in chicken thighs or delicate vegetables over indirect heat on the other.
Outdoor durability is backed by heavy-gauge 304 stainless steel construction. Unlike cheap outdoor appliances that show surface rust after a humid summer, the Angus is built to handle rain, wind, and heat cycles year-round. Its seamless, dual-lined roll-top hood retains high internal temperatures efficiently and resists wind chilling, all while shielding the outer hood from high-temperature discoloration. The heavy cast stainless burners are thick and robust, resisting flare-up corrosion and outlasting standard thin-gauge burner tubes by a wide margin.
Daily usability on the patio is thoughtfully addressed. Twin interior halogen lights illuminate the grates completely, letting you check meat doneness after sunset without balancing a flashlight. Flame ignition is fully mechanical thanks to dedicated piezo igniters on each valve, eliminating the frustration of dead spark batteries. A full-width drip tray catches food drippings effectively, sliding out smoothly for hassle-free grease management between weekend cooks.
Because this is a dedicated drop-in unit, it does require a properly vented, non-combustible island structure and careful planning for gas connections. It is a substantial, heavy grill that requires two people to set into place. For outdoor cooking enthusiasts who want exceptional searing performance, rock-solid steel components, and the cooking capacity to feed a crowd, the Bull Angus delivers lasting value for any custom backyard retreat.
Cooking on the Bull Angus delivers the kind of power that serious patio cooks look for. Each of the four cast stainless burners pumps out 15,000 BTUs, heating up the thick stainless steel cooking grates in just minutes. Searing thick ribeyes, skirt steaks, and chops happens quickly, locking in juices with defined grill marks instead of graying the meat.
Low-temperature control is equally impressive. By turning off the two center burners and dialing back the outer burners, the heavy dual-walled hood maintains steady convection heat around 250 to 300 degrees. This makes it easy to roast whole chickens, pork loins, or ribs with gentle, indirect heat without scorching the bottom.
Maintaining the Bull Angus is straightforward thanks to its 304 stainless steel components. The heavy-gauge cooking grates can be cleaned immediately after a cook with a sturdy stainless steel brush while the grates are still hot. High heat burns off most marinades and fats, leaving minimal residue.
Grease management is handled by a wide, slide-out drip pan located directly beneath the burners. Lining this tray with foil or absorbent grill pads makes cleanup simple and helps prevent flare-ups during greasy cooks like bacon or fatty burgers. An occasional wipe-down of the exterior with stainless steel polish keeps the brushed finish looking clean and protects it against outdoor elements.

Operating Your Bull Grill: Ignition, Safety, and Heat Management
Lighting a gas grill correctly protects your equipment and guarantees a steady, reliable flame for your cookout. Whether you operate a freestanding cart or a built-in outdoor cooking island, the ignition sequence relies on an orderly flow of gas and a crisp electrical or mechanical spark. Mastering this process prevents common frustrations like delayed ignition, low flame output, or unburned gas collection. Following established safety protocols keeps the entire cooking area secure from the moment you turn the fuel valve.
Pre-Ignition Safety Checks and Hood Positioning
Opening the grill hood completely is the single most critical safety rule before attempting ignition. Leaving the lid closed traps propane or natural gas under the dome if the burners fail to catch immediately. A sudden spark after fuel accumulates can create a severe fireball that risks personal injury and equipment damage. Always lift the roll-top hood fully back and confirm it rests securely in its open position before touching any fuel valves.
A thorough visual inspection of the gas supply line should precede every cooking session. Flexible rubber hoses on propane setups must remain free of sharp kinks, cracks, and signs of rodent chewing. If you recently connected a fresh propane cylinder, check the threaded fitting to ensure it sits tightly against the tank valve collar. Applying a simple mixture of soapy water around connection points quickly reveals leaks through expanding soap bubbles.
Critical Safety Rules for Outdoor Grill Placement
Outdoor fuel-burning grills must never operate inside a garage, breezeway, carport, or enclosed patio space. Gas burners consume ambient oxygen and release odorless, colorless carbon monoxide as a combustion byproduct. In enclosed or partially covered structures, toxic carbon monoxide reaches life-threatening concentrations in a matter of minutes. No open garage door, window opening, or floor fan provides adequate natural airflow to dilute these hazardous combustion fumes safely.
Structural fire risks also escalate dramatically when operating high-output cooking equipment under ceilings or near exterior walls. Intense radiant heat can ignite overhead wooden rafters, drywall paper, or stored household chemicals before a cook notices scorching. Always maintain generous outdoor clearance from vinyl siding, overhanging tree branches, and wooden deck railings. Placing your cooking equipment in a well-ventilated outdoor setting protects your home and complies with local fire safety codes.
Step-by-Step Procedure for Piezo Burner Ignition
Lighting a modern gas cooking unit begins at the primary fuel supply source. For liquid propane setups, slowly turn the top handwheel on the propane tank counterclockwise until it opens completely. Opening the tank handwheel too rapidly can trigger the safety excess-flow valve inside the regulator, severely restricting fuel volume. For natural gas installations, rotate the inline shutoff handle parallel to the pipe to allow unrestricted gas delivery to the manifold.
Locate the primary control knob, which is typically the far-left burner on your control panel. Push the zinc control knob inward firmly and rotate it counterclockwise toward the high ignition position. As you turn the knob past the resistance point, the integrated piezo igniter generates an audible snap that delivers a focused mechanical spark directly at the burner tip. The dedicated gas jet ignites against the spark, establishing a stable blue flame along the length of the burner tube.
Hold the knob inward for two to three seconds after ignition to allow the flame to stabilize across all burner ports. Visually inspect the cooking grates to confirm the flame has established itself across the cast stainless burner before releasing inward pressure. Once the first burner burns steadily, repeat the push-and-turn process for adjacent burners from left to right. Staggering your burner ignition ensures uniform cross-lighting and prevents unburned fuel from drifting across unlit cooking zones.
Manual Match Lighting Procedures for Flame Outages
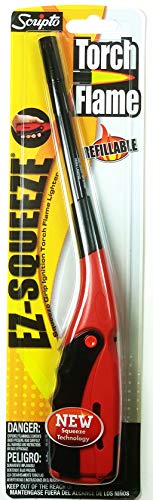
Piezo igniters occasionally fail to produce an adequate spark due to moisture accumulation, electrical wire corrosion, or misaligned electrode tips. When mechanical sparkers fail, manual match lighting provides a safe, dependable alternative to start your cookout. Keep the grill hood wide open and ensure all control knobs remain in the off position before handling an open flame. Prepare a long wooden fireplace match or place a standard paper match into the specialized wire extension clip provided with your unit.
Light the match and guide the extended flame down through the cooking grates directly beside the primary burner ports. Push and turn the corresponding burner knob to the high setting while holding the match steadily near the gas openings. The escaping fuel should catch the match flame immediately, producing a steady flame line across the burner surface. If ignition does not occur within five seconds, turn the knob off, step away, and wait at least five minutes for accumulated gas to dissipate completely.
Diagnosing Low Flame and Regulator Safety Lockouts
A weak, yellow flame that struggles to heat the firebox above three hundred degrees usually points to a tripped excess-flow valve. Modern propane regulators feature a spring-loaded brass surge mechanism designed to choke fuel delivery if it senses a severed hose or open valve. Opening the tank handwheel while a burner knob is cracked open trips this safety shutoff instantly. Resetting the regulator requires a specific shutdown sequence to re-equalize internal line pressures.
To reset your regulator, turn all grill control knobs to the off position and shut the propane tank handwheel tightly. Disconnect the black plastic coupling nut from the propane tank valve to release all residual pressure from the regulator body. Wait two full minutes before threading the coupler back onto the tank fitting, ensuring a hand-tight, square connection. Open the tank valve very slowly over several seconds, allowing gas to pressurize the line gradually before attempting to light the burners again.
Dirty venturi tubes also restrict proper air-and-gas blending, leading to irregular burner performance and persistent yellow tips. Spiders and small outdoor insects frequently construct webs inside the narrow air shutters during storage periods. These internal blockages starve the burner of necessary oxygen, creating lazy flames and potential flash-back fires behind the control panel. Periodic inspection of burner venturi openings with a flexible brush clears debris and restores clean, efficient blue combustion.
Preheating and Zone Temperature Management
Proper preheating stabilizes internal firebox temperatures and sterilizes cooking grates before food touches the metal. After confirming all desired burners are lit, lower the dual-lined stainless hood and let the grill run on high heat for ten to fifteen minutes. The internal hood thermometer should rise steadily toward five hundred degrees during this initial preheat stage. High heat carbonizes residual grease deposits from prior cooks, making them easy to brush away with a brass or stainless grate scraper.
The Bull Outdoor Products Angus 75,000 BTU Built-In grill head highlights the advantages of substantial heating power and burner independence. Built from heavy fourteen-gauge 304 stainless steel, this model features four cast stainless burners delivering fifteen thousand BTUs each, alongside an integrated warming rack. Managing four distinct control knobs gives cooks total flexibility over eight hundred and ten square inches of total cooking area. Creating distinct temperature zones lets you sear steaks over high heat while gently roasting delicate vegetables over indirect heat.
Establishing an indirect cooking zone requires turning off one or two central burners while keeping outside burners running at medium heat. Food placed directly over unlit burners cooks through circulating convection air beneath the closed roll-top hood rather than harsh direct contact. This configuration prevents flare-ups on thick cuts of meat and accommodates slow-cooking poultry without scorching exterior rubs. Adjusting outer burner dials allows fine control over internal ambient temperatures throughout longer barbecue sessions.
Expanding Cooking Versatility with Specialized Inserts
Switching cooking formats on a premium gas grill expands the range of recipes you can prepare outdoors. The Bull Stainless Steel Pro Grill Griddle (97020) slides directly into place after removing two standard cooking grate sections. Fabricated from solid 304 stainless steel with a full-sized grease trough, this flat-top surface handles delicate breakfast fare like pancakes, eggs, and smash burgers. When lighting the burners beneath a solid griddle plate, maintain medium heat settings to allow even heat spread across the chromium-plated metal.
Managing heat under solid steel requires moderate burner settings because the thick plate retains thermal energy efficiently. Cooking on a flat surface also calls for organized prep, making a nearby rolling barbecue prep table invaluable for keeping spatulas, squeeze bottles, and seasonings within arm reach. Moving between direct grate grilling and griddle searing transforms your backyard setup into a complete multi-course kitchen. Always scrape excess oil directly into the front grease trough to maintain clean cooking surfaces throughout meal prep.
Slow roasting whole roasts or chickens offers another rewarding way to utilize your outdoor cooking space. Pairing your grill with an electric rotisserie kit allows self-basting rotation above gentle burner heat for exceptionally juicy meats. A rotisserie attachment keeps meats turning steadily while the dual-lined hood maintains consistent internal convection heat. Positioning a stainless drip pan beneath the turning spit catches flavorful drippings while shielding the cast burners from flare-up flare-overs.
Island Integration, Clean Finishes, and Framing
Built-in outdoor kitchens demand clean installation lines and precise component fits to protect surrounding masonry structures. Accessories like the Bull Outdoor Products 69429 Steer Premium Grill finishing frame with reveal provide a polished, professional border around your island cutout. Constructed from matching stainless steel, this specialized frame bridges the gap between stone, stucco, or tile counters and your cooking appliance. The decorative reveal adds modern design appeal while preventing food debris and moisture from settling into internal cabinet recesses.
A properly installed finishing trim also ensures consistent airflow clearances around the base of the grill head. Built-in gas appliances require steady air intake beneath the control panel to support complete gas combustion and prevent manifold overheating. Selecting manufacturer-designed finishing frames guarantees that ventilation gaps remain unobstructed during intense high-heat cooking sessions. Integrating matched stainless components elevates the aesthetic appearance and structural reliability of custom backyard islands.
Safe Shutdown Protocols and Routine Maintenance
Shutting down your outdoor grill properly is just as vital as following safe ignition protocols. When you complete your cooking session, turn all burner control knobs firmly clockwise to the off position. Next, immediately close the propane tank handwheel or turn the inline natural gas valve perpendicular to the gas pipe. Closing the fuel supply prevents lingering line pressure from stressing internal fittings while the grill sits idle between barbecue meals.
Perform a quick high-heat cleanout while the firebox remains warm by brushing the cooking grates with a stainless wire brush. Slide out the primary grease tray beneath the firebox every few cooks to remove accumulated fats, drippings, and food scrapings. Heavy grease buildup in the bottom collection pan represents a significant flash fire hazard if ignored during prolonged high-temperature searing. Keeping the catch basin clean and storing your grill under a protective weather cover preserves burner efficiency and guarantees smooth ignition next time you cook.



Write Your Review
No reviews yet. Be the first to share your experience!