


Setting up an outdoor electric cooking station requires understanding power requirements, preheating cycles, and clean grate preparation. Learning how to start an electric grill provides a straightforward way to cook without handling flammable fuels or waiting on open flames. Placing the cooking unit on a stable surface like a sturdy rolling bbq prep table keeps cords organized and provides dedicated space for tongs and platters. Understanding the basic steps ensures consistent heating and prevents frustrating temperature drops before food hits the grate.
Electric outdoor cookers rely on direct heating elements rather than combustible briquettes or propane burners, making control knobs and steady voltage essential for good results. While classic electric barbecues draw power through integrated heating elements, many backyard cooks also use electric starters and arc tools to ignite solid fuels cleanly. Exploring the startup routine helps eliminate common electrical mistakes, such as overloading outdoor circuits or skipping the necessary lid-down warm-up period. A clean heating element and proper dial management make the entire cooking session run smoothly from the first turn of the dial.



Master Guide: How to Start and Operate an Electric Grill Safely
Starting an electric grill requires methodical steps to establish a safe electrical connection, calibrate the thermostat, and reach an optimal cooking temperature. Whether you are using a dedicated electric patio grill or utilizing specialized electric heating elements to ignite solid fuel beds, the fundamentals center on power integrity and clean contact surfaces. Following the correct sequence prevents electrical tripping, reduces warm-up delays, and ensures consistent heat output across the grate.
Pre-Start Inspection and Electrical Setup
Safe operation begins with examining the physical condition of the power cord, heating element, and electrical outlet. Cooks should inspect the entire length of the heavy-duty cord for cracks, frayed insulation, or bent plug prongs before connecting to power. Outdoor outlets must feature ground-fault circuit interrupter (GFCI) protection to protect against moisture-related electrical faults. Plugging directly into a dedicated outdoor wall receptacle provides the safest and most reliable power supply for high-wattage heating coils.
Extension cords introduce voltage drop and potential overheating hazards when paired with high-draw cooking appliances. If an extension cord becomes unavoidable, select an outdoor-rated, heavy-gauge cable that matches or exceeds the grill manufacturer’s amp rating. Keep all cord connections elevated away from puddles, lawn sprinklers, or damp deck boards to prevent circuit trips. Establishing a secure, dry perimeter around your electrical connection ensures uninterrupted power throughout the entire preheat cycle.
Inspect the internal heating element and grease management components prior to flipping the power switch. The removable drip tray or grease pan should be clean and lined with fresh foil or disposable liners to avoid grease flare-ups. A dirty heating element coated in old carbon residues radiates heat unevenly and produces harsh white smoke during initial warmup. Lightly brushing away dry ash and debris from the element protects the metal sheathing and promotes clean, efficient heat radiation.
Step-by-Step Procedure for Powering On and Preheating
Beginning the startup procedure requires setting the temperature controller to the off position before inserting the plug into the wall outlet. Once firmly plugged into the GFCI outlet, rotate the temperature dial to the preheat or high setting to activate the heating element. Most electric grills feature an indicator light that illuminates to confirm that current is flowing into the coil. Watching for this visual cue helps you verify that the electrical circuit has engaged without popping the breaker.
Closing the grill lid immediately after turning on the dial allows trapped convective heat to warm both the grates and the cookbox walls. Electric grills rely heavily on radiant and convective heat retention because they lack the intense direct thermal mass of live coal beds. Grates generally require fifteen to twenty minutes of steady heating with the lid closed to reach adequate searing temperatures. Leaving the lid open during warmup prolongs the process significantly and prevents the metal grates from storing enough heat to sear meat properly.
Checking the grates with an infrared thermometer or observing water droplet behavior can verify surface heat before placing ingredients. Water dropped onto a fully heated electric grate will vaporize instantly and dance across the metal bars rather than merely sizzle and sit. Preparing skewers or side dishes during this twenty-minute warmup window ensures you are ready to cook the moment the indicator light cycles off. Once the thermostat light turns off, the grill has reached its set preheat target and will begin cycling power to maintain temperature.
Dial Management and Heat Zone Regulation
Controlling cooking temperatures on an electric grill requires understanding how the internal thermostat cycles power to the heating element. Unlike gas burners that provide an unyielding flame, electric elements pulse on and off to maintain the dial’s target setting. High settings keep the element energized continuously for hard searing, while medium settings allow the element to pulse periodically for gentle roasting. Setting the dial slightly higher than your target cooking temperature can compensate for rapid heat loss when cooking on chilly or windy days.
Creating dual-temperature zones on an electric grill often requires physical zone management or indirect heat barriers. Models with single U-shaped or serpentine elements heat the entire interior, making the center significantly hotter than the perimeter. Moving delicate items toward the outer edges provides a cooler holding zone while denser cuts sear directly over the glowing coils. Some cooks place an elevated warming rack or an accessory like an electric bbq rotisserie kit to cook larger roasts slowly without burning the exterior.
Opening the grill lid frequently causes immediate thermal drop because electric heating elements take several minutes to recover lost heat. Every time the lid lifts, ambient air floods the cooking chamber and cools both the grates and the internal air thermometer. Keeping the lid closed as much as possible traps natural moisture, retains internal heat, and speeds up overall cooking cycles. Plan food flips deliberately to minimize the amount of time the cooking chamber remains exposed to open air.
Cooking Techniques for Electric Grates
Preparing food for an electric cooking surface involves light oiling of the food rather than saturating the bare grates with cooking spray. Applying a high-smoke-point oil directly to steaks, chops, or vegetables prevents sticking without triggering excess smoke from the heating coil below. Delicate proteins like fish fillets or skin-on chicken benefit from pre-heated, seasoned cast-iron or stainless steel grates that offer clean release. Lightly patting meats dry with paper towels prior to seasoning creates better surface contact and encourages distinct sear marks.
Managing flare-ups on an electric grill requires a different mindset than dealing with open wood or charcoal flames. Dripping fat hitting an electric heating element vaporizes quickly and creates bursts of smoke, but liquid grease collecting in the drip pan poses a genuine hazard. Emptying the catch tray before every session prevents pooled fat from reaching its ignition point during high-heat cooking. If a grease flare-up occurs on the coil, immediately close the lid and turn the temperature controller to off to smother the flame.
Applying flavorful sauces and marinades should be timed carefully toward the final minutes of cooking to avoid scorched sugars. Sugary glazes applied too early stick tenaciously to electric elements and grates, creating stubborn carbon build-up that is tedious to clean. Cooking a batch of poultry using a flavorful bbq wings recipe demonstrates how dry seasonings cook best over moderate heat before tossing wings in sauce near completion. Using an instant-read meat thermometer remains the safest and most reliable way to verify doneness rather than relying solely on visual exterior color.
Using Electric Charcoal Starters and Fire-Lighting Tools
Many outdoor cooks transition between pure electric grilling and using electric ignition tools to fire up solid-fuel barbecues without chemical fuels. Products like the Electric Charcoal Starter,ASNAMA 800W Grill utilize an 800-watt heating coil made of 304 stainless steel to ignite briquettes cleanly. The manufacturer specifies that this three-ring element sits directly inside the charcoal pile and requires six to eight minutes of plug-in time to establish glowing embers. Its 4.6-foot cable gives cooks flexibility around outdoor outlets while eliminating petroleum odors on food.
Another capable solid-fuel ignition option is the Stanbroil 600W Electric Charcoal Starter for Grill, which features a 600-watt element built for standard 110-volt outlets. Product details note that its wide heating surface ignites charcoal across deep or shallow grills in eight to ten minutes. A long extended handle keeps hands away from high temperatures, while an integrated metal plate attaches securely to the grill edge for hands-free ignition. Once lit, the manufacturer warns to remove the heating element and allow it to cool on a non-flammable surface away from children.
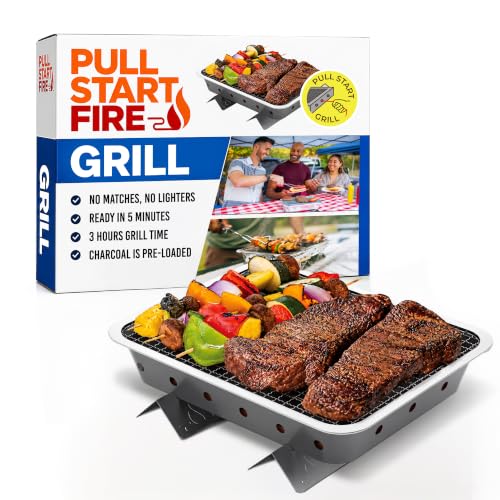
Portable ignition tools also include flameless plasma designs, such as the Electric Arc Grill Lighter USB Rechargeable from Sirius Survival. This tool utilizes windproof electric arc technology with a flexible 360-degree neck to reach fire starters or kindling at awkward angles. For quick portable setups without electrical outlets, instant options like the Pull Start Fire Grill, Natural Hardwood Charcoal provide a self-contained hardwood brick that ignites with a single pull string. These varied tools highlight how modern electric power simplifies startup routines across electric, hybrid, and traditional charcoal cookers.
Critical Placement and Setting Restrictions
Operating any outdoor grill requires strict adherence to fire safety protocols and clear spatial boundaries away from combustible materials. Barbecue grills, regardless of their fuel source, must never be used inside a home, enclosed garage, covered breezeway, or screened patio. Charcoal and gas grills release lethal carbon monoxide gas, an odorless hazard that accumulates rapidly even if an overhead garage door is propped open. Outdoor electric grills also generate intense radiant heat and smoke that create serious indoor fire hazards and respiratory irritants in unventilated spaces.
Always maintain a minimum clearance of ten feet from exterior walls, wooden siding, deck railings, and low-hanging tree branches when grilling outside. Place the grill on an even, level, non-combustible surface such as concrete, pavers, or an approved outdoor grill pad. Verify that apartment or condominium regulations permit outdoor electric barbecues on balconies before setting up your equipment. Never leave an energized electric cooker unattended, especially in households with active pets or small children running nearby.
Weather conditions also dictate whether electric grilling is safe to conduct on an open patio. Because electric cookers rely on line voltage, operating them during rainstorms, sleet, or heavy mist introduces serious shock risks. Always position the grill where rain cannot blow directly onto the electrical connections or thermostat housing. If wet weather rolls in unexpectedly during a cooking session, unplug the main power cord from the wall outlet before moving food or covering the grill.
Diagnostic Steps for Common Startup Glitches
Troubleshooting an electric grill that fails to heat up starts with inspecting the GFCI receptacle on the wall. Outdoor electrical outlets trip easily when exposed to morning dew or when shared with high-draw landscape lighting or pool pumps. Press the reset button on the GFCI receptacle firmly until it clicks, and ensure the circuit breaker in your electrical panel has not tripped. If the breaker trips repeatedly upon turning on the grill dial, the circuit may be overloaded or the heating element may have an internal short.
Inspect the physical connection between the removable thermostat controller and the grill base. Most portable electric grills feature a probe controller that must slide completely into the heating element terminals to establish contact. If the probe is loose or seated crookedly, the heating element will not receive consistent voltage from the outlet. Unplug the unit, remove the controller, wipe the metal terminals clean with a dry cloth, and reseat the probe firmly into the socket.
Slow preheating or inadequate grate temperatures often indicate low voltage caused by an excessively long or thin extension cord. Undersized cords drop voltage significantly under heavy electrical loads, starving the heating element of the wattage needed to glow red. Testing the grill by plugging directly into an outlet without an extension cord will quickly confirm if line drop is causing sluggish performance. If the element remains cold despite verified power, the heating element itself may have reached the end of its functional service life.
Safe Post-Cook Shutdown and Cleaning Routine
Shutting down an electric grill properly is just as important as the startup procedure for preserving heating element longevity. Turn the temperature control dial completely to the off position, wait a moment, and then disconnect the power plug from the wall. Allow the grill grates and heating element to cool down completely before attempting any deep cleaning or handling of internal components. Pouring water over hot electric elements or grates to accelerate cooling can crack ceramic insulators, warp metals, and destroy electrical connections.
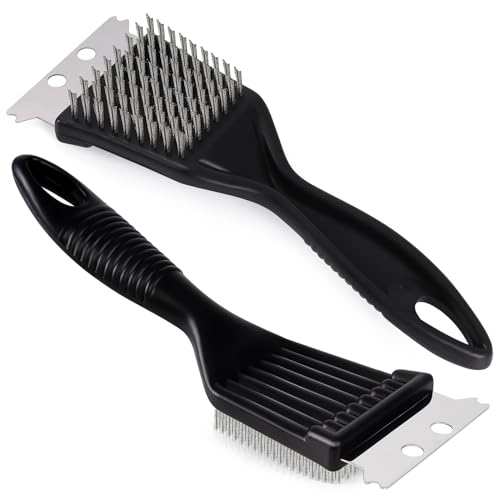
Cleaning the grates while they retain slight residual warmth makes removing baked-on grease much easier with a nylon or brass bristle brush. Avoid harsh chemical oven cleaners or abrasive steel wool on non-stick or coated electric grill grates, as these degrade protective finishes. Wipe down the reflective interior bowl and grease channel with warm, soapy water and a soft microfiber sponge after every couple of cooks. Keeping the interior reflective bowl shiny allows it to bounce radiant heat back upward toward your food efficiently during future sessions.
Storing an electric grill demands total protection from moisture, rust, and outdoor rodent activity between uses. Once the grill has cooled to ambient temperature, remove the digital or analog temperature probe and store it indoors in a dry drawer. Place a fitted, weather-resistant cover over the entire grill assembly to shield metal surfaces from morning condensation and sun damage. Storing the grill in a clean, dry shed or sheltered outdoor cabinet keeps electrical components dry and ready for your next barbecue.





Write Your Review
No reviews yet. Be the first to share your experience!