
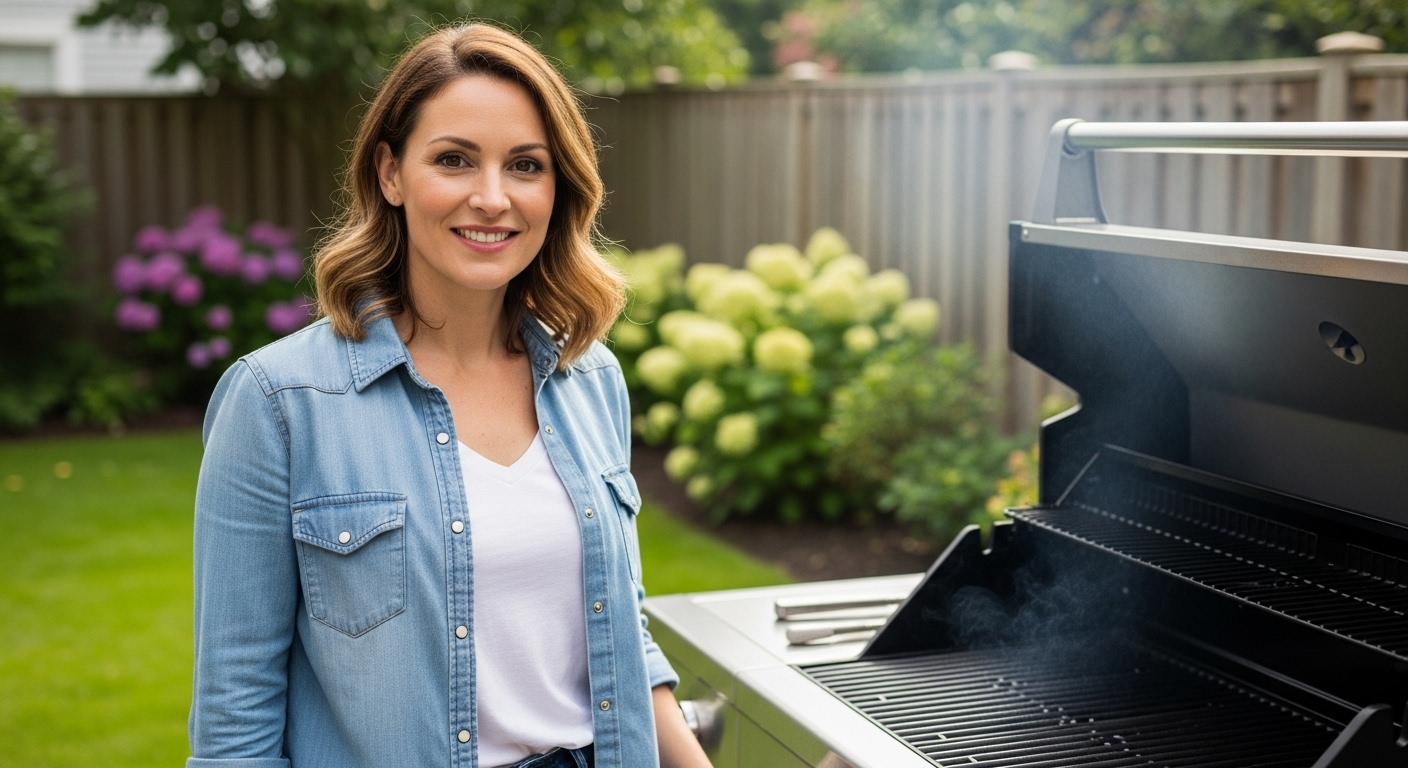

Starting your outdoor cooking journey can feel intimidating when you look at an unfamiliar cooker sitting on your patio. Whether you just brought home a brand new gas cart or a classic charcoal kettle, understanding how to use a grill for the first time requires learning basic fire management, burner ignition, and surface preparation. Proper airflow control and deliberate preheating prevent stubborn sticking while keeping your initial cookout completely safe. Setting up an organized outdoor workspace with a sturdy rolling BBQ prep table keeps raw meats, clean platters, and heat-resistant tongs within arm’s reach before you light the fire.
Every rookie griller faces common hurdles like flare-ups, scorched burger patties, and unpredictable temperatures during their first session. You can easily sidestep these beginner mistakes by establishing distinct direct and indirect cooking zones and letting the grates burn off any factory oils before placing ingredients down. Taking a calm, methodical approach turns an intimidating appliance into an enjoyable backyard fixture that reliably feeds family and friends. This comprehensive guide walks you through every essential step from safe placement and initial burn-off to post-cooking cleanup, giving you the practical foundation needed for flavorful outdoor meals.

Pros
- Super convenient setup and no cleanup required
- Lightweight and easy to carry anywhere
- Heats up quickly with even cooking performance
- Great for small gatherings or solo grilling
Cons
- Single-use only, so not suitable for regular backyard cooking
- Limited cooking space – best for 2-4 burgers or a few skewers
- Charcoal burns for about 1 hour, so longer cooks aren't possible
If you've ever found yourself craving a grilled burger at a campsite or tailgate but didn't want to haul a full-size charcoal grill, the Oppenheimer USA Disposable Charcoal Grill is exactly what you need. This is a lightweight, portable, single-use grill that comes pre-loaded with easy-light charcoal – just remove the wrapper, light the corners, and you're ready to cook in minutes. It's designed for outdoor enthusiasts who value convenience above all else.
This grill is best suited for campers, tailgaters, RV owners, and anyone who enjoys spontaneous outdoor cooking without the hassle of cleanup. It's also a solid pick for beach days, park picnics, or even emergency cooking during power outages. The 9x13 inch cooking grate gives you enough space for a few burgers, hot dogs, or skewers – perfect for 2-4 people. Just don't expect to smoke a brisket or feed a crowd.
In terms of real-world cooking performance, the easy-light charcoal lights quickly and reaches a decent grilling temperature within 10-15 minutes. The heat distribution is fairly even across the grate, though you might notice slightly cooler spots near the edges. Searing is possible for thin cuts like burgers and chicken thighs, but you won't get the same crust as a heavy cast-iron grate. Smoke flavor is present but mild – it's enough to satisfy a casual griller but not a BBQ purist. The fuel burns for about an hour, which is fine for quick grilling sessions but not low-and-slow cooking.
Build quality is what you'd expect from a disposable product – sturdy enough to hold up during cooking, but not meant for long-term use. The aluminum tray feels solid, and the wire grate supports food without sagging. There are no wheels, folding legs, or weather-resistant features because this grill is designed to be used and tossed. Portability is its strong suit: at 3.5 pounds and dimensions of 9x13x2 inches, it slips into a backpack or car trunk easily.
Setup is incredibly simple – no tools, no assembly, no charcoal to pour. Just remove the plastic wrap, place the grill on a non-flammable surface, and light the corners through the designated ignition strips. Cleanup is even easier: once the charcoal has cooled completely, you can dispose of the entire grill. Just make sure to follow local disposal guidelines for charcoal and ash. The biggest limitation is that it's single-use, so if you grill often, the cost adds up compared to a reusable portable grill.
Overall, the Oppenheimer USA Disposable Charcoal Grill is a fantastic solution for outdoor cooks who prioritize convenience and portability. It's not meant to replace your backyard kettle grill, but it's a lifesaver for camping, tailgating, or any on-the-go cooking scenario. If you're looking for a no-mess, no-fuss way to enjoy grilled food anywhere, this pack of two is a smart buy.
At just 3.5 pounds and 9x13x2 inches, this grill is incredibly easy to transport. It fits in a backpack, car trunk, or even a large tote bag. No need to worry about charcoal bags or lighter fluid – everything is built in. The lightweight design makes it a top choice for hikers, campers, and tailgaters who want to travel light.
This grill shines in scenarios where convenience and portability matter most. Use it for camping trips, tailgate parties, beach outings, park picnics, or even as a backup grill during power outages. It's also great for small gatherings where you only need to cook a few items. Not ideal for large BBQs or smoking.


Pros
- Comprehensive coverage of all grilling methods from direct heat to smoking
- Clear illustrations make complex techniques easy to understand and apply
- Digital format means instant access on any device - no waiting for shipping
- Written by a trusted barbecue authority with decades of hands-on experience
Cons
- Requires practice to truly master the techniques - it's not a plug-and-play tool
- No physical copy for those who prefer to flip through a printed book while cooking
- Some advanced techniques assume access to specific equipment not covered in the book
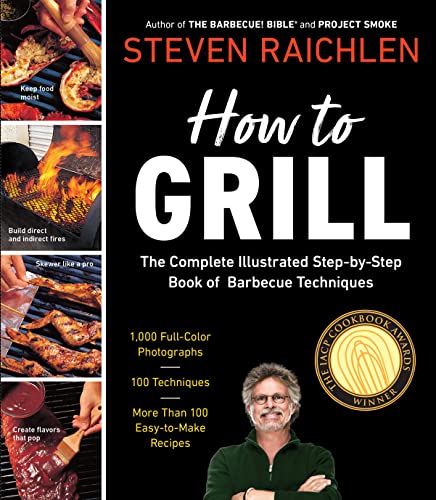
Steven Raichlen's How to Grill is more than just a cookbook - it's a complete illustrated course in outdoor cooking. Designed for backyard grillers, BBQ enthusiasts, campers, tailgaters, RV owners, and patio cooks, this digital guide covers everything from lighting a charcoal chimney to smoking a whole pork shoulder. If you've ever wanted to understand why your burgers char unevenly or how to get that perfect smoke ring, this book is your starting point.
The real strength of this guide lies in its emphasis on technique over recipes. You'll learn how to manage heat consistency for searing steaks, control temperature for low-and-slow smoking, and even how to adjust your grill for different fuel types. The step-by-step illustrations break down complex processes like indirect grilling and charcoal banking, making them accessible even for beginners. Whether you're fast-grilling burgers for a crowd or babysitting a brisket all afternoon, the methods here help you achieve better results with less wasted fuel.
Since it's a Kindle eBook, the portability factor is outstanding. You can pull it up on your phone while tailgating, reference it on a tablet at the campsite, or read it on your laptop before a backyard party. The knowledge inside is far more valuable than any single piece of gear - it teaches you how to get the most out whatever grill you own, whether it's a propane gas grill, a charcoal kettle, or a pellet smoker. For those who enjoy learning on the go, the digital format is a huge plus.
Setup and cleanup are non-issues here - you simply download the file and start reading. But like any skill-based resource, the real work happens when you step away from the book and fire up your grill. Some techniques require practice to get right, and a few assume you have specialized tools like a rib rack or a fish basket. That said, the lessons on grease management, flare-up control, and airflow are universally applicable and will improve any outdoor cook's confidence immediately.
If you're serious about improving your barbecue game, this book is a smart investment. It's not a gadget that will do the work for you, but it will teach you principles that last a lifetime. Pair it with your favorite grill and some good meat, and you'll be cooking like a pro in no time.

A Practical Guide to Your First Outdoor Grilling Session
Stepping up to a new cooker for the first time is an exciting milestone for any backyard cook. Taking the time to understand your equipment, prepare the cooking grates, and master temperature control ensures that your very first meal turns out delicious rather than charred. Grilling combines radiant heat, conduction, and convection, which cooks food much faster than a standard kitchen oven. Once you master the fundamentals of fuel safety, heat zones, and grate preparation, outdoor cooking quickly becomes a relaxing and reliable craft.
Safe Grill Placement and Patio Clearances
Positioning your cooker safely outdoors is the critical first step before opening a fuel valve or striking a match. Always set the grill on a flat, stable, non-flammable surface such as concrete, paving stones, or bare earth. Keep a perimeter of at least ten feet between the grill and any house siding, wooden railings, low tree branches, or eaves. Never operate any fuel-burning grill inside a garage, breezeway, shed, or enclosed patio, even if the garage doors are fully open. Burning charcoal, propane, natural gas, or pellets produces odorless carbon monoxide gas, which gathers rapidly in semi-enclosed spaces and creates deadly poisoning and fire hazards.
Wind direction is another key environmental factor beginners should assess before lighting the fire. Orient the grill so prevailing breezes do not drive smoke directly toward open house windows or patio seating. Strong gusts can also destabilize gas burner flames or blow heat against front control knobs, making them dangerously hot to touch. Keeping a multi-purpose fire extinguisher nearby provides valuable protection while you get accustomed to your new equipment. Establishing this clear perimeter ensures a secure cooking area for you and your guests.
The Initial Burn-Off: Removing Factory Residues
Brand new grills leave manufacturing facilities coated with thin protective oils, packing lubricants, and finish residues. Placing fresh food directly onto these factory surfaces can impart bitter chemical odors and spoil your first meal. Performing an initial dry burn-off vaporizes these production residues and cures internal high-heat coatings before any food touches the grates. This essential curing cycle also eliminates lingering packaging dust from burner shields, flavorizer bars, and the inner lid.
To cure a gas grill, open the lid, ignite all main burners, set them to high heat, and close the lid. Let the cooking chamber heat between four hundred and fifty and five hundred degrees Fahrenheit for twenty to thirty minutes until all visible smoke and solvent scents vanish. If you are curing a charcoal kettle, fill a chimney starter completely with coals, spread the lit coals across the grate, and let them burn hot with all dampers open for half an hour. Once the grill cools down to a moderate warmth, scrub the grates with a bristle-free brush and wipe them with a light coat of high-smoke-point cooking oil.
Lighting Gas, Charcoal, and Portable Cookers Safely
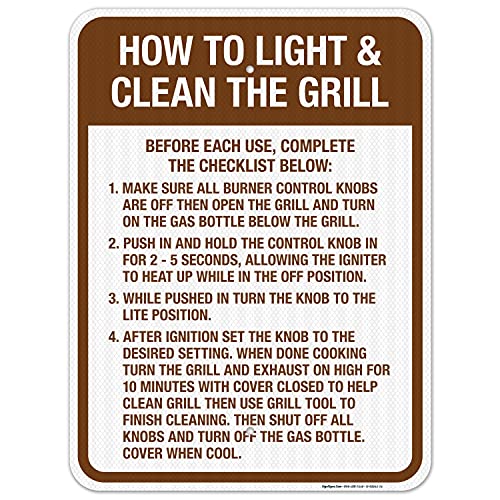
Lighting a grill requires a consistent sequence to maintain complete control over the flame. When lighting a propane or natural gas model, always open the lid completely before turning the fuel knob or pushing the igniter. Closing the lid while lighting traps expanding gas vapors inside the chamber, creating a severe flash fire hazard if the ignition hesitates. Turn on the fuel cylinder valve slowly, switch the primary burner knob to high, and engage the igniter switch immediately.
If the gas burner fails to catch within five seconds, turn the control knob off immediately. Leave the lid wide open and wait five full minutes for accumulated gas to vent into the open air before trying again. Charcoal grills require a chimney starter rather than smelly lighter fluids, which leave harsh petroleum notes on food. Stuff two sheets of crumpled paper beneath the chimney, load the top cylinder with briquettes or lump charcoal, and let the coals burn until an even layer of gray ash coats them.
For small day trips or beach cookouts, portable units like the Oppenheimer USA Disposable Charcoal Grill offer an all-in-one format with self-contained charcoal briquettes. Even with disposable trays, you must wait for the briquettes to ash over completely before setting food across the wire cooking surface. Rushing raw food over dark, actively smoking charcoal coats ingredients in bitter soot and causes uneven heat. Allowing coals to establish a steady glow ensures reliable radiant heat and cleaner flavors.
Setting Up Direct and Indirect Heat Zones
Controlling heat zones is the secret to moving beyond scorched food and unevenly cooked dinners. A two-zone setup divides your cooking surface into two distinct thermal areas: direct heat and indirect heat. The direct heat zone sits directly over lit burners or glowing charcoal, producing intense heat for flash-searing steaks, searing chops, and blistering thin vegetables. This radiant zone delivers rich caramelization and authentic charred grill marks in just a few minutes.
The indirect heat zone sits on the unlit side of the firebox, acting like an outdoor convection oven. Heat circulates beneath the closed lid to roast thicker meats gently without burning their exterior crust. When preparing a delicate recipe like a crispy barbecue wings recipe, roasting on the indirect side allows fats to render cleanly before you finish with a quick sear over direct heat. This dual-zone arrangement also gives you an instant rescue zone whenever flare-ups threaten your food.
Creating this setup on a gas grill is as simple as lighting burners on one side while leaving the other side off. On a charcoal grill, bank all lit briquettes onto one half of the lower grate and leave the opposite half empty. You can regulate cooking speeds effortlessly by shifting food between these zones as it cooks. Mastering this temperature balance transforms your grill into an exceptionally versatile outdoor range.
Essential Tools and Grate Preparation
A few dedicated tools make operating an outdoor grill far smoother and safer for beginners. Long-handled stainless steel tongs give you firm control over foods without placing your hands over escaping heat. A sturdy, wide-blade spatula slides cleanly beneath delicate burger patties or fish without breaking seared crusts. Heat-resistant barbecue gloves protect your hands when adjusting hot air dampers, shifting warming racks, or dumping a hot charcoal chimney.
Preheating the grates properly prevents food from tearing and sticking to the metal surface. Cold meat placed onto cold grill grates forms a stubborn bond with the metal as surface proteins coagulate. Give your grill ten to fifteen minutes to preheat with the lid closed before placing any food on the grates. Once hot, scrub away any stray residue with a wooden scraper or coil brush, then lightly wipe the rods with a towel dipped in vegetable oil.
As you gain experience, specialized accessories like a motorized barbecue rotisserie kit allow you to roast whole chickens or roasts that baste continually on a turning spit. For deeper culinary intuition, instructional books such as How to Cook Without a Book by CROWN help you adapt cooking techniques across different heat sources without relying on rigid formulas. Starting with dependable basics builds your confidence and sets up successful outdoor dinners.
Managing Flare-Ups and Monitoring Internal Temperatures
Dripping fat and sugary marinades naturally trigger brief flare-ups when they splash across hot burner covers or charcoal embers. While small flashes add subtle char, persistent flames coat food in foul soot and can start grease fires. Never pour or squirt water onto grease fires, as vaporizing steam spreads hot oil unpredictably. Instead, quickly move the food over to your indirect zone with tongs and shut the grill lid to starve the fire of oxygen.
Keeping the grill lid closed is essential for controlling chamber heat and preventing excessive flare-ups. Opening the lid repeatedly vents radiant heat into the yard, dropping firebox temperatures and adding substantial cooking time. Grilling with the lid down retains convection currents, which cooks foods evenly from all sides while retaining natural juices. Check your food only at calculated intervals rather than leaving the chamber open to the wind.
Never rely on surface color or visual estimates to confirm whether meats are fully cooked through. Wind, meat thickness, and grate temperatures cause cooking rates to vary considerably from session to session. Use a reliable digital instant-read thermometer inserted into the thickest section of meat, away from bones or metal skewers. Cook chicken and poultry until reaching a safe internal reading of one hundred and sixty-five degrees Fahrenheit, and cook ground meats to one hundred and sixty degrees.
Post-Cook Shutdown, Grate Maintenance, and Safe Storage
Taking care of your grill immediately after cooking prevents grease buildup and keeps the unit ready for your next cookout. On a gas cooker, crank the burners to high for five minutes after plating your food to carbonize residual sauce and drippings. Turn off the burner control knobs, shut the cylinder fuel valve tightly, and disconnect the regulator if storing for an extended season. On charcoal models, close top and bottom vents completely to extinguish the coals by cutting off oxygen.
Never dump warm charcoal ashes into household trash cans, compost bins, or onto dry garden beds. Charcoal embers can retain dangerous heat for twenty-four hours after the fire appears completely dead. Allow the cooker to cool completely, or transfer cooled ashes into a galvanized metal bucket fitted with a secure lid. Removing ash regularly prevents moisture from combining with wood ash, which creates a corrosive lye paste that eats through metal fireboxes.
Scrub the warm grates with a bristle-free brush right after cooking while the metal remains hot and pliable. Cleaning warm grates requires minimal effort compared to chipping away at hardened, cold grease the following morning. Check the grease tray or drip pan beneath the firebox periodically and empty it before heavy grease pools form. Once the grill has cooled down entirely to outside temperatures, pull a heavy-duty, water-resistant cover over the unit to protect it from rust and weathering.
Reference Books and Practical Safety Signage
Broadening your grilling skills becomes much easier when you draw upon established barbecue literature. Comprehensive technique guides such as How to Grill: The Complete Illustrated Book by Workman illustrate essential fire management, direct grilling, and slow-roasting techniques. Cooks interested in rotating roasts can turn to Rotisserie Grilling: 50 Recipes For Your Grill’s by House Sparrow Publishing for targeted preparation and seasoning concepts. Keeping a solid cookbook on hand provides clear inspiration for weekend menus and family cookouts.
For community patios, vacation rentals, or shared residential decks, clear reminders keep the grilling area safe and tidy. Mounting an aluminum notice like the How to Light and Clean The Grill Rules Sign from Sigo Signs or the How To Light And Clean The Grill Rules Sign from My Sign Center clearly outlines lighting steps and cleanup duties for all guests. Visible signage reinforces safe fuel handling, reminds visitors to scrape grates, and ensures shared outdoor spaces stay clean and functional for everyone.
Approaching your first grilling session with proper preparation, clean grates, and patient heat control ensures a safe and rewarding cooking experience. Dividing your cooking area into two distinct temperature zones gives you total flexibility to sear meats and avoid flare-ups. Keep your digital thermometer ready, perform a thorough initial burn-off, and take pride in mastering an outdoor cooking skill that will serve you well for years to come.


Write Your Review
No reviews yet. Be the first to share your experience!