


Lighting a backyard gas cooker should be an easy and predictable part of any outdoor meal. When you understand the proper steps for how to start weber spirit grill models, you protect your equipment, maintain safety, and create the ideal temperature foundation for searing steaks or roasting chicken. The process begins with basic airflow safety, tank inspection, and orderly burner ignition that prevents trapped gas fumes beneath the cookbox lid. Setting up a dedicated staging area with a rolling BBQ prep table keeps your cooking tongs, meat probes, and food platters organized before opening the fuel valves. Taking these simple preparatory precautions guarantees that your outdoor session runs smoothly from the very first spark.
Gas grills rely on balanced fuel flow and dependable electrical or spark switches to fire up cleanly. Modern Spirit series cookers feature front mounted controls and push button ignition systems that send fuel through precision burner tubes. If your starter clicks without lighting or your flame looks faint and yellow, diagnosing fuel line air locks or worn ignition components will restore original heat output. Knowing the correct sequence to open the supply valve, engage the primary burner, and verify crossover ignition ensures dependable results every time you step outside. By following manufacturer safety practices and routine maintenance, you can fire up your cookbox quickly without hesitation.


Essential Lighting Procedures, Safety Rules, and Maintenance for Weber Spirit Grills
Starting a gas grill safely requires an orderly approach that combines clear mechanical steps with strict outdoor safety awareness. Learning how to start weber spirit grill hardware correctly prevents unburned fuel accumulation, extends component life, and ensures dependable cooking temperatures every time you cook outside. Whether you operate a two-burner Spirit II model or an older front-control classic unit, following established lighting protocols protects your cookbox from unnecessary wear and keeps your cooking area secure.
Safety Precautions and Critical Airflow Before Lighting
The single most important rule before striking any flame is to open the grill lid fully. Trapped fuel beneath a closed hood creates a concentrated cloud of combustible gas that can ignite violently when an ignition spark occurs. Leaving the cookbox wide open allows natural air currents to dissipate residual fumes and provides clear visibility of the burner tubes. Taking two seconds to lift the lid completely should always be your automatic first physical action before touching any fuel valve.
Grill placement also plays a fundamental role in personal safety and fire prevention. Outdoor gas cookers must operate exclusively on open, well-ventilated outdoor patios away from wooden railings, low roof overhangs, and combustible materials. Under no circumstances should you ever operate a gas grill inside a garage, breezeway, shed, or enclosed porch, even if the overhead vehicle door remains wide open. Charcoal and propane burners produce invisible carbon monoxide gas and present acute fire risks that make enclosed structures hazardous.
Before initiating fuel flow, perform a quick sensory check around your liquid propane cylinder and regulator hose. Sniff near the connection fitting to verify there is no distinct sulfur odor indicating a loose fitting or cracked line. Inspect the flexible black rubber hose to confirm it has not deteriorated, cracked from sun exposure, or suffered damage from neighborhood rodents. If you detect any scent of escaping propane, turn off the cylinder valve immediately and resolve the leak before attempting to light the burners.
Standard Electronic and Push Button Ignition Sequence
Once your safety inspections are complete and the lid rests in its fully upright position, you can open the fuel source. Turn the handwheel on top of the liquid propane tank counterclockwise slowly until it reaches its fully open position. Opening the valve too quickly can trip the internal safety flow limiter inside the regulator, severely restricting fuel pressure. Giving the fuel line a brief moment to stabilize ensures consistent gas delivery through the internal manifold.
Locate the primary burner control knob, which corresponds to the first burner on the left side of front-mounted Spirit consoles. Push the knob inward firmly and turn it counterclockwise to the start and high position. Gas immediately flows into that specific burner tube and fills the venturi chamber near the electrode. Depress the electronic ignition button immediately, listening for a steady, rapid clicking sound that generates high-voltage sparks at the electrode tip.
The burner should ignite cleanly within two to five seconds of pressing the switch. Look through the cooking grates and flavorizer bars to visually confirm that a crisp blue flame has formed along the entire tube length. If the burner fails to catch within five seconds, turn the control knob back to off, leave the lid open, and wait at least five minutes for the gas to clear completely before trying again. Once the primary burner is lit, you can turn the adjacent control knobs to high, allowing the crossover ignition channel to light the remaining burners automatically.
Manual Match Lighting Procedure for Gas Grills
Electronic spark systems occasionally experience dead batteries, wet contacts, or loose wiring that prevent normal push-button ignition. When that happens, knowing how to light your grill manually allows you to proceed with dinner without delay. Every Spirit grill includes a flexible wire matchstick holder clipped securely to the interior cabinet frame or side panel. This tool provides the necessary reach to light the burner tubes from a safe physical distance.
To begin manual lighting, ensure all control knobs sit firmly in the off position while keeping the cookbox lid wide open. Insert a standard wooden match into the spring clip at the end of the wire holder and strike it against the matchbox. Lower the burning match directly through the cooking grates, positioning the open flame adjacent to the primary burner ports on the left side. Alternatively, older models offer a dedicated match-lighting hole located beneath the cookbox casting for direct access.
With the burning match held steadily in place beside the tube, push and turn the primary burner control knob to the start and high position. The flowing gas should ignite almost instantaneously against the open match flame. Remove the wire holder smoothly, blow out any residual match ember, and visually inspect the flame pattern along the tube. You can then rotate the remaining burner knobs to high to engage the crossover ignition without needing additional matches.
Preheating the Cookbox and Managing Cooking Zones
Lighting the burners is only the initial phase of preparing your cookbox for meal preparation. After confirming that all main burners have caught cleanly, close the lid and allow the grill to preheat on high heat for ten to fifteen minutes. This closed-lid preheating period brings the cast-iron or stainless grates up to cooking temperature and carbonizes leftover food residue from previous grilling sessions. A hot grate prevents raw meat from sticking and imparts clean, defined sear marks across your food.
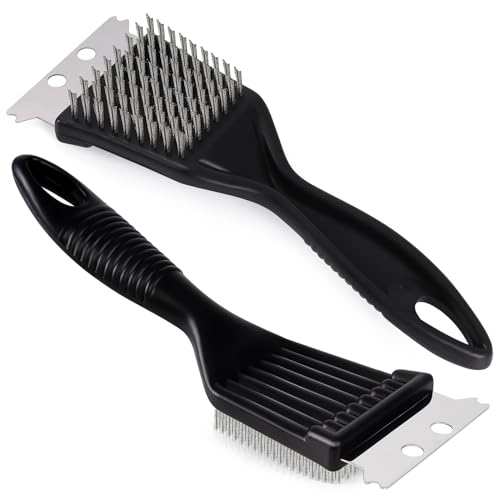
Once the cookbox thermometer registers your desired preheat target, use a durable grill brush to sweep away charred debris from the cooking surface. You can then adjust your burner dials to create dedicated direct and indirect temperature zones across the grates. Leaving one burner on high while adjusting the secondary burner to medium or low gives you precise control over cooking intensity. Once the cooking grates are fully preheated, you can move forward with high-heat favorites like a Korean beef BBQ recipe that benefits from immediate grate contact.
Managing heat zones properly prevents common grilling mishaps like severe flare-ups and burnt exteriors on thicker cuts of meat. Indirect zones allow you to sear delicate items over the active burner before sliding them to the cooler side to finish roasting evenly. Maintaining steady burner heat also allows you to glaze meats near the end of cooking with a homemade cranberry BBQ sauce without scorching the sugars. Closing the lid during the cook stabilizes the ambient convection current and retains moisture inside the food.
Solving Regulator Bypass and Low Flame Symptoms
One of the most frequent frustrations backyard cooks encounter is a grill that lights successfully but refuses to exceed low temperatures. When burners produce tiny, flickering flames that struggle to reach three hundred degrees, the propane regulator has entered bypass mode. Modern propane regulators incorporate an internal excess-flow safety valve designed to choke gas volume if a ruptured hose is detected. Opening the tank valve too quickly or opening it while a burner control knob is already turned on trips this protective mechanism.
Resetting a tripped regulator takes only a few minutes and restores normal operating pressure without requiring tools. Begin by turning all grill burner control knobs firmly to the off position. Next, close the propane cylinder handwheel completely by turning it clockwise until it stops snugly. Disconnect the plastic coupler nut from the cylinder valve thread, wait thirty seconds to allow internal pressure to equalize, and reattach the coupler firmly by hand.
After reattaching the connection, reopen the cylinder handwheel very slowly, turning it just a fraction of a turn initially before spinning it fully open. This deliberate pace permits gas pressure to build gradually across the regulator diaphragm without triggering the internal check ball. Return to your front console, open the lid, push the primary burner knob to high, and ignite the grill normally. The burner should roar to life with full fuel flow and reach high temperatures rapidly.
Inspecting and Replacing Worn Ignition Components
When pressing your ignition switch produces total silence rather than a rhythmic clicking noise, the electrical ignition circuit requires inspection. In many cases, a depleted AA or AAA battery concealed behind the button cap is the primary culprit. Unscrewing the button cover reveals the battery chamber, which should be checked periodically for white acid corrosion or moisture accumulation. Cleaning the terminal contacts with a dry cloth and installing a fresh alkaline battery often restores instant spark generation.
If battery replacement fails to resolve the issue, the mechanical push-button switch itself may have deteriorated from heat, humidity, or repeated physical use. For owners of newer models, installing the 66220 Igniter for Weber GS4 Genesis II/Spirit II provides a direct replacement solution for damaged front-panel switches. This PETKAO replacement button features a soft rubber surface, chrome bezel, and the signature lightning bolt symbol. It is listed as compatible with Weber Spirit II 200 and 300 series grills manufactured from 2017 onward, along with corresponding Genesis II platforms.
Installing a replacement switch requires minimal mechanical effort because the housing utilizes built-in snap-in mounting tabs. The back of the module features two male flat spade terminals designed to connect securely to your existing ignition wiring harness. Note that this specific replacement part does not include extra wiring or internal batteries, so you must retain your existing wire leads and supply a fresh battery. Snapping the switch into the console cutout and seating the spade terminals firmly restores dependable one-touch ignition performance.
Maintaining and Upgrading Burner Tubes for Clean Flame
A gas grill cannot ignite cleanly or maintain balanced heat if the burner tubes suffer from rust, corrosion, or internal obstructions. Small insects and garden spiders frequently nest inside the venturi openings behind the control panel during dormant winter months. These silk webs restrict air mixing, leading to lazy yellow flames, uneven heating, and dangerous flashback fires behind the console. Inspecting the air shutter screens each spring and clearing blockages with a flexible venturi brush ensures clean combustion.
Over several seasons of heavy cooking, exposure to salty marinades and high heat can cause metal fatigue and split burner seams. When burner ports become clogged or corroded through, installing the Uniflasy 69785 18 Inch Grill Burner for Weber restores balanced gas flow across the entire cookbox floor. This replacement kit is constructed from food-grade 304 stainless steel, which offers substantial resistance to oxidation and burn-through compared to standard metals. It is designed to replace original equipment part number 69785 on Spirit I and II 200 series models with front-mounted control knobs.
The package contains two 18-inch main burner tubes along with a 10.5-inch crossover tube that transfers flame smoothly between burners. Installing new burner tubes involves removing the cooking grates and flavorizer bars, unclipping the rear mounting hardware, and sliding the old tubes off the gas valves. Sliding the fresh stainless tubes into position ensures consistent port alignment and eliminates cold spots across your grates. Clear burner ports allow gas to ignite immediately upon sparking, preventing unburned fuel accumulation during startup.
Post-Cook Burn-Off and Safe Shut Down Practices
Shutting down your cooker correctly is just as important for longevity and safety as the initial lighting procedure. Once your food has been removed to a cutting board, close the lid and leave all active burners on high for approximately five minutes. This short burn-off cycle turns grease drippings and sauce remnants into powdery white ash that brushes away easily during your next preheat session. Performing this quick cleaning habit prevents grease buildup in the bottom tray and eliminates rancid odor development inside the cookbox.
After completing the burn-off period, turn off the system by turning the propane cylinder handwheel clockwise until it is fully sealed. Allowing the burners to extinguish naturally burns off the small volume of fuel remaining inside the regulator line. Once the flame dies, turn all burner control knobs on the console back to the off position. Allow the entire grill to cool completely before placing a protective weather cover over the exterior to guard against seasonal moisture.





Write Your Review
No reviews yet. Be the first to share your experience!