


Unboxing a shiny outdoor cooker brings plenty of excitement, but firing it up for the first cookout requires a few preliminary steps to ensure clean flavor and proper performance. Factory manufacturing oils, protective coatings, and packing residues often linger on brand-new grates and burner assemblies. Learning how to cook on a new grill starts with an initial high-heat burn-off to purge those production compounds before any meat touches the metal. Taking time to season cast-iron surfaces and establish steady heat zones protects your equipment while preparing you to tackle classic outdoor meals like marinated Korean barbecue cuts with complete confidence.
Whether your setup runs on propane, natural gas, charcoal, or wood pellets, every fuel source behaves differently during its inaugural run. New metal surfaces lack the natural nonstick patina that develops over seasons of careful use, meaning food sticks more readily if you rush the preheating phase. Understanding how temperature dials respond, where hot spots develop, and how to maintain steady two-zone airflow will transform an unpredictable first session into a dependable cooking routine. With safe outdoor positioning and basic fire management in place, you can protect your investment and serve tender, flavorful food right from the start.
Pros
- Comprehensive recipe library covering virtually every protein, vegetable, and marinade
- Clear instructions on setting up two-zone heat and managing live flames
- Convenient digital format fits easily on a phone or tablet right at the grill station
- Straightforward ingredient lists focused on authentic flavor without unnecessary filler
Cons
- Requires keeping a phone or tablet nearby, which exposes your screen to grease and smoke
- Digital layout lacks full-color photos for every individual recipe
- Cannot replace physical hardware like grill thermometers or meat probes
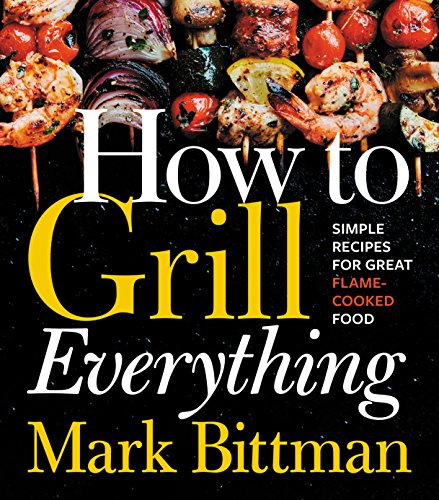
How to Grill Everything functions as a practical instructional blueprint for outdoor cooks rather than a standard piece of cooking hardware. Operating as a digital reference manual, it is built to bridge the gap between basic flame roasting and true temperature mastery across charcoal grills, gas burners, and backyard smokers.
This guide is best suited for backyard barbecue enthusiasts, patio cooks, campers, and tailgaters who want quick, reliable recipe blueprints without flipping through bulky, sauce-splattered hardcovers. Whether you are firing up a compact portable grill at a tailgate or running an all-day smoking session on your patio, the instructions focus heavily on practical fire management and fundamental outdoor techniques.
The instructional content emphasizes real-world cooking performance, guiding you through hot-and-fast searing, indirect baking, and gentle smoke infusion. It breaks down essential skills such as establishing dual-zone heat, managing airflow to maintain steady temperatures, and timing meat correctly to lock in juices and avoid burnt crusts caused by uncontrolled flare-ups.
In terms of usability and outdoor convenience, the Kindle format proves remarkably functional around a working barbecue station. You can pull up cook times, ingredient ratios, and sauce recipes instantly on your smartphone or a weather-resistant tablet stand, keeping your prep tables clean and free of heavy book stands that can tip over in windy weather.
A realistic limitation is that navigating a digital screen with barbecue tongs or sauce-covered hands can get messy, requiring you to wipe your fingers or protect your device from stray grease splatters. Visual cooks may also notice that not every recipe features a finished color photograph, prioritizing sheer recipe density and technique instruction instead.
For anyone serious about improving their backyard barbecues, weeknight patio dinners, or outdoor campsite menus, this digital grilling guide offers tremendous practical value. It takes the guesswork out of fire cooking and serves as a dependable companion beside any grill setup.
The core strength of this outdoor cooking guide lies in its focus on thermal dynamics and fire control. It teaches grillers how to read flame intensity, organize charcoal piles for indirect baking, and dial in gas burner valves to prevent food from scorching.
Readers learn how to achieve crisp exterior sears on thick steaks while keeping the center tender, along with techniques for sustaining steady low heat for tender ribs and pulled meats. The advice on using wood chips and wood chunks also helps patio cooks extract clean, aromatic smoke flavor without over-smoking their food.
This recipe guide excels in backyard barbecue settings where you need versatile menu options that please a crowd, from simple flame-broiled burgers to seasoned grilled vegetables and fish. Its streamlined layout makes meal planning painless during weekend cookouts.
It is equally useful for tailgating and campsite adventures where space and weight are strictly limited. Storing hundreds of recipes directly on your mobile device leaves your vehicle trunks and camp bins open for coolers, fuel, and grilling gear.

Pros
- Safe and effective cleaning without bristle concerns - ideal for families and health-conscious grillers.
- Steam-cleaning action tackles burnt-on residue quickly, even after high-heat searing or low-and-slow smoking sessions.
- Replaceable head design offers long-term value and reduces plastic waste compared to single-use brush heads.
- Works on all grill types and grate materials, making it a versatile addition to any outdoor cooking arsenal.
- Heat resistance up to 600°F allows you to clean while grates are still hot, speeding up the cleaning process.
Cons
- Requires preheating the grill and dipping the brush in water, which adds a step compared to traditional dry scraping.
- The initial purchase price is higher than many basic wire brushes, though the replaceable head offsets long-term cost.
- Some users may find the brush head becomes less effective over time as the padding wears, requiring replacement heads.
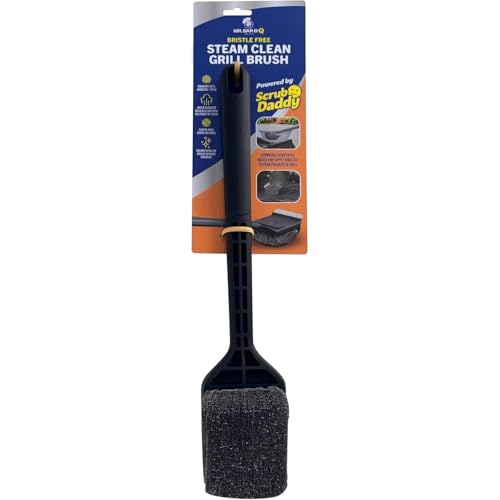
The Grill Rescue BBQ Replaceable Cleaning Head is a bristle-free grill brush designed for safe, effective cleaning on all types of grates. It uses steam-cleaning technology - simply heat your grill, dip the brush in water, and scrub away grease and residue without the risk of wire bristles breaking off into your food. This makes it an excellent choice for backyard grillers, BBQ enthusiasts, campers, tailgaters, and RV owners who want peace of mind while cooking outdoors.
In real-world use, this brush performs admirably on both high-heat searing and low-and-slow smoking setups. The steam action lifts burnt-on gunk from cast iron and stainless steel grates, leaving them clean with minimal effort. While it doesn't directly affect heat consistency or smoke flavor, a clean grate is essential for good searing and preventing flare-ups, which indirectly improves your cooking results. The heat resistance up to 600°F means you can clean while the grill is still hot, saving time between cooks.
Build quality is solid - the cleaning head uses a high-temperature Aramid Fiber layer that withstands repeated use, and the polypropylene handle offers a comfortable, non-slip grip. The replaceable head extends the brush's lifespan, making it a more sustainable and cost-effective option compared to disposable brushes. It's also dishwasher safe, so cleanup after a long tailgate or camping trip is as simple as tossing it in the machine.
Setup and storage are straightforward: the brush is ready to use out of the box, and its compact size (5 x 4 x 18 inches) fits easily in a grill caddy or camping gear bag. The only limitation is the extra step of preheating and dipping in water, which might feel unnecessary to those used to a quick dry scrape. Also, the upfront cost is higher than basic wire brushes, but the replaceable head design saves money over time.
Overall, this brush is a practical investment for anyone who grills frequently - whether you're hosting a backyard party, smoking brisket on a weekend, or cooking burgers at a campsite. It prioritizes safety without sacrificing cleaning power, and its compatibility with all grate materials adds versatility. If you value a bristle-free, low-maintenance cleaning routine, the Grill Rescue system is worth considering.
To get the most out of your Grill Rescue brush, follow these simple care tips. After each use, allow the brush head to cool slightly, then rinse it under warm water or place it in the dishwasher for a thorough clean. The head is dishwasher safe, but avoid using abrasive cleaners that could wear down the padding.
When the brush head becomes less effective at removing residue - typically after several months of regular use - simply replace it with a new Grill Rescue cleaning head. The handle is designed to snap on and off easily, so swapping heads takes seconds. Store the brush in a dry place away from direct heat to prolong its lifespan. Regular replacement ensures optimal cleaning performance and safety.

Pros
- Super convenient setup and no cleanup required
- Lightweight and easy to carry anywhere
- Heats up quickly with even cooking performance
- Great for small gatherings or solo grilling
Cons
- Single-use only, so not suitable for regular backyard cooking
- Limited cooking space – best for 2-4 burgers or a few skewers
- Charcoal burns for about 1 hour, so longer cooks aren't possible
If you've ever found yourself craving a grilled burger at a campsite or tailgate but didn't want to haul a full-size charcoal grill, the Oppenheimer USA Disposable Charcoal Grill is exactly what you need. This is a lightweight, portable, single-use grill that comes pre-loaded with easy-light charcoal – just remove the wrapper, light the corners, and you're ready to cook in minutes. It's designed for outdoor enthusiasts who value convenience above all else.
This grill is best suited for campers, tailgaters, RV owners, and anyone who enjoys spontaneous outdoor cooking without the hassle of cleanup. It's also a solid pick for beach days, park picnics, or even emergency cooking during power outages. The 9x13 inch cooking grate gives you enough space for a few burgers, hot dogs, or skewers – perfect for 2-4 people. Just don't expect to smoke a brisket or feed a crowd.
In terms of real-world cooking performance, the easy-light charcoal lights quickly and reaches a decent grilling temperature within 10-15 minutes. The heat distribution is fairly even across the grate, though you might notice slightly cooler spots near the edges. Searing is possible for thin cuts like burgers and chicken thighs, but you won't get the same crust as a heavy cast-iron grate. Smoke flavor is present but mild – it's enough to satisfy a casual griller but not a BBQ purist. The fuel burns for about an hour, which is fine for quick grilling sessions but not low-and-slow cooking.
Build quality is what you'd expect from a disposable product – sturdy enough to hold up during cooking, but not meant for long-term use. The aluminum tray feels solid, and the wire grate supports food without sagging. There are no wheels, folding legs, or weather-resistant features because this grill is designed to be used and tossed. Portability is its strong suit: at 3.5 pounds and dimensions of 9x13x2 inches, it slips into a backpack or car trunk easily.
Setup is incredibly simple – no tools, no assembly, no charcoal to pour. Just remove the plastic wrap, place the grill on a non-flammable surface, and light the corners through the designated ignition strips. Cleanup is even easier: once the charcoal has cooled completely, you can dispose of the entire grill. Just make sure to follow local disposal guidelines for charcoal and ash. The biggest limitation is that it's single-use, so if you grill often, the cost adds up compared to a reusable portable grill.
Overall, the Oppenheimer USA Disposable Charcoal Grill is a fantastic solution for outdoor cooks who prioritize convenience and portability. It's not meant to replace your backyard kettle grill, but it's a lifesaver for camping, tailgating, or any on-the-go cooking scenario. If you're looking for a no-mess, no-fuss way to enjoy grilled food anywhere, this pack of two is a smart buy.
At just 3.5 pounds and 9x13x2 inches, this grill is incredibly easy to transport. It fits in a backpack, car trunk, or even a large tote bag. No need to worry about charcoal bags or lighter fluid – everything is built in. The lightweight design makes it a top choice for hikers, campers, and tailgaters who want to travel light.
This grill shines in scenarios where convenience and portability matter most. Use it for camping trips, tailgate parties, beach outings, park picnics, or even as a backup grill during power outages. It's also great for small gatherings where you only need to cook a few items. Not ideal for large BBQs or smoking.

Pros
- Comprehensive guide on wood-fired cooking from grill to kitchen
- Beautiful hardcover book with inspiring photos and clear instructions
- Teaches real-world fire management for consistent heat and smoke
- Suitable for all skill levels, from backyard beginner to seasoned pitmaster
Cons
- Pricey at $69, though the hardcover quality and content justify it for dedicated cooks
- Not a physical cooking tool – you'll need to acquire your own grill or fire setup
- Some techniques may require practice or additional equipment like a firewood source
If you're serious about moving beyond gas grills or basic charcoal cooking, Smoke: New Firewood Cooking is the book that'll change your approach to fire. Published by Rizzoli, this hardcover guide dives deep into how to build flavor using firewood, whether you're working over a backyard grill, a campfire, or even your kitchen stove. It's not just a recipe book – it's a manual on heat, smoke, and wood selection that any outdoor cook will appreciate.
This book is best suited for backyard grillers who want to add real smoke to their steaks and burgers, BBQ enthusiasts looking to master low-and-slow cooks, and campers or tailgaters who cook over open fires. RV owners and patio cooks will also find plenty of useful techniques for cooking with wood chunks, logs, or chips on their existing setups. It bridges the gap between classic grilling and serious fire management, making it a valuable resource for weekend cooks and dedicated pitmasters alike.
Real-world cooking performance is the core focus here. The book explains how different woods affect smoke flavor, how to manage temperature for searing versus slow cooking, and how to maintain heat consistency without constant fuss. You'll learn about building two-zone fires, managing flare-ups, and getting that perfect crust on a brisket or a juicy burger. The techniques cover everything from fast grilling to low-and-slow smoking, with practical advice on fuel efficiency and cooking capacity for a crowd.
Build quality is excellent – this is a sturdy hardcover book that can handle a bit of splatter near the grill. The pages are thick and the binding is solid, so it'll hold up to frequent use in an outdoor cooking environment. While it's not a physical grill or smoker, the book itself is built to last through years of reference. For portability, it's easy to toss in a camping gear bin or keep on a patio shelf, though you'll want to protect it from rain.
Setup and cleanup are irrelevant here – it's a book. But the real limitation is that you'll need to already own or be willing to invest in a firewood-capable grill, fire pit, or stove to apply the techniques. The book assumes you have access to wood and a cooking surface, which might be a hurdle for pure gas grill users. Also, some recipes call for specific wood types that may not be readily available everywhere.
Overall, Smoke: New Firewood Cooking is a practical, inspiring guide for anyone who wants to take their outdoor cooking to the next level. If you're a backyard entertainer, a camping chef, or a BBQ obsessive looking to deepen your fire skills, this hardcover book is a worthy investment. It's not a quick fix – it's a learning tool that'll pay off with every cookout.

Pros
- Tailored specifically for flat-top gas griddle heat zones and oil techniques
- Diverse recipe selection spanning breakfast spreads, street food, and crowd-pleasing dinners
- Clear instructions that make high-volume backyard entertaining straightforward
- Compact paperback size fits nicely on outdoor prep tables or inside an RV pantry
Cons
- Paperback binding requires care to avoid oil splatters and outdoor moisture damage
- Focuses exclusively on flat-top griddling rather than traditional grate grilling or low-and-slow smoking
Outdoor flat-top cooking differs significantly from standard grate grilling, requiring specific heat management, spatial awareness, and oil control. Blackstone Griddling serves as a practical, hands-on recipe manual engineered specifically for outdoor gas griddle enthusiasts. Whether you are running a four-burner station on your patio, packing a tabletop griddle for a weekend campsite, or firing up breakfast outside the stadium on game day, this guide provides actionable inspiration. It caters directly to backyard cooks, RV owners, tailgaters, and outdoor entertainers who want to push their flat-top setup past the basics.
The strength of any flat-top cookbook rests on how well it translates high surface heat into exceptional food. The recipes in this collection leverage the natural strengths of cold-rolled steel griddles: intense searing capability, rapid moisture evaporation, and distinct multi-zone temperature layouts. You will find reliable techniques for creating crisp diner smash burgers, balancing high-heat stir-fries without burning the aromatics, and executing large breakfast platters with synchronized eggs, hash browns, and bacon. The guidance helps you coordinate your cooking surface so every component finishes hot at the exact same moment.
Because this is a physical paperback, bringing it out near sizzling spatulas and hot propane burners requires a bit of practical consideration. The layout is clean and legible, making it easy to read recipe ratios from a few feet away on a side prep shelf. While the paper stock feels sturdy for regular indoor kitchen use, outdoor cooks will want to protect the pages from direct oil splatters, wind gusts, and sudden patio drizzle. Stashing it under your griddle prep cart or sliding it into a protective sleeve keeps it clean and ready through continuous outdoor cooking sessions.
Beyond ingredient lists, the guide reinforces essential outdoor griddle habits. Working with flat surfaces requires attentive grease trough navigation, proper squirt-bottle water deglazing, and steady scraping technique between courses. The book teaches cooks how to stage foods across cooler burner zones while keeping hot searing zones open for fresh ingredients. This layout-focused mindset helps reduce propane waste, prevents messy boil-overs, and simplifies post-cook scrape-downs before applying your final coat of protective seasoning oil.
While pitmasters looking for low-and-slow wood pellet recipes or traditional charcoal smoking advice will need to look elsewhere, this book excels at its intended focus. It bridges the gap between novice griddle ownership and confident, restaurant-quality patio cooking. If you recently invested in an outdoor gas griddle or want to breathe fresh excitement into your weekend tailgates and campsite breakfasts, this recipe manual is a worthy and affordable addition to your outdoor culinary toolkit.
Mastering a flat top griddle requires understanding surface zones rather than open flames. This guide emphasizes how to manipulate individual propane burner controls to create hot searing zones alongside low-heat holding areas on your steel plate.
From rapid street tacos to multi-portion pancake batches, the techniques outlined highlight fast surface recovery and effective spatula work that prevent overcrowding and preserve distinct food textures.
Tailgating crews and campsite cooks will appreciate the speed and simplicity of the recipes. Cooking outside requires efficient prep and minimal dirty dishware, both of which are central to griddle-style meal planning.
Backyard entertainers feeding large family gatherings can leverage the high-yield breakfast and dinner layouts, ensuring everyone gets hot food off the steel plate simultaneously without long waits between batches.

Pros
- Over 100 creative recipes that transform your grill into a pizza oven, perfect for backyard entertaining.
- Practical tips for achieving consistent heat and avoiding burnt crusts, even on basic grills.
- Portable and durable paperback design makes it ideal for camping, tailgating, and RV trips.
- Written for all grill types, including gas, charcoal, and pellet, so no need for specialized equipment.
Cons
- Some recipes assume a basic level of grilling experience, which might be challenging for absolute beginners.
- The book focuses on pizza, so it may not appeal to those looking for a broader range of outdoor cooking recipes.
- Paper pages can get greasy or stained in a messy outdoor cooking environment, though that's true for most cookbooks.
If you're a backyard griller or BBQ enthusiast looking to break out of the burger-and-steak routine, Pizza on the Grill by Taunton Press is a fantastic addition to your outdoor cooking library. This paperback cookbook packs over 100 feisty, fire-roasted recipes that turn your standard grill into a versatile pizza oven. Whether you're cooking on a charcoal kettle, a propane gas grill, or a pellet smoker, the recipes are designed to help you achieve that coveted smoky flavor and crispy crust you'd expect from a wood-fired oven.
This book is best suited for backyard cooks, campers, tailgaters, and RV owners who love to experiment with their outdoor cooking gear. It's not just about pizza; the recipes cover everything from classic Margherita to creative seasonal toppings, plus a few unexpected dishes like grilled flatbreads and calzones. The instructions focus on real-world grilling scenarios, like managing heat zones on a two-burner grill or using a pizza stone on a campfire grate, making it practical for a wide range of setups.
In terms of cooking performance, the book excels at teaching you how to control heat consistency and avoid common pitfalls like burnt bottoms or undercooked dough. You'll learn techniques for searing the crust, managing flare-ups from cheese drippings, and using indirect heat for even cooking. The recipes emphasize fuel efficiency, whether you're using charcoal briquettes, propane, or wood pellets, so you can cook multiple pizzas without constantly refueling. For those who love low-and-slow smoking, there are even recipes that incorporate a touch of smoke for added depth.
Build quality is solid for a paperback cookbook, with a durable cover and lay-flat binding that holds up well on a picnic table or camp kitchen. The pages are thick enough to resist minor splashes, but you'll want to keep it away from direct grease splatter. Portability is a major plus: it's lightweight and compact enough to toss in a camping bin, RV storage compartment, or tailgate cooler without taking up much space. That said, it's not waterproof, so a quick wipe-down after a messy cookout is a good idea.
One realistic limitation is that some recipes assume you have a basic understanding of grilling, like managing hot spots or using a pizza stone. Beginners might need to watch a few online tutorials first. Also, the book is laser-focused on pizza, so if you're looking for a general grilling cookbook, this won't cover steaks, ribs, or veggies. But as a specialized guide for outdoor pizza making, it's hard to beat.
Overall, Pizza on the Grill is a practical, inspiring resource for anyone who wants to expand their outdoor cooking repertoire. It's especially great for backyard entertainers who love hosting pizza nights, campers who want to impress at the campsite, and tailgaters looking for a crowd-pleasing alternative to standard game-day fare. If you're ready to fire up your grill and try something new, this book will guide you through every step.
This cookbook shines in a variety of outdoor settings. For backyard grillers, it's perfect for weekend pizza parties where you can fire up the grill and cook multiple pies with different toppings. Campers will love the portability and the ability to cook delicious pizza over a campfire or portable grill, adding a gourmet touch to any campsite meal. Tailgaters can prep dough ahead of time and cook fresh pizzas in the parking lot, impressing fellow fans with something beyond typical burgers and hot dogs. RV owners will appreciate the compact size and the fact that no specialized pizza oven is needed just a standard grill or camp stove.
While the cookbook itself doesn't require cleaning, the recipes emphasize practical tips for keeping your grill clean during pizza making. You'll learn how to manage cheese drips and grease to prevent flare-ups, as well as how to properly clean a pizza stone or baking steel after use. The book also suggests using a grill brush and maintaining your grates to ensure even heat distribution. For the paperback itself, a quick wipe with a damp cloth and drying it out of direct sunlight will keep it in good shape for many cookouts.

Pros
- Clear step-by-step instructions make meat preservation accessible for beginners
- Focus on budget-friendly methods using common kitchen and outdoor tools
- Covers canning, curing, and smoking, giving versatile preservation options
- Practical for outdoor cooks who want to prepare meat for camping, tailgating, or backyard parties
Cons
- Does not include specific recipes for pellet grills or flat top griddles
- May require additional research for advanced smoking techniques
- Limited to beginner level, experienced smokers might find it too basic
If you are an outdoor cooking enthusiast who loves backyard BBQs, camping trips, or tailgating events, this guidebook is a smart addition to your library. It focuses on preserving meat at home using canning, curing, and smoking methods that rely on common tools, not expensive gear. That means you can start extending the life of your brisket, pork shoulder, or venison without breaking the bank.
This book is best suited for backyard grillers who want to smoke meat for low-and-slow cooks, campers who need to prep meals ahead for trips, and tailgaters who like to bring homemade jerky or smoked sausages to the game. It also helps RV owners and patio cooks who want to reduce food waste and always have preserved meat on hand for quick meals. The step-by-step approach makes it easy for beginners to learn safe preservation techniques.
When it comes to real-world cooking performance, this guide emphasizes heat consistency and smoke flavor for smoking, as well as proper temperature control for canning and curing. You will learn how to achieve that authentic smoky taste without a high-end smoker, using basic charcoal or propane setups. The methods are designed for fuel efficiency, so you can smoke multiple batches without burning through your propane or charcoal supply. For low-and-slow cooking, the book covers how to maintain steady heat for hours, which is key for tender, flavorful meat.
Build quality is not applicable here since this is a book, but the knowledge inside is durable and practical. The instructions focus on weather resistance and portability of your preserved meats, meaning you can store them in a cooler for camping or take them to a tailgate without worry. Cleanup is minimal because you are preserving meat, not cooking it directly on a grill, so grease management and flare-ups are not an issue. The book also covers how to store preserved meat properly to avoid spoilage.
One realistic limitation is that this guide is aimed at beginners, so experienced smokers might find the techniques too basic. It does not include specific recipes for pellet grills or flat top griddles, which could be a drawback for those who use those tools. However, the core principles of canning, curing, and smoking are universal and can be adapted to any outdoor cooking setup.
Overall, this is a practical buying recommendation for anyone who wants to save money on meat while enjoying the satisfaction of home preservation. Whether you are a weekend BBQ enthusiast, a camper looking to lighten your load, or a tailgater who loves homemade snacks, this guide will help you master meat preservation with confidence. Pair it with your favorite smoker or grill, and you will be ready to enjoy preserved meat all year round.
Essential Steps for Cooking on a New Grill
Operating an outdoor cooker for the first time requires deliberate preparation to transform raw metal into an efficient cooking surface. Many backyard cooks feel eager to toss steaks or burgers over the fire immediately, yet skipping the preliminary cleaning and heat-tempering phases often leads to acrid chemical fumes and stuck food. A systematic sequence of washing, burning off manufacturing oils, seasoning the cooking surface, and learning your heat dials will guarantee clean flavors. Approaching your initial session with patience establishes safe cooking habits and sets up your cooker for consistent performance across years of outdoor meals.
Completing the Initial Burn-Off Before Your First Cook
Every newly manufactured outdoor grill retains microscopic residues from factory stamping, machining, and shipping processes. Anti-corrosion oils, packaging dust, paint solvents, and chemical rust inhibitors protect the unit in transit but will contaminate food if not completely eradicated. An initial burn-off, often called curing or seasoning the firebox, uses sustained high heat to vaporize these volatile chemical compounds. You should always consult your specific manufacturer manual for exact runtime recommendations, but most outdoor units benefit from thirty to forty-five minutes of steady heat.
Begin the process by inspecting the interior firebox, burners, flavorizer bars, and grates to ensure all plastic zip ties, foam padding, and manuals have been removed. Light the burners or ignite your charcoal bed in a safe outdoor location with the lid wide open to prevent dangerous gas buildup. Once ignition is verified, close the grill lid and adjust the heat dials or airflow dampers to a medium-high setting. Heavy white or gray smoke with a distinct chemical smell will typically billow from the exhaust vents during the first twenty minutes of operation.
Let the grill continue heating until that pungent odor dissipates completely and the exhaust air smells neutral. For gas and pellet units, maintaining a temperature between four hundred and five hundred degrees Fahrenheit allows synthetic residues to burn away without warping new sheet metal. Charcoal users should let a full chimney of briquettes burn down while the vents remain fully open to achieve comparable chamber heat. Once the burn-off period finishes, shut down the burners or close the dampers and allow the entire cooker to cool naturally before touching the interior components.
Cleaning and Seasoning Different Grate Materials
After the initial heat burn-off cools, the cooking surface requires a gentle wash followed by surface seasoning. Bare cast-iron, porcelain-enameled cast-iron, and stainless steel grates each demand different treatment to maximize their longevity and cooking performance. Wash bare grates with warm water and mild dish soap to remove loose soot particles, then dry them thoroughly with lint-free towels. Water left sitting on unseasoned cast iron quickly creates surface rust, so drying must occur immediately after washing.
Bare cast-iron grates require a protective layer of polymerized oil before you ever place raw protein across their bars. Coat all sides of the clean, dry grates with a thin sheen of high-smoke-point cooking oil, such as canola, grapeseed, or avocado oil. Avoid butter, olive oil, or animal fats during this baseline phase because their lower smoke points burn into bitter carbon rather than forming a slick polymer barrier. Place the oiled grates back into the grill, heat the chamber to roughly four hundred degrees Fahrenheit for forty-five minutes, and let the oil bake into a slick, dark patina.
Stainless steel and porcelain-coated grates do not require the extensive polymerization layers that bare cast iron needs, but a light oil application still helps prevent sticking. Porcelain enamel provides a glass-like barrier against moisture, meaning you should never scrape it with sharp metal tools or harsh steel wool that could chip the protective coating. For flat-top cooking surfaces, resources like the book Blackstone® Griddling: The Ultimate Guide outline how repetitive oil layers build a reliable nonstick surface on heavy rolled steel. Consistent oiling after each cleaning keeps any metal surface resilient against food residue.
Calibrating Temperatures and Locating Hot Spots
Built-in dome thermometers rarely reflect the true cooking temperature at grate level because heat rises and pools near the top of the hood. A lid gauge can easily read fifty degrees higher or lower than the zone where your steaks actually rest. Utilizing an independent digital grate thermometer or an infrared surface thermometer provides an accurate measurement of your actual cooking surface. Checking these readings during your practice run helps you understand the true relationship between dial markings and grate temperatures.
Every grill features unique airflow characteristics that generate warmer and cooler zones across the firebox. You can easily map these heat variations across your cooking surface using the classic white sandwich bread test. Preheat the grill to medium heat, lay regular slices of white sandwich bread across the entire grate in uniform rows, and close the lid for approximately two minutes. Opening the lid reveals a visual heat blueprint: dark toasted slices highlight hot spots, while pale bread identifies gentle zones.
Gas grills frequently run hotter near the back edge where heat baffles funnel combustion gases toward the rear exhaust vent. Charcoal kettles tend to concentrate intensity directly over the glowing coal bed, while pellet cookers often show higher heat directly above the central fire pot. Understanding your cooker’s unique footprint prevents you from scorching delicate foods like fish fillets while giving you the confidence to position dense chops where searing energy remains strongest. Documenting these patterns early saves you from ruined meals during high-pressure family gatherings.
Setting Up Direct and Indirect Heat Zones
Mastering two-zone cooking is the single most valuable technical skill for any outdoor cook. A two-zone setup divides the grill chamber into an active direct-heat zone for high-temperature searing and a passive indirect-heat zone for gentle roasting. Direct heat transfers energy through intense radiant infrared waves, making it ideal for thin burgers, hot dogs, and asparagus. Indirect heat functions like a convection oven, circulating ambient warm air around thick cuts without scorching exterior seasonings.
On a multi-burner gas grill, creating two zones requires igniting the burners on one side while leaving the opposing burners switched off. Placing your meat on the unlit side allows dense roasts or bone-in chicken thighs to reach safe internal temperatures without burning sugary glazes. If you enjoy rich wood aromas on gas appliances, inserting heavy smoker boxes for gas grills directly over the active flame burners infuses gentle wood notes into your roasts without suffocating airflow. You can also explore specialized texts such as Smoke: New Firewood Cooking for deep insights into pairing wood varieties with different heat styles.
Charcoal setups achieve the same versatility by banking all glowing briquettes against one side of the lower charcoal grate. Leaving the opposite side vacant provides an immediate refuge whenever rendering fat triggers sudden grease flare-ups. Portable options like the Oppenheimer USA Disposable Charcoal Grill offer convenient self-contained lighting for travel, but their compact size limits indirect space, making careful food monitoring essential. On standard backyard cookers, maintaining a generous indirect safety zone prevents scorched dinners when cooking for larger crowds.
Preventing Sticking on Freshly Seasoned Metal
Brand-new cooking grates lack the microscopic carbon layers that provide long-term slip resistance on veteran outdoor cookers. Proteins placed on dry or lukewarm metal will instantly bond with microscopic surface pores, tearing apart when you attempt to flip them. The most effective defense against tearing is preheating the grill grates thoroughly for at least ten to fifteen minutes before introducing food. Hot metal rapidly denatures surface proteins, forming a crisp crust that naturally releases itself from the grate once seared.
Oil the food directly rather than dumping excessive liquid oil onto the hot grates right before cooking. Brushing chicken breasts or pork chops with a light coat of cooking oil ensures consistent coverage and prevents excess oil from dripping into the burners to spark flare-ups. If you must lubricate the grates, fold a clean paper towel into a tight pad, grip it securely with long-handled tongs, dip it lightly into cooking oil, and wipe the hot bars smoothly. This controlled approach coats the metal without creating dangerous flare-ups underneath.
Patience during the cooking cycle is equally crucial for clean food release. If a burger patty or salmon steak resists your spatula when you attempt to lift it, the surface crust has not fully developed. Allow the food to cook undisturbed for another minute, checking gently until the caramelized exterior releases cleanly on its own. Detailed recipe books such as How to Grill Everything: Simple Recipes for Great detail how proper sear timing eliminates torn meat and preserves appetizing grill marks on delicate cuts.
Managing Flare-Ups and Airflow Across Fuel Types
Flare-ups occur when rendered animal fats or cooking marinades drip directly onto radiant heat sources, igniting into sudden tongues of open flame. While a brief burst of flame can add acceptable aroma, sustained contact deposits acrid soot on food and burns exterior surfaces before the center cooks through. Never attempt to extinguish grease flare-ups with a spray bottle filled with water, as vaporized steam can blow grease droplets across the firebox and cause severe burns. Instead, move the food over to your indirect zone and close the lid to starve the flame of fresh oxygen.
Airflow management controls combustion speed and chamber temperature across both charcoal and wood-fueled setups. Lower intake vents draw fresh oxygen into the firebed, while upper exhaust dampers allow spent combustion gases to escape smoothly. Opening both vents wide generates roaring temperatures for crisp flatbreads or recipes found in Pizza on the Grill: 100+ Feisty Fire-Roasted. Restricting the bottom intake damper slows coal consumption and brings internal temperatures down to moderate roasting ranges between two hundred fifty and three hundred degrees Fahrenheit.
Sugar-heavy basting liquids present another common ignition hazard on new cookers where heat regulation is still unfamiliar. Applying sweet glazes or a batch of homemade cranberry barbecue sauce too early in the cookout causes the sugars to char into bitter black crusts within minutes. Always reserve sweet sauces and glazes for the final five to ten minutes of cooking over gentle indirect heat. This timing allows the glaze to caramelize into a glossy coating without igniting runaway flames across your burners.
Safe Outdoor Clearances and Maintenance Routines
Positioning your cooker safely in an outdoor environment is mandatory to prevent structural fires and life-threatening toxic gas buildup. Grills must never be operated inside a garage, breezeway, screened porch, enclosed patio, or underneath low wooden overhangs. Opening a garage door or operating fans does not provide adequate ventilation to clear dangerous levels of carbon monoxide, which is odorless, invisible, and lethal. Always place fuel-burning equipment outdoors on a flat, non-combustible surface at least ten feet away from house siding, deck railings, and dry vegetation.
Food safety also requires verifiable temperature tracking rather than relying on estimated cooking clocks. Color checks and tactile finger tests are notorious for producing undercooked poultry or dried-out steaks. Insert a calibrated digital instant-read thermometer into the thickest part of the meat, avoiding bones and fat pockets, to confirm safe internal temperatures recommended by food safety authorities. Proper temperature verification pairs well with home curing and safety literature like Preserving Meat at Home on a Budget, reminding cooks that precise temperature monitoring protects diners from foodborne illness.
Safe cleaning equipment preserves both your cooker and your family’s health during post-meal maintenance. Traditional wire bristle brushes pose severe physical health risks because loose wire fragments can detach, stick to cooking grates, and end up ingested in cooked food. Modern alternatives like the Grill Rescue BBQ Replaceable Cleaning Head use a bristle-free design with an Aramid fiber layer that harnesses steam power when dipped in water and applied to hot grates. Its heat resistance up to six hundred degrees Fahrenheit and dishwasher-safe head make grate maintenance both sanitary and safe across cast-iron or stainless steel surfaces.
Post-Cook Care and Preparing for Subsequent Sessions
The final phase of cooking on a new grill takes place after the meal has been plated and served. While the grates retain residual heat, run your cleaning brush across the surface to clear away softened grease and food bits before they cool into concrete-hard deposits. Once the grates are clean, apply a quick protective wipe of cooking oil over the warm metal to shield against ambient humidity and rust formation. Emptying the bottom grease tray or ash catcher regularly prevents dangerous grease fires from igniting during subsequent high-heat preheating cycles.
Allow the entire cooker to cool down completely to outdoor ambient temperatures before placing an all-weather cover over the unit. Covering a warm grill traps evaporating moisture and combustion steam inside the firebox, creating a humid microclimate that accelerates hardware corrosion and fastener rusting. Ensure fuel valves are turned off tightly at the propane cylinder or natural gas supply line after every cooking session. When storing charcoal setups, confirm all coals are thoroughly extinguished and cold to the touch before disposing of residual ash in a metal safety container.
Developing a consistent routine of inspection, seasoning, and gentle cleaning ensures that your outdoor cooker improves in performance with every meal. As cooking oils repeatedly polymerize over the grates, the cooking surface will darken into an exceptionally smooth, nonstick barrier that makes outdoor grilling effortless. Paying close attention to heat management and maintaining clean internal grease pathways keeps your investment reliable for countless backyard dinners with family and friends.





Write Your Review
No reviews yet. Be the first to share your experience!