


Firing up a premium outdoor cooking station requires a firm understanding of proper burner ignition and gas safety protocols. When you want to know how to start aog gas grill equipment, following the exact manufacturer sequence ensures consistent burner lighting while avoiding dangerous fuel accumulation beneath the hood. American Outdoor Grill units, whether installed in a custom barbecue island kit or positioned on a freestanding cart, rely on balanced air-to-fuel ratios and reliable ignition hardware. Learning the necessary pre-ignition safety checks and knob positions allows you to operate your grill safely and efficiently every single time.
Different AOG series feature either mechanical piezo systems or powered electronic igniters, making it critical to recognize your specific model setup before opening any valves. Starting your grill properly prevents unburned propane or natural gas from gathering in the firebox, which protects your outdoor cooking investment and ensures consistent heat distribution. This guide details primary burner lighting, manual match methods, troubleshooting common ignition faults, and basic burner maintenance. With these clear operational steps, you can ignite your cooking surface confidently and get straight to grilling your favorite meals.
Complete Operating Guide for Lighting and Managing an AOG Gas Grill
Lighting an American Outdoor Grill safely begins with one essential rule: always lift the hood completely before touching the gas supply or burner control knobs. Whether your cooker operates on liquid propane or a dedicated natural gas line, trapped fuel under a closed lid poses an immediate flash fire hazard if a spark occurs after gas has gathered. Understanding your specific ignition system, verifying steady fuel delivery, and following the correct knob sequence guarantees a smooth start every time you cook. Taking a methodical approach also protects the internal ceramic components and stainless steel burners from unnecessary wear.
Pre-Ignition Safety Checks and Fuel Supply Verification
Before introducing any flame or electrical spark to the firebox, you must inspect the fuel supply and control panel. Ensure that all burner control knobs are pushed inward and turned to the OFF position. If you use a liquid propane cylinder, open the tank valve slowly by turning the handwheel counterclockwise until it is fully open. Opening a propane valve too quickly can trip the internal excess flow safety device inside the regulator, severely restricting gas volume and preventing burners from lighting properly.
For natural gas installations, locate the manual shutoff valve on the supply pipe and rotate the handle parallel to the pipe to permit full fuel flow. Take a few moments to inspect the flexible gas line for kinks, abrasion, or signs of wear. If you smell gas before touching the knobs, immediately close the main shutoff valve and search for leaks using a balanced mixture of liquid dish soap and water brushed over every connection. Bubbles forming on fittings indicate an active gas leak that must be resolved before attempting to start the appliance.
Proper environmental clearance is equally vital before initiating the lighting sequence. The grill must sit on an open, level outdoor surface away from combustible walls, wooden railings, and low overhanging eaves. Outdoor gas appliances generate substantial radiant heat, and placing them too close to heat-sensitive siding or under low ceilings creates an immediate fire hazard. Verifying proper clearances and adequate ventilation keeps your cooking station safe and operating within manufacturer design specifications.
Step-by-Step Instructions for Starting AOG T-Series Grills
The AOG T-Series utilizes a rapid-fire rotary piezo ignition system that requires no batteries or external electrical power. This mechanical system generates a dependable spark through internal crystal compression whenever you turn the burner control knob. To begin, confirm that the grill hood is propped fully open and resting securely against its rear stops. Never attempt to ignite a burner while the lid is partially or completely lowered.
Select the primary burner you wish to ignite, typically the left or center burner on multi-burner models. Depress the control knob firmly, then rotate it counterclockwise toward the HI position. As the knob reaches the ignition point, you will hear a sharp mechanical snap as the piezo striker fires a spark across the electrode at the burner port. Check through the cooking grates or flame viewing slots to confirm that a steady blue flame has ignited along the burner tube.
If the burner fails to light within five seconds of the mechanical click, immediate action is necessary. Turn the control knob back to the OFF position right away and leave the hood open. Allow five full minutes for any accumulated gas vapor to dissipate into the open outdoor air before attempting another ignition cycle. Once the primary burner is lit, you can ignite adjacent burners by repeating the push-and-turn sequence or allowing the flame carry-over tubes to ignite neighboring sections.
Lighting AOG L-Series Grills with Electronic Ignition
AOG L-Series grills feature an advanced electronic ignition system powered by an external 120-volt electrical connection or a dedicated battery pack. This system delivers a continuous series of rapid sparks to the burner electrodes, making ignition exceptionally quick and reliable. Start by ensuring the power supply cord is plugged into a functional ground-fault circuit interrupter outlet or that fresh batteries are installed in the pack. Lift the hood completely open before initiating the lighting procedure.
Depress the burner control knob for the chosen burner and rotate it counterclockwise to the HI setting. Next, press and hold the electronic ignition switch located on the control panel to send a continuous electrical pulse to the spark generator. You will hear rapid clicking as sparks arc across the electrode gap near the burner gas ports. Release the ignition button as soon as you confirm that the flame has caught across the burner surface.
If the burner does not ignite after five continuous seconds of clicking, release the ignition button and return the burner knob to OFF. Wait five full minutes with the lid elevated so that unburned gas does not linger in the cooking chamber. Lingering gas poses an ignition danger if sparked after pooling around the burners. After the waiting period passes, inspect the electrode alignment before trying the electronic sequence a second time.
Manual Match-Lighting Procedure When Ignition Fails
If dead batteries, power outages, or worn ignition wiring prevent automatic ignition, you can light your AOG grill manually using a match. Never hold a short match with your bare fingers directly over the cooking grid, as doing so puts your hands dangerously close to the gas ports. Instead, locate the match-holding wand typically clipped inside the grill cart door or stored in an adjacent drawer. Secure a standard wooden kitchen match firmly in the coiled wire loop at the end of the wand.
Keep the grill hood wide open and ensure all burner control knobs remain in the OFF position. Strike the match, then guide the burning head down through the manual lighting hole on the side of the firebox or alongside the vaporizing panel directly next to the burner. Position the flame close to the burner gas ports before touching the control knob on the front panel. Having the flame already in place prevents fuel from gathering prior to ignition.
With the burning match held steadily next to the burner ports, push in the corresponding control knob and rotate it counterclockwise to HI. The burner should ignite almost instantly with a quiet puff of flame. Once the burner lights, withdraw the match holder carefully and extinguish the match in a cup of water or on a non-combustible surface. If the burner fails to catch within five seconds, turn the knob to OFF immediately and wait five minutes before attempting manual lighting again.
Lighting the Infrared Backburner and Rotisserie System
Many premium AOG setups include an optional infrared rear backburner designed specifically for spit roasting and rotisserie cooking. Before starting this burner, remove the warming rack and main stainless steel rod grates from the firebox. High heat radiating from the backburner can warp standard grates if they remain directly beneath the infrared ceramic tile during prolonged rotisserie sessions. Ensure the rotisserie spit rod and motor bracket are properly mounted if you plan to cook right away.
Open the hood completely and make sure the main lower burners are turned off. Push in the backburner control knob and turn it counterclockwise to the HI setting while engaging the electronic ignition switch or piezo trigger. Unlike standard tube burners, the infrared burner uses a thermocouple safety valve that monitors flame temperature to prevent unburned fuel flow. Keep the control knob firmly depressed for ten to fifteen seconds after ignition so the thermocouple can heat up and keep the internal valve open.
Release the knob slowly after the brief warm-up period and observe the ceramic burner surface. The ceramic tile should begin glowing with a uniform orange-red pattern across its entire face within two minutes. If the flame blows out when you release the knob, the thermocouple likely did not reach operating temperature. Turn the knob to OFF, wait five minutes with the lid open, and repeat the lighting sequence while holding the knob inward slightly longer.
Troubleshooting Common Ignition and Starting Problems
When an AOG gas grill refuses to start, the issue usually stems from one of three areas: electrical spark failure, gas delivery restrictions, or blocked burner tubes. If you hear no clicking sound on an L-Series model, the battery in the ignition module may be completely drained. Unscrew the ignition button cap on the control panel, remove the old battery, and check for corrosion on the metal terminal spring. Installing a fresh alkaline battery with the positive terminal facing outward frequently restores the electronic spark immediately.
If the igniter produces a visible spark but the gas fails to catch, the propane regulator may have locked into low-flow bypass mode. This safety lockout happens when the tank handwheel is opened while a burner knob is slightly open or when the valve is opened too fast. To reset the regulator, turn all grill knobs to OFF and close the propane cylinder valve completely. Disconnect the regulator hose from the tank, reconnect it firmly, and then reopen the tank valve very slowly to equalize line pressure.
Burners that ignite with weak, sputtering yellow flames or light only on one side often suffer from spider webs or insect nests inside the venturi tubes. Spiders are attracted to the chemical scent of gas odorants and frequently build dense webs inside the narrow air intake throats during warm months. These obstructions disrupt the air-to-fuel ratio, starving the flame of oxygen and causing potential flashback fires behind the control panel. Removing the burners seasonally and cleaning the internal barrels with a flexible venturi tube brush restores proper gas flow and balanced blue flames.
Another frequent culprit is grease accumulation on the ceramic spark electrode. During intense cooking sessions, marinades and fat drippings can coat the small metal tip, grounding the electrical charge and preventing a clean spark from jumping to the burner. Inspect the white ceramic insulator and metal prong located near each burner port. Gently wiping the tip clean with rubbing alcohol and a brass wire brush removes baked-on carbon deposits and reestablishes reliable electrical arcing.
Preheating, Heat Zones, and Flavor Management
Once you achieve stable burner ignition, closing the hood and allowing the grill to preheat properly is vital for excellent culinary results. Run all active main burners on the HI setting for ten to fifteen minutes before introducing any food to the cooking grids. This initial high-heat cycle allows the heavy stainless steel rod grates and vaporizing panels to absorb thermal energy. A fully preheated grate sears proteins cleanly on contact, preventing sticking and producing professional grill marks.
AOG grills rely on stainless steel vaporizing panels positioned directly above the burners to distribute heat evenly and vaporize food drippings into savory smoke. If you desire deeper wood flavor without switching to a dedicated charcoal unit, you can place heavy-duty smoker boxes for added wood smoke directly on top of the flavor grids over an active burner. As the wood chips smolder inside the vented box, rich aromatic smoke circulates beneath the closed hood, infusing delicate poultry, pork shoulders, or beef roasts with genuine barbecue character.
Mastering two-zone cooking gives you complete temperature control over delicate and dense cuts alike. By leaving one or two burners on medium-high and turning off an adjacent burner, you establish distinct direct and indirect cooking zones across the primary grid. This configuration works exceptionally well when searing thin meats like marinated Korean short ribs over direct heat before moving them to the cooler side to finish rendering without scorching sugary sauces.
Essential Safety Rules and Enclosed Space Warnings
Operating any gas grill demands strict adherence to authoritative fire safety protocols and fuel handling practices. Under no circumstances should you ever operate a gas grill inside a garage, carport, covered patio room, breezeway, or screened porch. Burning propane and natural gas produces carbon monoxide, an odorless, invisible, and potentially fatal gas that rapidly accumulates in partially enclosed spaces. Opening an overhead garage door does not provide adequate cross-ventilation to prevent lethal gas buildup or eliminate fire hazards.
In addition to toxic fumes, outdoor cooking appliances present a significant radiant fire risk to nearby structural framing. Keep the cooking unit at least three feet away from all exterior building walls, overhangs, deck railings, and dry landscaping. Always keep an approved fire extinguisher rated for grease and electrical fires nearby rather than relying on garden hoses, which can spread burning grease over a wider area.
Routine grease tray maintenance is another critical safety duty that prevents uncontrolled firebox flare-ups. AOG grills feature a slide-out stainless steel drip tray and disposable catch tray designed to funnel liquified fats away from active flames. Inspect this tray before every cooking session, emptying residual grease and replacing aluminum liners as needed. Allowing old drippings to accumulate creates a volatile fuel source that can ignite into an intense grease fire if high heat reaches the lower cabinet.
Portable Fuel Alternatives When Permanent Gas Grills Are Inaccessible
While a built-in AOG gas cooking station delivers high BTU capacity and convenience in a backyard kitchen, certain outdoor settings require alternative cooking equipment. Remote camping expeditions, beach tailgates, RV travel, or sudden gas utility shutoffs make permanent outdoor kitchen appliances unusable. In these mobile scenarios, outdoor cooks frequently depend on self-contained portable fuel units that require no gas lines, regulators, or bulky propane tanks.
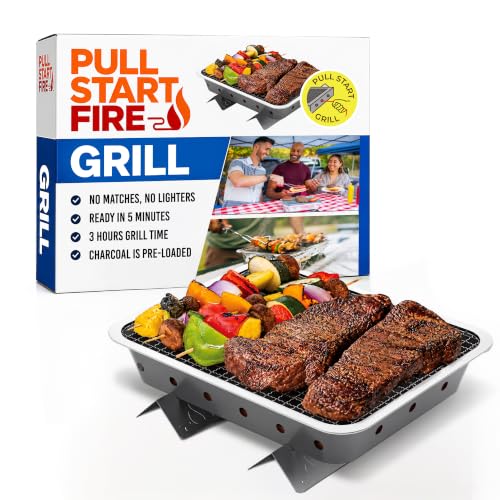
Compact setups such as single-pull lighting charcoal units provide an accessible outdoor cooking alternative when you are away from home. These self-igniting systems feature pre-loaded natural hardwood charcoal bricks that light with a single mechanical pull string, reaching grilling temperature in roughly five minutes without lighter fluid or chimney starters. The stainless steel surface and stabilizing feet allow cooks to prepare burgers, steaks, and vegetables directly on flat outdoor surfaces without hauling heavy hardware.
Choosing between permanent outdoor kitchen gas grills and disposable portable units ultimately depends on your cooking location and infrastructure needs. Gas appliances offer push-button convenience, rapid heat adjustments, and zero ash cleanup for daily family dinners on the patio. Meanwhile, portable single-burn charcoal alternatives serve as dependable emergency backup cookers or lightweight travel companions whenever your primary gas grill is out of reach.
Executing the proper startup sequence on your AOG gas grill safeguards your equipment and guarantees reliable cooking performance every time you step outside. Always keep the hood fully open, inspect your fuel lines for leaks, and ignite burners individually while watching for an immediate blue flame. If a burner fails to catch within five seconds, shut off the gas, wait five full minutes for vapors to clear, and proceed with a fresh ignition or manual match attempt. By combining consistent pre-start checks with regular burner maintenance, you ensure safe, enjoyable grilling across every season.




Write Your Review
No reviews yet. Be the first to share your experience!