


Standing in front of cold grates with hungry guests waiting can turn an enjoyable evening into an exercise in frustration. Learning how do u start a grill properly eliminates the stress of stubborn coals, foul lighter fluid odors, and unlit gas burners. Whether you cook over lump hardwood, traditional charcoal briquettes, or liquid propane, mastering the ignition phase ensures steady cooking temperatures and clean combustion from the first sizzle.
Different grill formats demand distinct startup protocols, yet they all share fundamental rules regarding oxygen supply and preheating. Charcoal setups require patient airflow management before placing meats, while gas units call for immediate burner verification with an open hood to prevent fuel pooling. Cooks looking to impart deeper wood smoke onto charcoal or gas arrangements often integrate specialized accessories, such as smoker boxes for charcoal setups, which also require stable base embers to generate aromatic flavor. Taking time to establish clean combustion protects your food from harsh bitter smoke and guarantees consistent cooking performance.
Essential Principles and Methods for Starting Any Grill
Learning the proper sequence to light a fire transforms outdoor cooking from an unpredictable chore into an exact process. Understanding how do u start a grill requires identifying your specific fuel source, securing adequate air circulation, and allowing the cooking surface to preheat thoroughly. Bypassing basic preparation often produces foul white smoke, acrid chemical tastes, or uneven surface temperatures. Following a disciplined lighting routine guarantees better sear marks, reliable temperature control, and a far safer cooking environment.
The Core Mechanics of Combustion and Airflow
Every fire requires three core components: combustible fuel, sufficient oxygen, and an adequate ignition source. Air must enter through intake dampers to feed the heat and exit freely through exhaust vents when starting a charcoal fire. Gas systems rely on an engineered venturi tube that premixes ambient air with pressurized fuel before it meets the spark. Restricting airflow during initial ignition starves the flame, leading to incomplete combustion and heavy soot deposition on your grates.
Clean combustion occurs when fuel burns efficiently at high temperatures, producing translucent heat waves rather than dense clouds of smoke. Thick white or gray smoke indicates that coals are still smoldering or that volatile organic compounds have not yet burned away. Placing raw meat over smoldering fuel imparts an acrid, bitter flavor that easily ruins delicate seasonings. Allowing coals or burners to establish a steady, mature flame ensures that only pure heat and sweet wood essence touch your food.
Lighting Charcoal with a Metal Chimney Starter
A dedicated metal chimney starter remains the most reliable and chemical-free tool for igniting lump charcoal or briquettes. The cylindrical metal tube utilizes a natural convective draft, pulling cool air up through bottom perforations as heat builds inside. To begin, remove the top cooking grate from your grill and place the chimney on the lower fuel grate. Fill the upper chamber of the cylinder with your chosen charcoal, taking care not to overfill past the top rim.
The bottom hollow compartment beneath the wire partition holds your starter fuel. Place one or two non-toxic natural fire starter cubes or lightly balled sheets of newspaper into this lower space. Light the starter with a long-stem lighter, ensuring flames catch across multiple contact points. Within two minutes, the natural updraft pulls intense heat directly through the charcoal stack, igniting the bottom briquettes and spreading upward without lighter fluid.
Observe the coals closely as the fire works its way through the chimney cylinder. Dense gray smoke will initially billow from the top, gradually thinning as the heat intensifies. The charcoal is fully ready when flames lick out of the top cylinder and the coals show a visible coating of white ash. Grasp the insulated handle with a heat-resistant grilling mitt and carefully dump the glowing coals onto the fuel grate in your desired configuration.
Starting Charcoal with Natural Starters and Mound Arrangements
If a chimney starter is unavailable, building a structured charcoal pyramid directly on the lower fuel grate works effectively. Arrange your charcoal briquettes or hardwood lump pieces into a compact mound, concentrating the fuel in the center of the firebox. A pyramid shape allows heat generated at the bottom to rise directly through adjacent coals, creating a compounding thermal effect. Keep the base relatively tight while ensuring small gaps remain between pieces so oxygen can circulate freely.
Tuck two natural paraffin wax cubes, wood shavings, or vegetable oil-soaked paper towels into the base crevices of the mound. Light each starter directly, allowing open flames to catch the underside of the central coals before making adjustments. Avoid burying the starter blocks completely, as smothering them limits the oxygen needed to sustain a vigorous initial flame. Leave the central coals to burn undisturbed until they glow red and display an ashen gray exterior.
Once the coals are ash-covered, use long metal tongs to spread them into direct or indirect cooking zones. Replace the main cooking grate, close the grill lid, and let the grate preheat for ten minutes before cleaning and oiling. This preheating stage burns off any surface dust and brings the cooking grates up to searing temperature. Taking time during this step prevents delicate foods from sticking when they first hit the metal bars.
Step-by-Step Gas Grill Ignition and Burner Management
Gas grills offer convenience and rapid startup, but improper ignition techniques create serious fire and explosion hazards. The most critical safety rule when lighting a propane or natural gas grill is opening the lid completely before introducing any spark. Leaving the lid closed allows unburned gas to accumulate inside the cookbox, where a sudden spark can cause an explosive fireball. Always inspect burner tubes and venturi ports for spiderwebs or grease blockages prior to seasonal startup.
Begin the lighting sequence by opening the valve on your propane tank slowly, turning the handwheel counterclockwise until it stops. Opening the tank valve too quickly can trip the internal excess flow safety valve, severely limiting gas pressure and leaving burners with tiny flames. Once the gas line is pressurized, turn the primary ignition burner knob to the designated high position. Immediately depress the electric spark button until the burner ignites with a quiet, steady flame.
Verify visually that flames are burning evenly across the entire length of the burner tube. If the burner fails to catch within five seconds, turn the control knob back to the off position immediately. Leave the lid open and wait at least five full minutes for accumulated gas to dissipate before attempting a second ignition. Once the primary burner is lit and verified, turn on adjacent burners to bring the entire cookbox up to your desired cooking temperature.
Starting Pellet Grills and Controller Sequencing
Pellet grills rely on an automated electromechanical system to manage ignition, fuel delivery, and internal temperatures. When powering on a pellet grill, the motorized auger feeds compressed hardwood pellets from the hopper into a centralized metal burn pot. A high-wattage electric heating element glows red-hot inside the burn pot while an induction fan forces oxygen across the pellets. Understanding this mechanical sequence helps cooks identify operational issues before food touches the grates.
Ensure the pellet hopper contains clean, dry hardwood pellets that are free of moisture or excessive sawdust crumble. For overnight brisket cooks or lengthy smoking sessions, adding a bbq pellet hopper extension kit provides extended fuel capacity so the system never runs dry mid-cycle. Turn the electronic controller to the startup setting with the lid open, allowing the initial dense smoke to clear as the combustion flame catches. Once you hear a steady combustion roar, close the lid and set your target cooking temperature.
Self-Igniting Portable Charcoal Systems for Travel
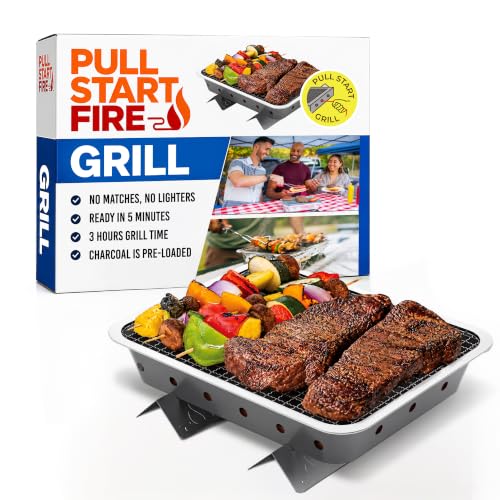
Portable cooking scenarios often require quick, self-contained ignition methods that eliminate the need for heavy accessories or separate lighter fluid bottles. The Pull Start Fire Grill, Natural Hardwood Charcoal illustrates how modern design can simplify outdoor charcoal startup. The product features an integrated single-pull ignition string that lights a pre-loaded charcoal brick without matches, kindling, or chemical accelerants. Pulling the ignition cord triggers an internal starter that spreads heat across the entire fuel bed within minutes.
Compact dimensions of 13 x 10 x 2 inches and a light weight of approximately 3 pounds make this portable charcoal unit well suited for tailgating, remote campsites, and emergency utility. The unit rests on stabilizing feet that elevate the hot base away from flat outdoor surfaces, protecting picnic tables from direct thermal scorch. Its stainless steel cooking grate sits directly above the charcoal brick, transferring heat evenly without requiring secondary grate assembly.
According to the manufacturer specifications, this self-igniting setup hits cooking temperature in approximately 5 minutes and delivers up to 3 hours of steady heat. Steaks, burgers, poultry, and vegetable skewers cook evenly across the cooking area because the charcoal brick produces consistent heat from edge to edge without hot spots. Once the cook concludes and the coals have cooled completely, the disposable format allows for simple disposal without scrubbing messy grates or hauling heavy charcoal bags back home.
Managing Intake and Exhaust Dampers for Stable Heat
Airflow regulation is the primary mechanism for controlling temperature on any solid-fuel cooker once ignition is achieved. The bottom intake damper controls the total volume of oxygen reaching the burning coals, directly governing how intensely the fire burns. Opening the bottom vent wide increases oxygen availability, raising combustion rates and driving internal grill temperatures upward. Constricting the bottom intake vent starves the embers of oxygen, causing the fire to cool down toward lower smoking ranges.
The top exhaust damper acts as a chimney, dictating how quickly hot combustion gases and smoke escape the cooking chamber. Keeping the exhaust vent at least partially open is essential to maintain thermal draft and prevent stale, acrid soot from settling on the meat. Closing the top exhaust damper completely smothers the fire and extinguishes the coals by trapping inert carbon dioxide around the fuel bed. Adjusting dampers in small increments of one-quarter inch allows the internal temperature to stabilize smoothly over ten to fifteen minutes.
Safety Mandates: Why Fuel-Burning Grills Never Belong Indoors
Grilling presents real fire and health risks that require strict adherence to outdoor operating boundaries. Fuel-burning appliances, including charcoal, propane, natural gas, and wood pellet grills, produce significant quantities of odorless, colorless carbon monoxide gas during normal operation. Grills must never be operated inside a home, garage, breezeway, camper, tent, or any other enclosed or partially enclosed structure. Even operating a grill inside a garage with the main vehicle door fully open fails to provide adequate ventilation to prevent toxic carbon monoxide accumulation.
Beyond poisoning hazards, burning fuels release intense radiant heat and stray sparks that can ignite nearby building materials, siding, or overhanging eaves. Outdoor grills should always stand on a firm, level, non-combustible surface situated away from house walls, deck railings, and dry vegetation. Keep a functional fire extinguisher, a bucket of sand, or a garden hose within easy reach before initiating any grill startup procedure. Never leave a burning or preheating grill unattended, particularly when children or pets share the outdoor living area.
Diagnosing Common Ignition Failures and Weak Heat
A charcoal fire that sputters or fails to gain momentum usually suffers from restricted oxygen or moisture contamination. Check the bottom of the firebox to confirm that accumulated ash from previous cooking sessions is not blocking lower vent holes. Charcoal stored in humid sheds or damp basements readily absorbs ambient moisture, which robs thermal energy as water boils away during ignition. If damp coals refuse to catch, replenish the chimney with fresh, dry fuel stored in an airtight storage bin.
Gas grill flame issues often stem from a tripped regulator safety mechanism rather than a mechanical burner defect. If your burners produce low, yellow, flickering flames that fail to heat the cookbox, the excess flow safety valve is likely engaged. To reset this mechanism, turn off all burner control knobs and fully close the propane tank valve. Disconnect the regulator hose from the tank, wait thirty seconds, reconnect the coupling firmly, and slowly open the tank valve to restore normal line pressure.
Culinary Timing: Knowing When Your Grate Is Truly Ready for Food
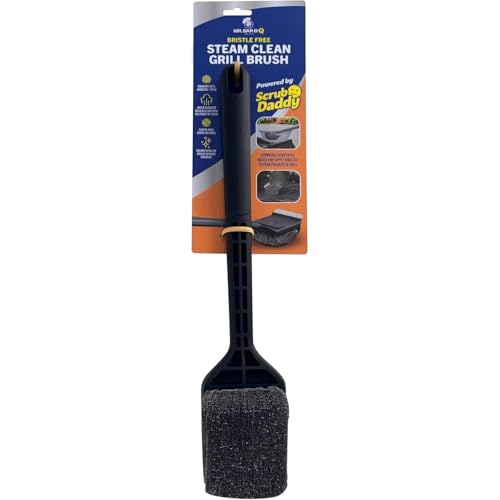
Placing food onto a grill prematurely is a frequent mistake that causes meat to stick severely to cold metal grates. Preheating the grate for ten to fifteen minutes with the lid closed allows the metal bars to reach full cooking temperature, creating a natural searing effect that releases proteins cleanly. Once the grate is hot, scrub away charred debris from prior cooks using a stiff bristle-free scraper or folded foil pad. Coat the hot metal lightly with a high-smoke-point cooking oil using a folded paper towel held in long tongs.
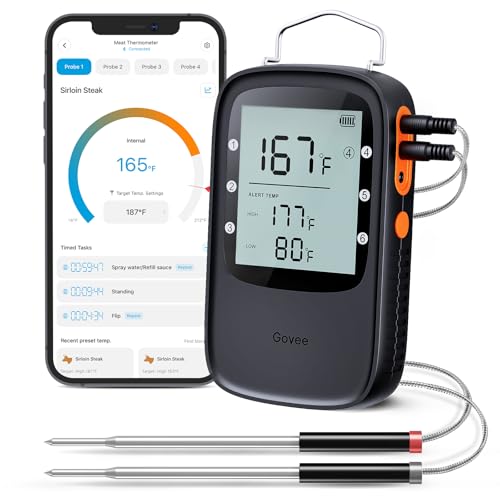
Understanding direct and indirect heat zones allows you to finish delicate proteins without scorching the exterior before the interior reaches food-safe temperatures. Searing pork chops or chicken over high direct flames develops rich caramelization, after which you can move the cuts to indirect heat to baste with a tangy Carolina gold sauce for sticky, glazed perfection. Verifying your target cooking temperatures with a digital probe thermometer ensures that your grill setup translates into properly cooked, juicy barbecue every single time.
Practical Takeaway for Consistent Grilling Sessions
Mastering grill startup procedures comes down to disciplined habits, proper tools, and patient attention to airflow and fuel readiness. Avoid relying on chemical lighter fluids that leave foul tastes behind, and prioritize clean ignition methods such as chimneys, electric hot rods, or self-contained pull-start packs. Keeping your equipment clean of grease and ash ensures that every cook begins with predictable heat output and zero safety hazards. When you give your fire the time and oxygen it needs to mature, exceptional outdoor meals naturally follow.




Write Your Review
No reviews yet. Be the first to share your experience!